


With the Pipeline suite of plugins, the mantra of Jenkins 2.0—of ‘Pipeline as Code’ —is gaining momentum. This is evident from the growing number of organisations embracing this new way of codifying build flow. This article’s objective is to lower the entry banner for the DevOps and engineering teams that are at the threshold of switching over to Jenkins 2.0 and Pipeline as Code, and help them get started.
For many years, Jenkins has been the most preferred choice when it comes to practising automated continuous integration. The traditional (also known as freestyle) way of setting up new projects in Jenkins has been (and still is) through the graphical user interface. With the help of the GUI, pre- and post-build tasks, including handling parameters and injecting custom environment variables, can be glued together in a single project.
With the release of Jenkins 2.0, there has been a shift in the strategy to set up new projects in Jenkins. Almost all the build tasks are treated as Pipeline as Code, using the suite of Pipeline plugins, which means that the complete build flow can be codified. Therefore, it can be tracked in version control, thus enabling collaboration across teams. For a quick overview and highlights of the features in Jenkins 2.0, visit https://jenkins.io/2.0/.
Jenkinsfile is where Pipeline as Code is maintained, and it should be placed in the root directory of the source code.
Partitioning CI/CD (Continuous Integration/Continuous Deployment) into logically unique but interconnected parts, and the visual representation of this entire chain of events, is termed as build flow and this is what makes Pipeline attractive.
Pipeline is gradually evolving into the new way to programmatically construct a logical flow of tasks — for example, compile source code, generate artifacts and deploy them – all by using a variety of plugins and third-party tools. However, it should be emphasised that the build system (make, ant, or a mix of scripts in whatever language you choose) does not need to be revamped and can be reused as is.
Prerequisites or assumptions
Before we proceed further, make sure you have access to Jenkins (v2.3x and above) with standard plugins, and are able to set up a test project. You should also have the basic familiarity to set up new projects in Jenkins.
This article will be based on the syntax of scripted Pipeline, a general-purpose DSL that’s based on the Groovy programming language. However, the declarative syntax can be used too to achieve the same results with minor modifications.
The definitive place to start reading about Jenkins Pipeline is https://jenkins.io/doc/book/pipeline/.
The link https://jenkins.io/doc/pipeline/steps/ is the reference for various steps supported in the Pipeline environment.
A comparison of the two syntaxes (imperative and declarative) is documented at https://jenkins.io/doc/book/pipeline/syntax/#compare.

Anatomy
Let’s begin with analysing Pipeline as Code by focusing on the individual stages, one at a time. Groovy code runs in a JVM environment in a build agent (not called slaves any more) and in a tightly controlled environment, i.e., a Groovy sandbox. This sandbox environment ensures that Pipeline as Code cannot be used to invoke system calls. These calls are made available by Jenkins for administrative purposes – so use them with caution!
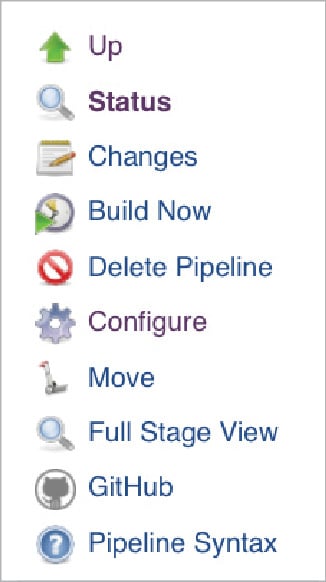
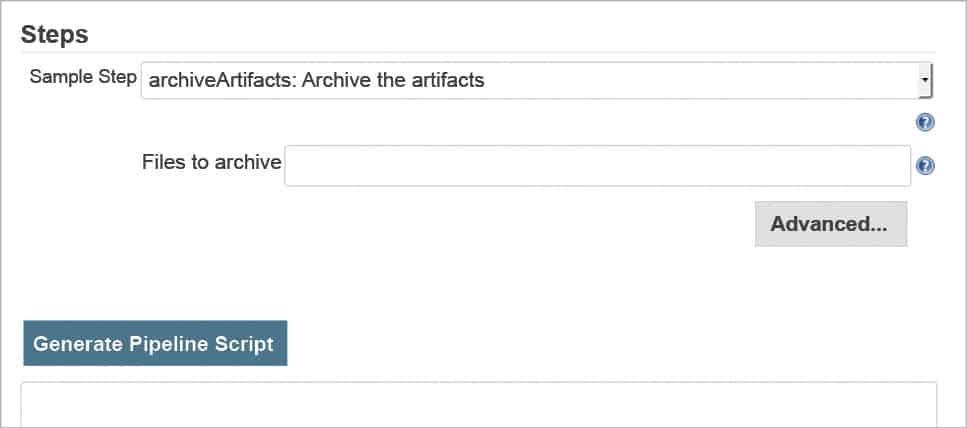
An easy and quick reference on how to auto-generate code snippets for most of the Pipeline steps is available with the option Pipeline Syntax (as shown in Figure 1), which can be accessed from the Jenkins project’s landing page, if the project is set up using Pipeline-style. This will launch a new tab/window, as per the browser’s configuration, providing the dropdown list of the various steps available, along with the options and a small text box to display the generated code snippet (as seen in Figure 2) for the selected step.
Here is a snippet of Pipeline as Code:
#!groovy

node(‘label’) {

stage(‘Prep’) {

git url:’https://github.com/your-name/your-repo-path.git’, branch: ‘master’

}

}
It’s a good practice to start the script with the shebang header #!groovy, which helps in code highlighting. Some of the best practices in writing Jenkins Pipeline are listed at https://dzone.com/articles/top-10-best-practices-for-jenkins-pipeline?fromrel=true. The ‘node’ block helps to group the various stages, and execute the steps defined in the stages in the build agents that have the ‘label’. stage block groups different individual steps, which are executed on the build agent. A few examples of the commonly used steps are git, sh and echo.
Single-line comments are preceded by two forward slashes ( // ), and comments spanning multiple lines start with /* and end with */.
/*
This is a multi-line comment to highlight its usage and it ends here.
*/
Build flow
Let’s construct an example of a scripted pipeline to: i) prepare the workspace and download the source code, ii) compile the source code (a small program written in C language), and iii) archive the artifacts. These tasks will be codified using scripted Pipeline syntax. For the purposes of this discussion, the Jenkins project has been created and named ‘OSFY-pipeline demo’.
Jenkinsfile in the link, https://github.com/mramanathan/osfy-pipeline-demo/blob/master/pipeline_bin/Jenkinsfile., is the complete source (written in Groovy) for this demo project.
Though the Jenkins documentation mandates that this file be named Jenkinsfile and placed at the root of the repository, in our example, it is named Jenkinsfile.groovy and kept under the folder pipeline_bin. This convention of placing the Jenkinsfile at the root of the repo should be followed while setting up the project configuration in Jenkins.
A clean start
To ensure that every trigger of the OSFY project starts a fresh build job with a clean workspace, we use the step deleteDir(). While node and stage blocks are covered, a new step named dir is introduced here, and deleteDir is wrapped inside this step.
node(‘linux’) {

stage(‘Clean Start’) {

dir(‘demo-sources’) {

deleteDir()

}

}

}
The contents of the folder, demo-sources, if present, will be removed. In the subsequent stages, the same folder will be reused to maintain continued access to the downloaded source code.


Download the source code
The git step references the master branch to download source code from the specified GitHub repo that’s referenced using the URL. This step can include other options, like using the credentials which may or may not be different from that set-up in the Jenkins master. The contents of the repo are downloaded and stored in demo-sources.
stage(‘Prepare Workspace’) {

dir(‘demo-sources’) {

git url: ‘https://github.com/mramanathan/osfy-pipeline-demo.git’, branch: ‘master’

}

}
While the git step is enough to handle most of the scenarios to download the source code, situations might arise where the download (which is essentially a Git clone) could fail if the source code repository is quite large, i.e., not just in terms of source code but other assets, like, binary files, system images, build packages, and extensive meta data, like branches and tags. The remedy for this is available as another step— checkout.
Compiling the source code
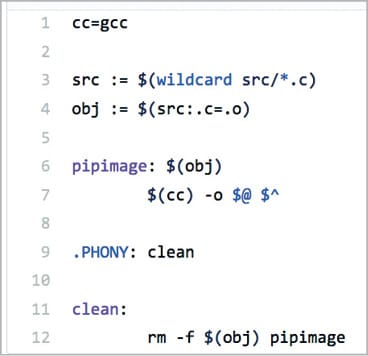
From the dir, demo-sources, we will call the make utility program to compile the code and generate the object artifact. The make utility uses a makefile that helps to build a tree of dependencies, define targets and variables, and perform actions. This makefile is also available in the root of the GitHub repo, mentioned in the section titled ‘Build Flow’.
The source code is inside the src directory at the root of the GitHub repository. It is a tiny little program written in C language:
stage(‘Generate Binary’) {

dir(‘demo-sources’) {

sh “make pipimage”

}

}
Archive
To enable the build artifact to be downloaded and used for further testing, we use the archive step to save the output from the previous compile stage. Once archived, the artifact can be downloaded from the project page in Jenkins for simple build projects. Jenkins supports integration with third-party artifactory tools, like, for example, JFrog and Maven, which help to version and promote the artifacts.
stage(‘Archive’) {

dir(‘demo-sources’) {

archive excludes: ‘*.txt’, includes: ‘pipimage’

}

}
The build artifact, thus generated, can be downloaded by clicking on the down arrow button that’s available upon completing the build. Its details can also be checked on the project page.
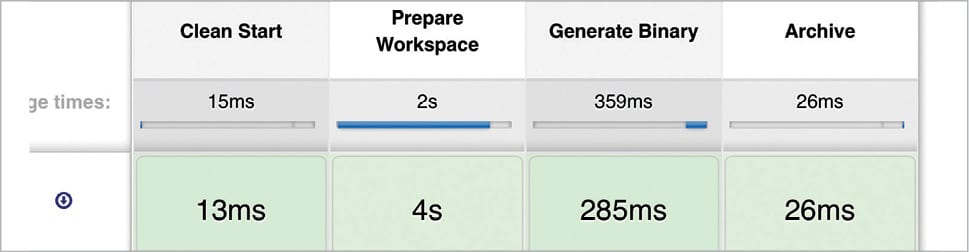
Stage view
For every job run of the project that’s triggered either manually or automatically, the Pipeline plugin presents a visual representation of all the completed and failed stages. If the build is successful, then the stages are shown in green, else, the failed stage is shown in red and the build stops there without executing any further stages in red.
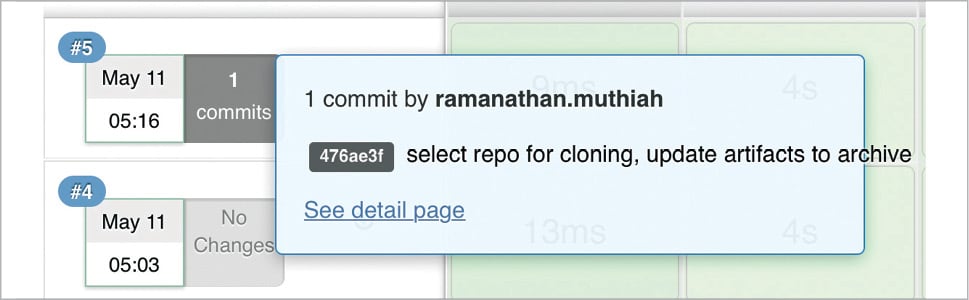
If the Jenkins project is configured to trigger automatic builds on new commits in the configured GitHub repo, which can be enabled via WebHooks, then the commit information will be displayed along with the stages.
With this strategy to codify the entire build flow by breaking it up into its logical, constituent blocks and grouping them together, Jenkins Pipeline is in perfect alignment with the current trend to instrument the infrastructure using code. Of course, with the support of 1000+ plugins available in the ecosystem, there is a multitude of other possibilities to extend Jenkins capabilities, such as, to detect and set the build statuses, as well as send out notifications to Slack and HipChat. With BlueOcean, the revamped user interface (that offers the capability to write Jenkinsfile using declarative syntax), Jenkins is certainly evolving with the times.
For bigger projects, global Pipeline shared libraries reduce the maintenance burden by abstracting away the common tasks from the main Jenkinsfile. This approach brings down the entry barrier for engineering teams adapting or switching to Jenkins Pipeline. Refer to the Jenkins documentation at https://jenkins.io/doc/book/pipeline/shared-libraries/.


