


Kotlin is a statically typed programming language specially designed for modern multi-platform applications. Experiment and use it to become the proud creator of your own Android app by following the simple instructions in this article.
Android, which was declared open source from the year 2007, works on Java and C++ as its official languages. In May 2017, at the Google I/O, it was announced that Kotlin, a statically typed programming language that is 100 per cent interoperable with Java, was also an official language of Android.
For current Android developers, Kotlin is a chance to use an Android-centric language to solve the usual problems, such as runtime exceptions and Java’s lengthy coding. Google assures continued support for Java, which means that your existing coding patterns are preserved. Kotlin, on the other hand, is an easy solution for a beginner to get started with Android’s own programming language.
Configuring Kotlin
Android Studio 3.0 comes with pre-installed Kotlin. For all other versions below 3.0, the user needs to install Kotlin manually as follows:
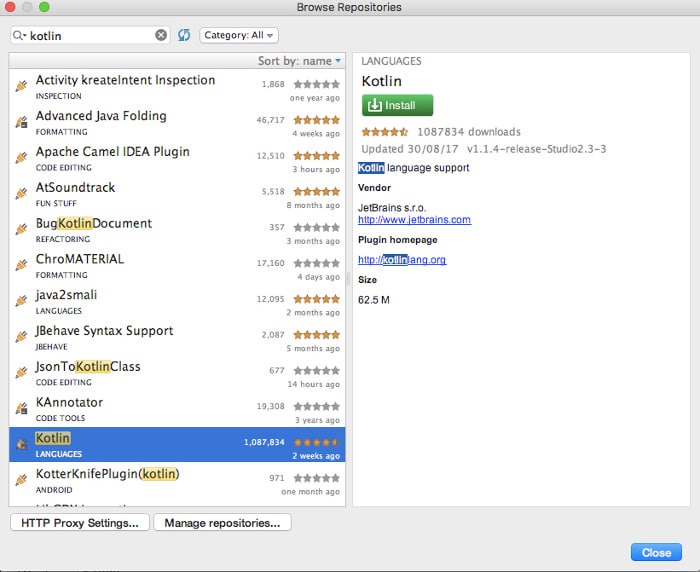
- Open Settings (Preferences in Mac).
- Select Plugins and search for Kotlin (Figure 1).
- Hit Install to add Kotlin to your Android Studio.
Now, if the Android Studio version is not 3.0, we need to add the following code into the build.gradle (Project: MyApplication) file (located at the bottom of the left side of the Project window, inside Gradle Scripts), under the dependencies section.
classpath “org.jetbrains.kotlin:kotlin-gradle-plugin:$kotlin_version”

classpath “org.jetbrains.kotlin:kotlin-android-extensions:$kotlin_version”
Also add the Kotlin version into the buildscript section, as follows:
ext.kotlin_version = ‘1.1.x’
Now, add the following line to the build.gradle (Module: app) file, as the second line, followed by the com.android.application plugin:
apply plugin: ‘kotlin-android’
Creating a new project with Kotlin
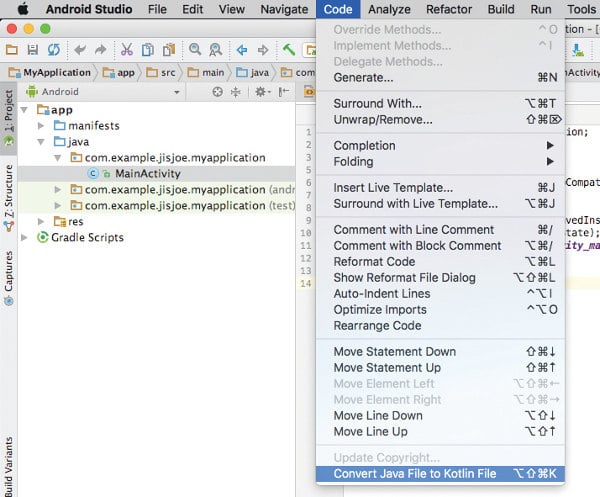
Android Studio 3.0 users can directly select Kotlin as their default language while creating a new project; as usual, select File > New > New Project. The slide asking for the project’s name will have an option underneath, ‘Include Kotlin Support’. Checking the box will enable Kotlin, and this is the starting activity — the MainActivity (default name) named MainActivity.kt. For other versions, the user needs to convert the existing Java class to Kotlin, by opening the MainActivity.java file, and then selecting Code > Convert Java file to Kotlin file (Figure 2).
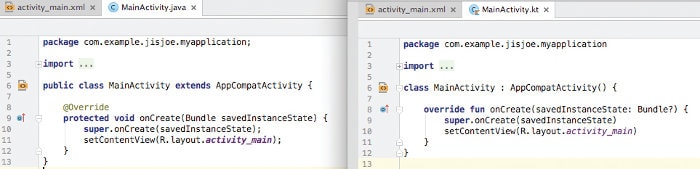
Figure 3 shows the differences between Java class and Kotlin class. The following differences can be noted:
1. The extension has changed from .Java to .kt.
2. extends AppCompatActivity is changed to: AppCompatActivity(). In Kotlin, the declaration of a variable name is followed by a ‘:’, after which the datatype is specified.
3. ‘override’ becomes part of the onCreate function and the function syntax is changed to ‘fun onCreate’ in Kotlin. Unlike Java, Kotlin requires explicit annotations for overridable members for overrides.
We can see a considerable difference in the Java and Kotlin syntax. Kotlin is a simple and easy-to-code language, allowing users to skip the headache of verbosity.
Coding with Kotlin: The layout design
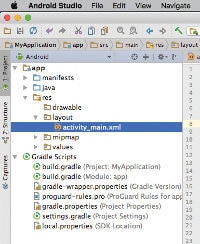
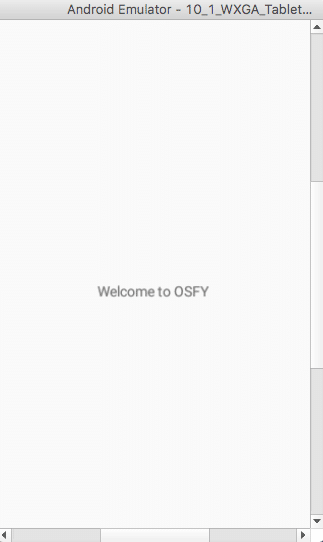
Let’s create our simple application, which will print ‘Welcome to OSFY’ on the screen. Here we need a TextView, which we will refer to and set a text to it. Let’s now open the layout file, which is located at app > res > layout > activity_main.xml (the default name). Figure 4 shows the location.
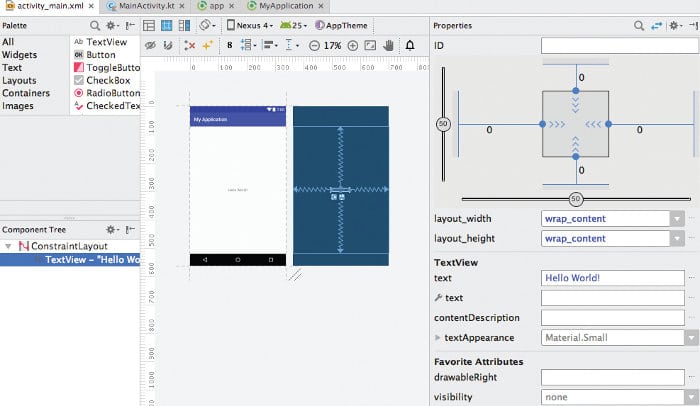
Here, we can see that a TextView has already been added to the layout file. Switch to the ‘Design’ section from the TextView (this can be changed at the bottom part of the displayed window, containing code). Next, select the TextView from the Component Tree window (Figure 5).
In Figure 5, on the left, we have the Palette window, where we can select and add more widgets to the application screen. To the right, we have the Properties window, where we can make property changes to the selected TextView.
The most important property is the ID, so provide a suitable name, or rather, set the ID value as ‘textview’ itself for easy identification. This ID is used to uniquely identify the particular element in our Java/Kotlin code. We can also view many other properties, such as setting size, giving colour, etc, by selecting the ‘View all properties’ link at the bottom of the Properties window.
Coding with Kotlin: The Java/Kotlin part
In normal Java coding, we need the following code to refer to a TextView, and for setting a text to the above added TextView:
TextView t;

t=(TextView) findViewById(R.id.textview);

t.setText(“Welcome to OSFY”);
The above code is used to set a text to the TextView element, with the ID ‘textview’ added to the layout file, in Java coding.
In Kotlin, the following code is used:
val t: TextView = findViewById(R.id.textview) as TextView;

t.setText(“Welcome to OSFY”);
Here we can see the changes in the coding, while using Java and Kotlin. Also note that if there is any object we declare in the code, which has a null value as default, it will not compile in Kotlin. That is:
//Java

String t;

t=null;

//Kotlin

val t: String = null
The above code will execute in Java, but will not compile in Kotlin. This is because Kotlin provides ‘null safety’ or, in other words, Kotlin marks an end to the long-time problem of NullPointerException.
Running your first project using Kotlin
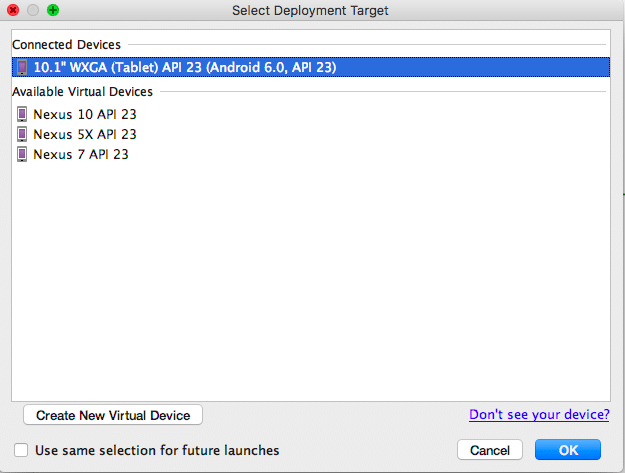
In order to run the application, we need to click the Run button located on the top panel of Android Studio. A window to choose the device will appear (Figure 6). We can either use an Android virtual device, or an Android device connected to the computer.
If you are using an Android device, then you must enable developer options in it, before enabling Android Debugging in the menu options.
Kotlin and Oreo
Android recently announced its next Android version, Android Oreo, along with sparkling new development features. These include downloadable fonts, font support in XML, emoji compatibility, auto sizing TextView, and other style and theme options.
What we have just learnt about the features of Kotlin, which is an Android-centric programming language, will help us to work with the new Android features.
For example, let’s look at auto-sizing TextView. When we code for older versions, prior to Oreo, we need to design separate design files for varying screen sizes, which fit the screen features, like height, width, etc. But in Oreo, we have an auto-sizing option, which will auto-resize the text according to the target device screen. For this, the following code is used:
<?xml version="1.0" encoding="utf-8"?>

<TextView

android:layout_width="match_parent"

android:autoSizeTextType="uniform" />
A new property called autoSizeTextType has been introduced in Oreo, which will control the auto sizing of the TextView. The value can either be uniform or none, based on the requirement. We have already learned that connecting elements is easier using Kotlin. This is evident when using the auto-sized TextView programmatically with Kotlin, as follows:
val t: TextView = findViewById(R.id.textview) as TextView;

t.setText(“Welcome to OSFY”);

TextViewCompat.setAutoSizeTextTypeWithDefaults(t,TextViewCompat.AUTO_SIZE_TEXT_TYPE_UNIFORM);
TextViewCompat.setAutoSizeTextTypeWithDefaults is used for the purpose, where the arguments are TextView instant and auto size text type, which can be either TextViewCompat.AUTO_SIZE_TEXT_TYPE_NONE or TextViewCompat.AUTO_SIZE_TEXT_TYPE_UNIFORM.


I am also an android developer and also use android studio 2.0 but the android developer can not make easily the app so I also use the Kotlin in the Android studio whose I made easily the android app. so thanks for sharing the post.