


If you are interested in creating your own chat robot, then here is a tutorial on how to do it yourself by using Java and AIML.
A chat robot or chatterbot is a human chat simulator. It is a program for auditory or textual conversation between a computer and a human being. Such robots are used for fun, education and 24×7 customer services. When students and customers have many questions to ask, the robot gives the answers on behalf of teachers or customer service executives.
In this article, I have used AIML, A.L.I.C.E, Java and NetBeans. A brief introduction to these technologies follows.
AIML (Artificial Intelligent Markup Language) is an XML based mark-up language to help create a chat robot from scratch. It was first developed by Dr Richard Wallace when he created a chat robot named A.L.I.C.E (Artificial Linguistic Internet Computer Entity).
The important tags for AIML are listed below.
- <aiml>: The parent tag to start and end the AIML document.
- <category>: Every new question or pattern with its relevant answer goes in this tag.
- <pattern>: Matches the pattern with the user’s question.
- <template>: The robot gives the answer from the template if the pattern can be matched.
<?xml version = “1.0” encoding = “UTF-8” ?>
<aiml version = “1.0.1” encoding = “UTF-8”?>
<category>
<pattern> What is your name? </pattern>
<template>
I am Alice, nice to meet you.
</template>
</category>
</aiml>
Here is an explanation of the code given above. File first.aiml contains the XML based tag for the robot’s knowledge. Here, the <category> tag is used to describe the user pattern or the user’s question. <template> is the response given by the robot to the user if the user’s pattern is matched.
A.L.I.C.E is the robot created in 1995 by Dr Richard Wallace, in Java, by using AIML. We can also say that A.L.I.C.E is an AIML parser. Nowadays, many parsers are available in various languages like PHP, Python, etc.
Steps to creating a chat robot
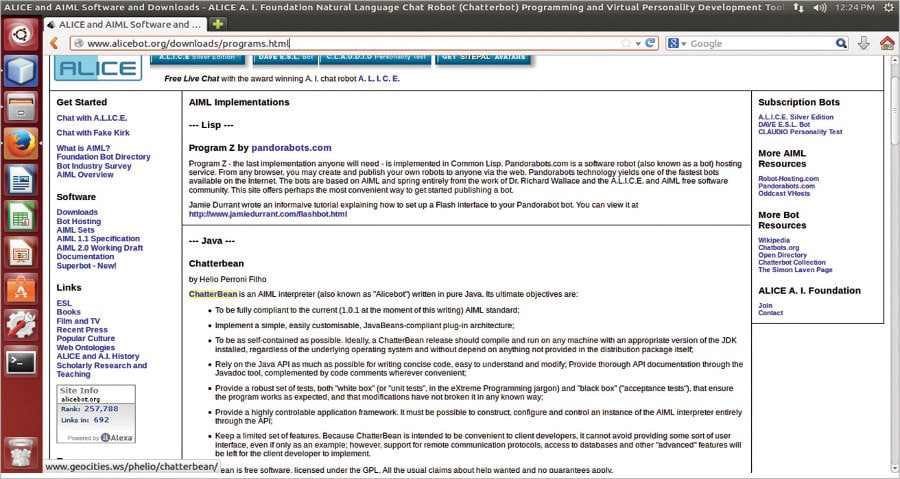
1. Download the source code from http://www.alicebot.org/downloads/programs.html
2. Go to the Java section.
3. Download the source code under the link Chatterbean.
4. Under the section ‘Download, Building and Usage Information’, go to ‘Download Chatterbean 00.008 Source Distribution’. We will download the source code rather than the binary distribution.
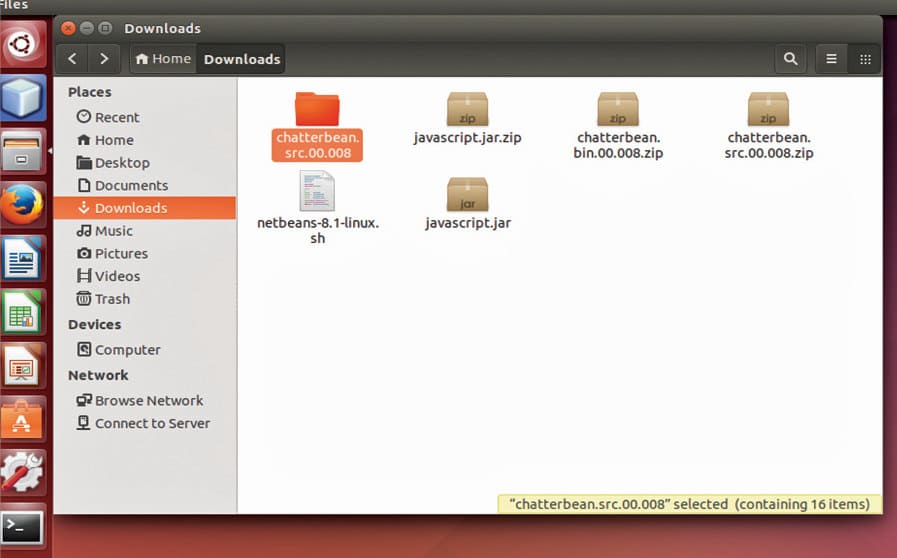
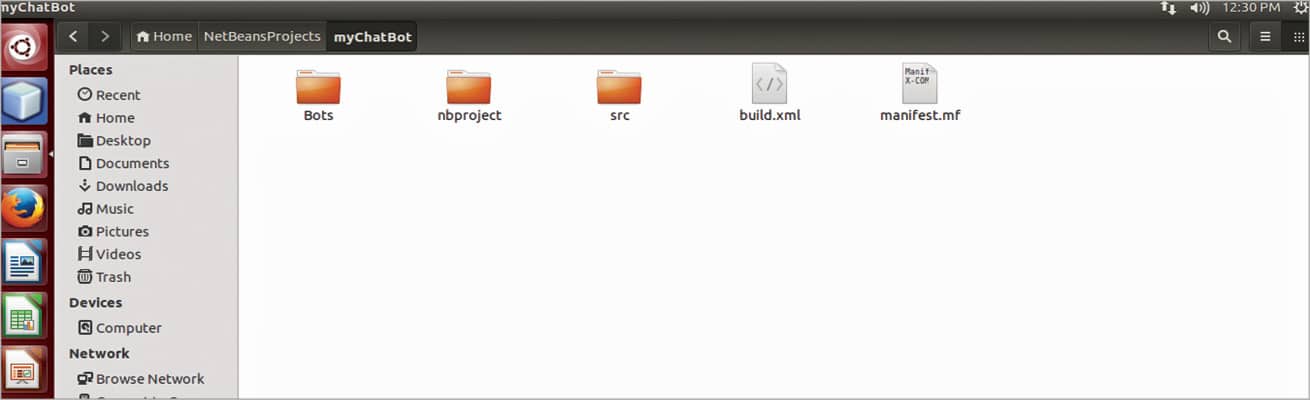
5. Extract Chatterbean to the folder (Figure 2).
This extracted folder contains the ‘Bot’ directory, which will have the collection of AIML. We can create our own AIML to increase the knowledge of our robot. But first let’s proceed to the set-up. The folder ‘Source’ contains Java code for the robot A.L.I.C.E and the AIML parser. We will use this, as it is, in our program.
Preparing NetBeans for coding
The following steps prepare NetBeans for coding.
1. Create a project named ‘myChatBot’.
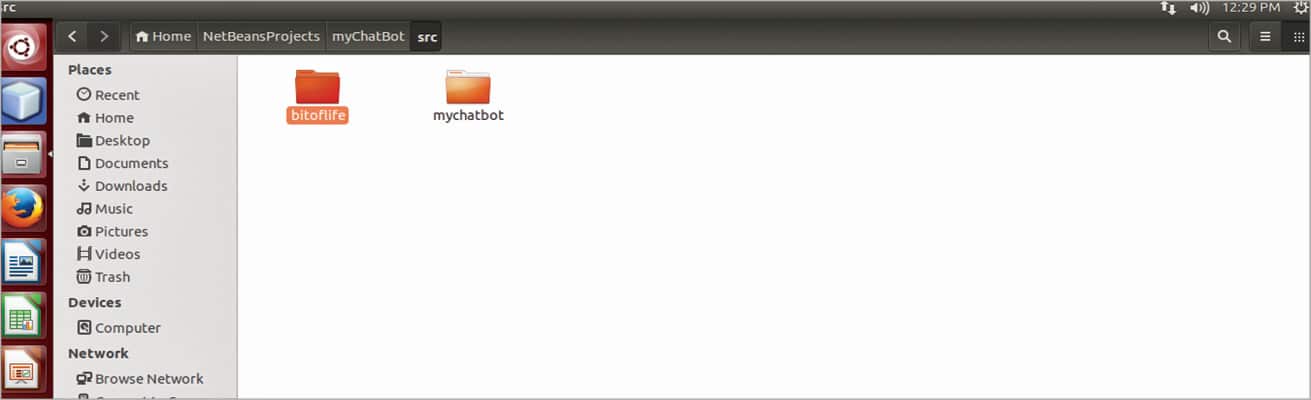
2. Copy the existing source code of A.L.I.C.E into our Project folder. Copy botoflife from the downloaded source code to NetbeansProject/mychatbot/src as shown in Figure 4.
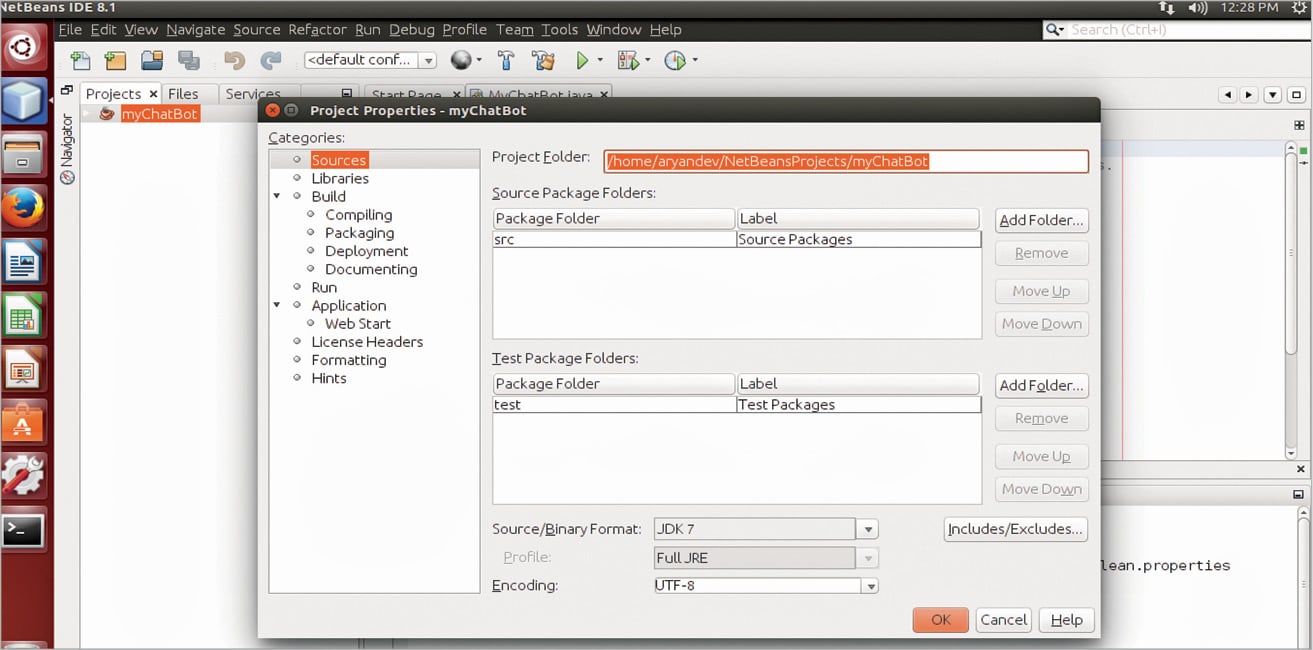
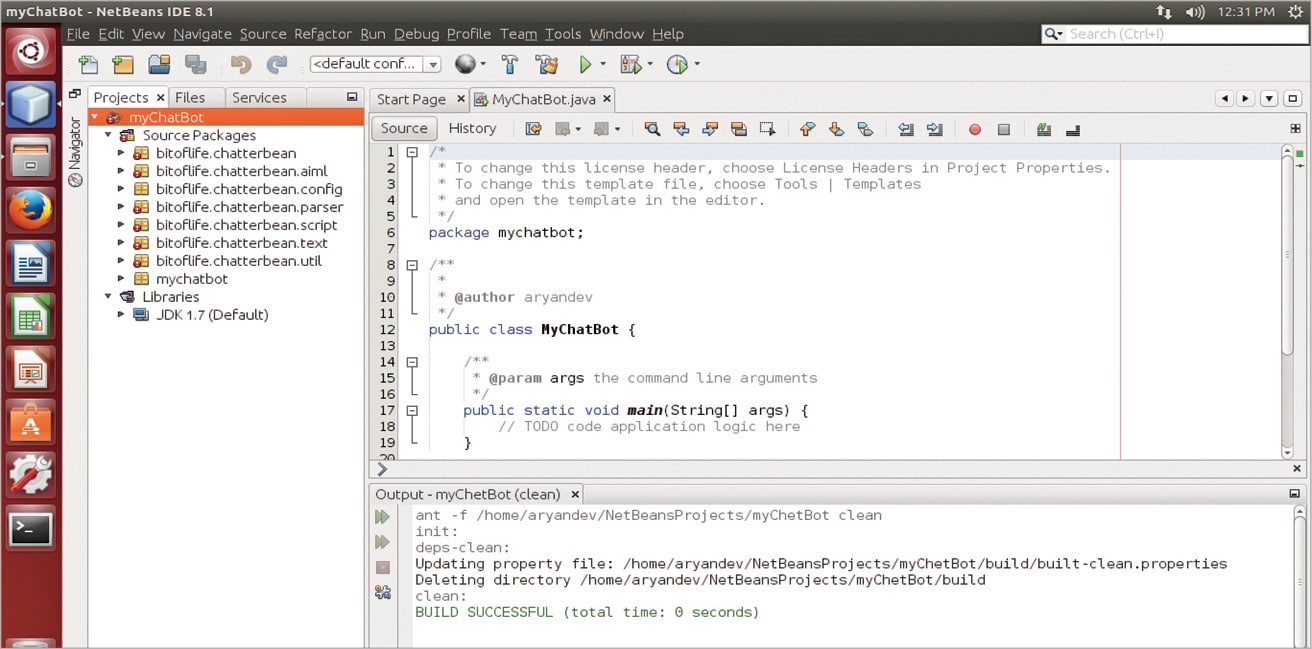
The source code will appear in the Projects tab under Source Packages at the NetBeans IDE shown in Figure 5.
3. Now copy the Bot folder from the downloaded source code to NetbeansProject/myChatBot as shown in Figure 6.
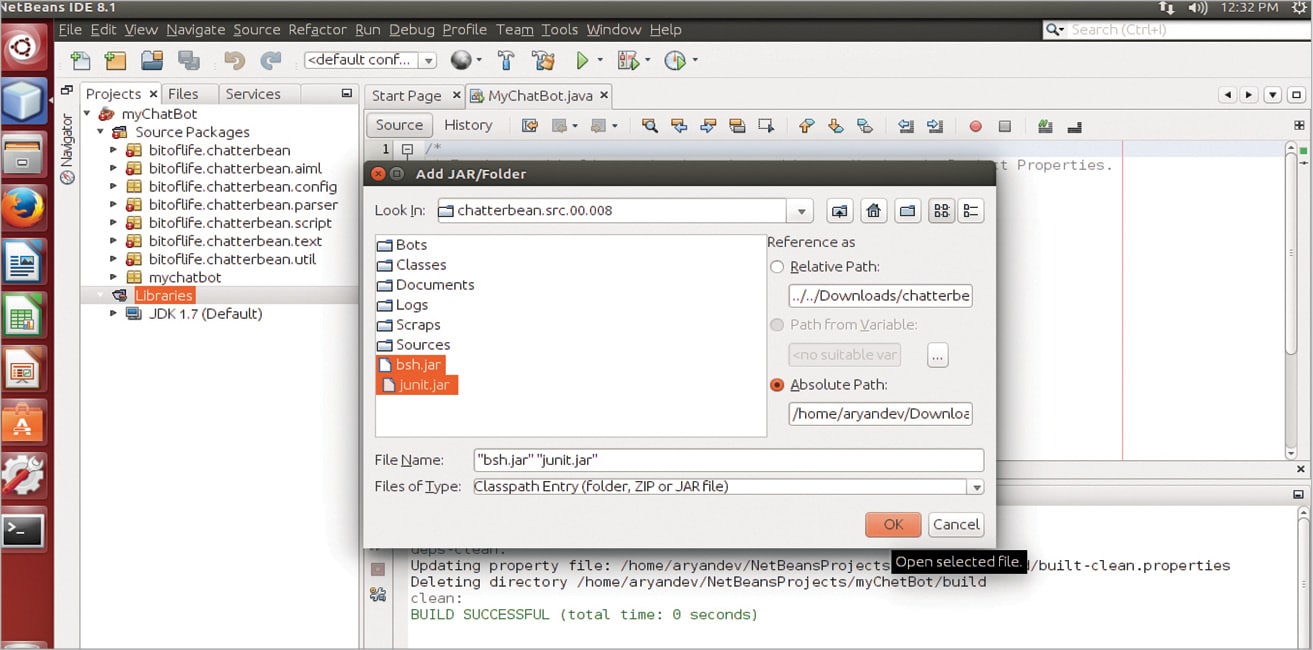
4. Add additional supportive libraries which come with the A.L.I.C.E source code. These are bsh.jar and junit.jar.
The set-up is now ready. Open MyChatBot.java which contains main() and import the libraries, using the following code:
import bitoflife.chatterbean.AliceBotMother;
import bitoflife.chatterbean.AliceBot;

public static void main(String[] str)
{
try{
AliceBotMother mother = new AliceBotMother();
AliceBot mybot = mother.newInstance();
String ask = “Who are you?”; //Here You can ask Dynamic question.
String str = mybot.respond(ask);
System.out.println(str);
}
catch(Exception ex)
{
System.err.println(ex.toString());
}
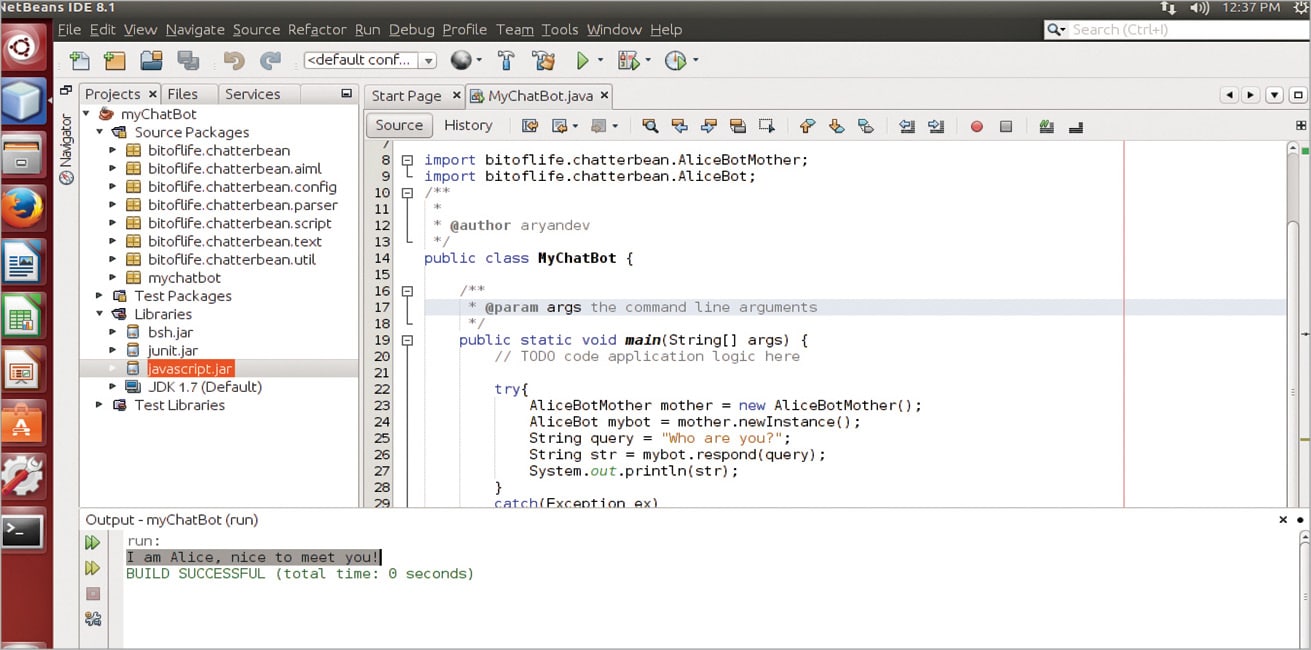
Execute the code. It will generate the answer shown in Figure 8.
In the above code, in the first two lines, the AliceBotMother and AliceBot class create the instance of Bot. Now, ask a meaningful question; in our case, it’s String ask. Now pass this string to object AliceBot with the respond function, which returns the string answer predefined in the relevant AIML. We can ask various questions by replacing the string in ask variable.
Your own, personal robot is now ready! As it’s a Java based application, you can use it on various platforms.


is there a way to call specific java methods as per the text entered by user ?
Really Great Post…
You can easily buy Chatbot Source Code from here http://bit.ly/2uFcIvb
please the link to download the source code isn’t working can anyone please give me a valid link.
Ok where is the library’s link??!
please the link to download the source code isn’t working can anyone please give me a valid link.
how to trained the robot with more data? in given example , we are not training the robot simply matching the patter.
Im trying to run the java program but im getting a “main” java .lang.ArrayIndexOutofBoundsException:1 at bitofile.chatterbean.ChatterBean.main(ChatteeBean.java:294)can anyone please help out