


If you wish to develop, host and scale your application in the cloud, then OpenShift could be your best bet. And you can do all of this quickly on a public cloud hosted by Red Hat.
OpenShift is a Platform as a Service (PaaS) offering from Red Hat. It allows developers to develop, deploy and scale applications in a cloud environment. Developers and operations engineers can choose between various offerings provided by OpenShift, such as online, on-premise and the open source project option.
Prerequisites
The following are some of the requirements for deploying your Web app in the OpenShift environment:
1. An OpenShift account (signing up is free at https://www.openshift.com/app/account/new)
2. Installation of OpenShift client tools (https://developers.openshift.com/en/managing-client-tools.html)
3. Knowing the basics of Web technologies like HTML, CSS and Python
Terminologies
Let us look at some of the terminology used throughout the article.
1. Application refers to a typical Web application, which you wish to run on the OpenShift platform.
2. Gears is a server container with a set of resources, which allows developers to run their applications.
3. Cartridge is nothing but a framework or component that can be used to create and run an application.
Background
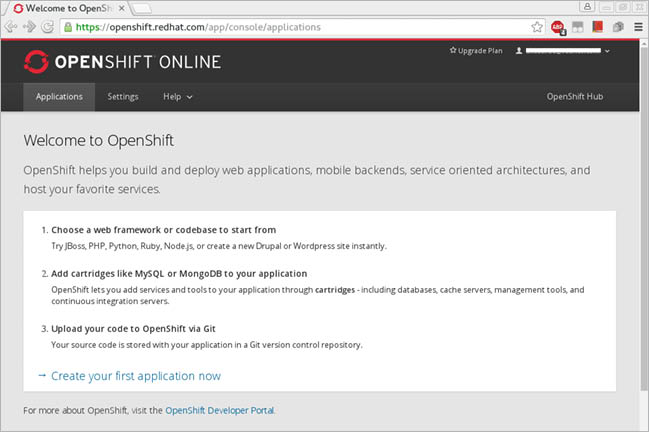
After registering for a new free OpenShift account, you can log in into the OpenShift Web console, which is hosted at https://openshift.redhat.com. Your free OpenShift account includes three small gears with 1GB of storage per gear. You can always upgrade or downgrade your plan as per your requirements and application traffic. OpenShift provides cartridge support such as Python, PHP, node.js and Ruby.
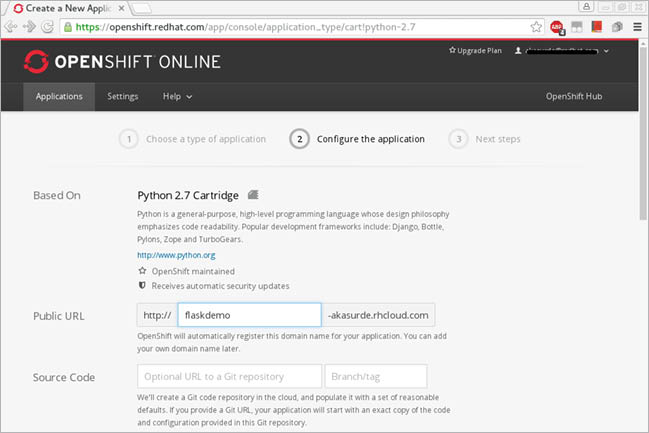
To create a new application, click the ‘Create your first application now’ link. On the next page, select your application type. Let’s choose the ‘Python 2.7’ app from the given list. After selecting the application, configure it using the ‘Configure the application’ page.
Let’s keep the default settings unchanged and click the ‘Create application’ button to create our new application in OpenShift. You can explore and adjust different settings as desired. On the application page, you will notice that a new application is listed, in this case ‘flaskdemo’. By default, all applications are hosted under the sub-domain ‘rhcloud.com’. You can also add your own domain name to point to this sub-domain.


Developing a Flask app
OpenShift provides developers a Git repository, with each application created. For this app, we can clone the source from the link provided in the ‘Application Setting’ page.
Using Git, you can clone the source code provided as follows:
git clone <SOURCE_URL> flaskdemo
After cloning the source, you will notice that three files have been created in the ‘flaskdemo’ directory. These are:
1. requirements.txt – This is a Python requirement file.
2. setup.py – This file holds application related details such as the name, author, version and package dependencies.
3. wsgi.py – This is a standard template boilerplate app script.
Now, let us develop our Flask in this directory. First, replace the contents of wsgi.py with the following code:
#!/usr/bin/python import os virtenv = os.environ[OPENSHIFT_PYTHON_DIR] + /virtenv/ virtualenv = os.path.join(virtenv, bin/activate_this.py) try: execfile(virtualenv, dict(__file__=virtualenv)) except IOError: pass from FlaskDemo import app as application
Create a file called FlaskDemo.py and add the following content to it:
from flask import Flask app = Flask(__name__) @app.route(/) def home(): return <h1>Hello World</h1> if __name__ == __main__: app.run(debug=True)
The following line in setup.py is for installing dependencies for Flask:
# install_requires=[],
Replace the above line with the following:
install_requires=[Flask==0.7.2, MarkupSafe],
Now, commit your changes and push the changes to OpenShift:
# git add . # git commit -m Initial commit for FlaskDemo app # git push origin master
Once you are done with pushing the changes, look for error messages in the Git push command. If there are no errors, head to http://flaskdemo-{domain-name}.rhcloud.com/. Replace the domain name with the domain name you provided. Your Flask application will be hosted on this URL.
In this article, we have looked at how to create an OpenShift application and deploy a Flask application on it.
If you are interested in deploying a blog or Web application, then you can check out OpenShift. If you want to contribute to the development of OpenShift itself, check the open source project OpenShift Origin, which is the official upstream source for OpenShift. You can read the guidelines for contribution at https://blog.openshift.com/how-to-contribute-code-to-openshift-origin-paas/.


Thanks for the article, it would be great if this were updated using the Dev Preview of the Next Generation of OpenShift Online https://www.openshift.com/devpreview/