


Apache Cassandra is an open source, highly scalable NoSQL database, thats well known for handling large volumes of data across multiple data centres and the cloud.
In this article, we will learn to set up and optimise Apache Cassandra.
Setting up Apache Cassandra on Linux
To set up Cassandra on a Linux machine, install Apache Cassandra 3.x on RHEL/CentOS 6.5 or later.
The prerequisites are:
- Yum package management
- Root or non-root user with sudo privileges
- Oracle Java Platform, Standard Edition 8 (JDK) or OpenJDK 8. JDK is recommended for Cassandra installation as it has some
- tools that are not in JRE
- Python 2.7
Installation steps
i) Check the Java version, as follows:
$ java -version
If Oracle Java is used, the results should look like whats shown below:
java version "1.8.0_65"
Java(TM) SE Runtime Environment (build 1.8.0_65-b17)
Java HotSpot(TM) 64-Bit Server VM (build 25.65-b01,
mixed mode)
ii) Create a new Yum repo datastax.repo under /etc/yum.repos.d
/etc/yum.repos.d/datastax.repo
[datastax-ddc]
name = DataStax Repo for Apache Cassandra
baseurl = http://rpm.datastax.com/datastax-ddc/3.2
enabled = 1
gpgcheck = 0
You can change the latest version. The current latest version is 3.2.
iii) Now, Apache Cassandra will be available for installation through Yum.
$ sudo yum install datastax-ddc
The above command will also install the Cassandra utilities such as sstablelevelreset, sstablemetadata, sstableofflinerelevel, sstablerepairedset, sstablesplit and token-generator.
iv) Cassandra is now installed as a service. To check its status, use the following command:
$ sudo service cassandra status
Start Cassandra as follows:
$ sudo service cassandra start
To stop Cassandra, use the following command:
$ sudo service cassandra stop
Start the Cassandra command line, as follows:
$ cqlsh
Installing Apache Cassandra 3.x on the latest Ubuntu LTS or Debian stable release
The prerequisites are:
a. Advanced package tool should be installed
b. Root or non-root user with sudo privileges
c. Oracle Java Platform, Standard Edition 8 (JDK) or OpenJDK 8. JDK is recommended for Cassandra installation, as it has some tools that are not in JRE.
d. Python 2.7
Installation steps
Check the Java version as follows:
$ java version
i. If Oracle Java is used, the results should look like whats shown below:
openjdk version "1.8.0_72-internal"
OpenJDK Runtime Environment (build 1.8.0_72-internal-b05)
OpenJDK 64-Bit Server VM (build 25.72-b05, mixed mode)
ii. Create a new source list cassandra.sources.list under /etc/apt/sources.list.d/:
$ echo deb http://debian.datastax.com/datastax-ddc 3.2 main | sudo tee -a /etc/apt/sources.list.d/cassandra.sources.list
iii. Allow installation of the Oracle JVM instead of the OpenJDK JVM.
Open the /etc/apt/sources.list file, and find the line that describes your source repository for Debian. Add contrib non-free at the end of the line and save the file. For example:
deb http://some.debian.mirror/debian/ $distro main contrib non-free
iv. Add the DataStax repository key to your aptitude trusted keys, as follows:
$ curl -L https://debian.datastax.com/debian/repo_key | sudo apt-key add -
v. Update the apt-get repository and install Apache Cassandra, as follows:
$ sudo apt-get update
$ sudo apt-get install datastax-ddc
vi. To verify the installation, check the status, as shown below:
$ sudo service cassandra status
Start Cassandra, as follows:
$ sudo service cassandra start
Stop Cassandra, as shown below:
$ sudo service cassandra stop
Setting up Cassandra on Windows
The prerequisites are:
a. Java 8
b. 32-bit systems require the Visual C++ 2008 runtime
Installation steps
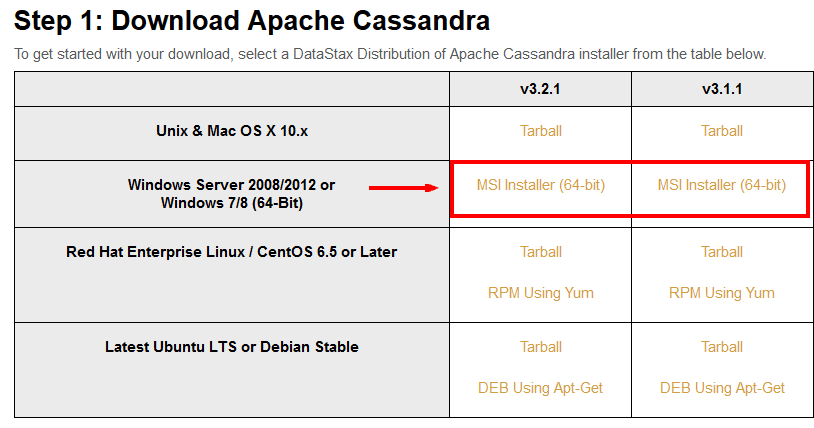
Download the Windows installer from http://www.planetcassandra.org/cassandra/.
i. Download the link http://downloads.datastax.com/datastax-ddc/datastax-ddc-64bit-3.2.1.msi.
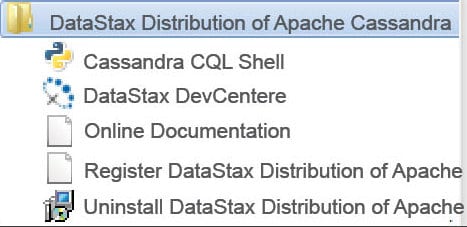
After a successful download, run the installer and follow the set-up wizard to install. While installing, accept the option Automatically start Data Stax DDC Service to automatically start the services whenever the computer reboots.
When your installation is done successfully, you will be able to see the new program, DataStax Distribution of Apache Cassandra under Start Menu-> All Programs.
ii. Verify the installation using nodetool:
C:\> \Program Files\DataStax-DDC\apache-cassandra\bin\nodetool status
The expected output is:
Datacenter: datacenter1
========================
Status=Up/Down
|/ State=Normal/Leaving/Joining/Moving
-- Address Load Tokens Owns Host ID
Rack
UN 127.0.0.1 133.97 KB 256 ? 16e04c6b-5d43-4372-9e71-7acdcaa023bc rack1
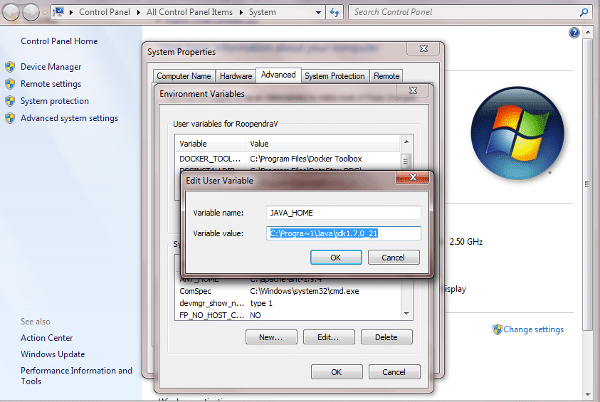
If you still find an error in displaying the nodetool status, then check the JAVA_HOME env variable path. It should point to your Java installation (e.g., C:\Program Files\Java\jdk1.8.0_51).
Multi-node cluster configuration
In the previous section, I have described the installation on a single node. In this section, I will cover the setting up of Cassandra Multinode (same data centre).
The prerequisites are:
a. Install same versions of Cassandra on all nodes
b. Get the IP address of each node
c. Change the default clusters name
Installation steps
i. If Cassandra is running, stop it and clear the data.
a. To stop Cassandra, use the following command:
$ sudo service Cassandra stop
b. To clear data, use the command given below:
$ sudo rm -rf /var/lib/cassandra/data/system/*
ii. Prepare cassandra.yaml on all nodes and restart Cassandra.
Change to the config properties that we need while setting up the multinode cluster.
num_tokens: This defines the number of tokens randomly assigned to this node on the ring. The default value is 256.
-seeds: Cassandra nodes use this list of hosts to find each other and learn the topology of the ring. We must change this if we are running multiple nodes.
listen_address: If not set, Cassandra asks the system for the local address, the one associated with its host name. In some cases, Cassandra doesnt produce the correct address and you must specify the listen_address.
endpoint_snitch: This is the name of the snitch.
As an example, we have installed Cassandra into three nodes — 110.82.155.0, 110.82.155.1 and 110.82.155.2, of which two are seed nodes (110.82.155.0 and 110.82.155.2).
cluster_name: MultinodeTestCluster num_tokens: 256 seed_provider: - class_name: org.apache.cassandra.locator.SimpleSeedProvider parameters: - seeds: 110.82.155.0,110.82.155.2 listen_address: rpc_address: 0.0.0.0 endpoint_snitch: GossipingPropertyFileSnitch
iii. Write the appropriate rack and data centre name cassandra-rackdc.properties:
# indicate the rack and dc for this node
dc=DC1
rack=RAC1
iv. After completing the previous step, start the seed nodes (e.g., 110.82.155.0, 110.82.155.2) one by one, and then start the remaining nodes (e.g., 110.82.155.1).
$ sudo service cassandra start
To verify the installation, use the following command:
$ nodetool status
Optimisation of Apache Cassandra
Cassandra is well known for its good write performance. However, there are a few cases where things do work but could be better. Here are a few recommendations to optimise the performance of Apache Cassandra.
Tuning the Java resources: You can optimise the performance of Cassandra by tuning Java heap size. The default configuration of the heap size is based on the system memory, as shown below:
If you are planning to change the heap size, its recommended that you change MAX_HEAP_SIZE and HEAP_NEWSIZE together.
MAX_HEAP_SIZE: This sets the maximum heap size for the JVM. The same value is also used for the minimum heap size. This allows the heap to be locked in memory at the start of the process, to keep it from being swapped out by the OS.
HEAP_NEWSIZE: This is the size of the young generation heap. The larger this is, the longer Garbage Collection pause times will be. The shorter it is, the more expensive Garbage Collection will be (usually). A good guideline is 100MB per CPU core.
By using the cache efficiently: You should consider key cache and row cache if rows do not belong to the large tables. The latest version of Cassandra allows us to configure partial or full caching of each partition (rows_per_partition).
Here are some tips to use the cache efficiently:
- Store lower-demand data or data with extremely long partitions in a table with minimal or no caching.
- Deploy a large number of Cassandra nodes under a relatively light load per node.
- Logically separate heavily-read data into discrete tables.
Improve write performance by configuring memtable throughput: Configuring memtable throughput can improve write performance. Cassandra flushes memtables to disk, creating SSTables when the commit log space threshold has been exceeded. Configure the commit log space threshold per node in cassandra.yaml. How you tune memtable thresholds depends on your data and write load.
Enable compression to optimise for read performance: A proper compression algorithm helps to increase the performance of Cassandra. As per the official documentation, writes on compressed tables can show up to a 10 per cent performance improvement.
The compression algorithms are LZ4Compressor, SnappyCompressor, and DeflateCompressor.
You must also choose the appropriate compaction strategy for the corresponding I/O pattern.
References
[1] http://docs.datastax.com/en/cassandra/3.x/cassandra/install/installTOC.html
[2] http://www.planetcassandra.org/cassandra/
[3] http://docs.datastax.com/en/cassandra_win/3.x/cassandra/install/installWin.html
[4] http://www.planetcassandra.org/Try-Cassandra/
[5] http://docs.datastax.com/en/cassandra/3.x/cassandra/initialize/initSingleDS.html
[6] http://docs.datastax.com/en/cassandra/3.x/cassandra/operations/opsMonitoring.html


