The DevOps culture consists of continuous practices that help to achieve faster time to market and the highest quality for an application. This article gives a brief description of Azure DevOps, and then shows how to implement CI/CD in it for a sample application.
In agile software development, implementation of DevOps practices using end-to-end automation with Visual Studio Team Services or Azure DevOps helps to achieve better software quality and faster time to market.
Benefits of implementing DevOps practices
Table 1 lists the business and technical benefits realised by multiple organisations after the culture transformation achieved using DevOps practices.
| Business benefits | Technical benefits |
| Improved communication and collaboration between teams |
Early detection of failures |
| Happy people | High availability |
| Faster time to market | Stable and consistent environment |
| Quality releases | Efficient utilisation of resources |
| Productivity gains | Easy rollback: Enhanced recovery time |
| Transparency in process execution | Single-click deployment |
| Measurement of achievement; for example, improvement in deployment time | Continuous deployment |
| Agile teams | Monitoring |
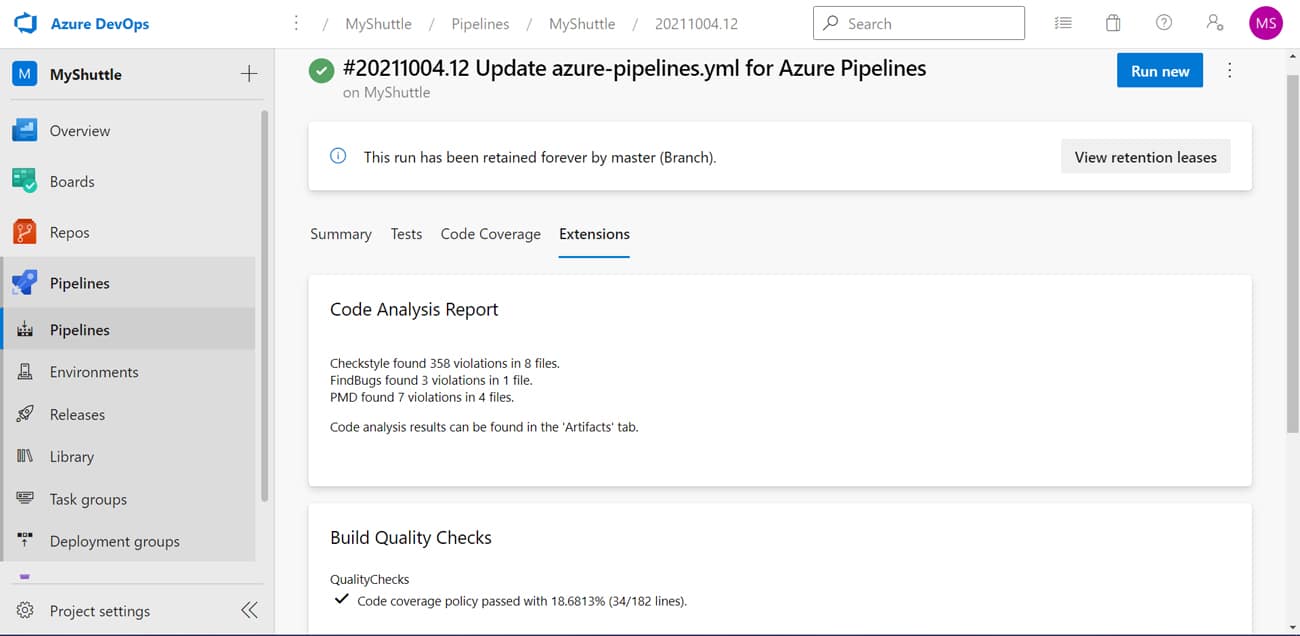
| Reliability and reusability | Cross-skills learning |
Table 1: DevOps benefits
Azure DevOps is a software as a service (SaaS), also known as a hosted service. Visual Studio Team Services is a platform from Microsoft that provides an end-to-end automation toolchain for developing and deploying different types of applications written in Java, .NET, Python, PHP, Angular, Node.js, Ionic Cordova, Android, iOS, and so on. It integrates with most of the tools used in the automation of application life cycle management activities, and provides a free tier to get started. One of the major benefits of Azure DevOps is that it provides the hosted agents.
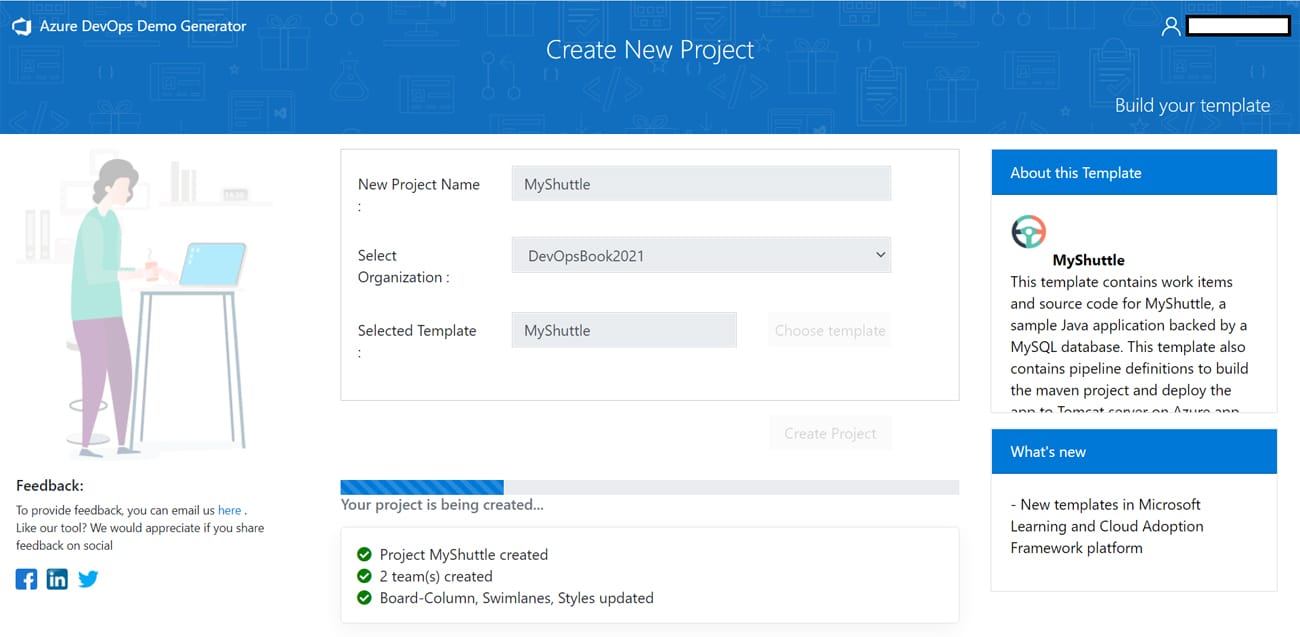
Table 2 gives the services available in Azure DevOps for implementing continuous practices.
| Azure Boards | Agile is a set of principles that brings pace to development and delivery while DevOps practices make sure that this pace is maintained. Scrum is one of the most popular Agile based frameworks. Continuous planning practice in the organisation helps to achieve visibility, collaboration and communication, feedback, and velocity.
Azure Boards service helps to manage projects that use Scrum and Kanban with customisable dashboards, and integrated reporting. It helps to track user stories, backlog items, tasks, features, and bugs. |
| Azure Repos | Azure Repos provides Git or Team Foundation Source Control as your Git version.
We can connect to Azure Repos to access repositories and manage work using the command line, Visual Studio Code, Visual Studio, Xcode, Eclipse, and IntelliJ. |
| Pipelines 1. Build pipelines 2. Release pipelines |
Build and Release pipelines are for CICD implementation using tasks in UI or YAML scripts that reside in azure-pipelines.yaml
For private projects, up to 1800 minutes (30 hours) of pipeline jobs are free every month for execution. Windows, Linux, or Mac machines are available for Build. For more details on Microsoft-hosted agents, you can visit https://docs.microsoft.com/en-us/azure/devops/pipelines/agents/hosted |
| Azure Test Plans | Azure DevOps and TFS (Team Foundation Server) provide support for the following types of testing for better quality and effective collaboration:
|
| Azure Artifacts | Azure Artifacts provides features to create and share package feeds for Maven, npm, and NuGet packages. It is pre-installed in Azure DevOps Services, Azure DevOps Server 2019 and 2020. and Team Foundation Server (TFS) 2017 and 2018. |
| Extensions Marketplace |
Visit https://marketplace.visualstudio.com/azuredevops to get more details on the support for Extensions for Azure DevOps. |
Table 2: Azure DevOps services
CI/CD pipeline in Azure DevOps
Continuous integration (CI) is the DevOps practice of integrating new features or a bug fix in the existing distributed version control systems such as Git, which triggers code quality checks, unit test execution, and build. It is easy to implement, and hence for those starting with DevOps, it works as a solid base on which the rest of DevOps practices can stand. The objective of continuous delivery and continuous deployment (CI/CD) is to deploy an application in dev, test, UAT and the production environment in an automated manner. It helps in incremental releases after short spans of development, or a sprint in agile terms.
Some of the key terminologies used within Azure DevOps are:
- Organisation: We can create one or more organisations in Azure DevOps and each organisation can have multiple projects.
- Project: There are multiple projects in one organisation using access control. Each project has its own Azure Boards, Azure Repo, Pipelines, and other services
Let us now use the Azure DevOps Demo Generator to get a sample project and create a Pipeline.
| Feature | Azure DevOps Services | Azure DevOps Server |
| NuGet |
Yes | Yes |
| npm | Yes | Yes |
| NuGet.org upstream source | Yes | Yes |
| Maven | Yes | Yes |
| Maven Central upstream source | Yes | Azure DevOps Server 2019 Update 1 and newer, Azure DevOps Server 2020 |
| Python | Yes | Azure DevOps Server 2019 Update 1 and newer, Azure DevOps Server 2020 |
| Universal Packages | Yes | No |
1. Go to https://azuredevopsdemogenerator.azurewebsites.net/
2. Click on Choose Template.
3. Select the Java based template, which is MyShuttle.
4. Provide a New Project Name and select Organisation. Click on Create Project.
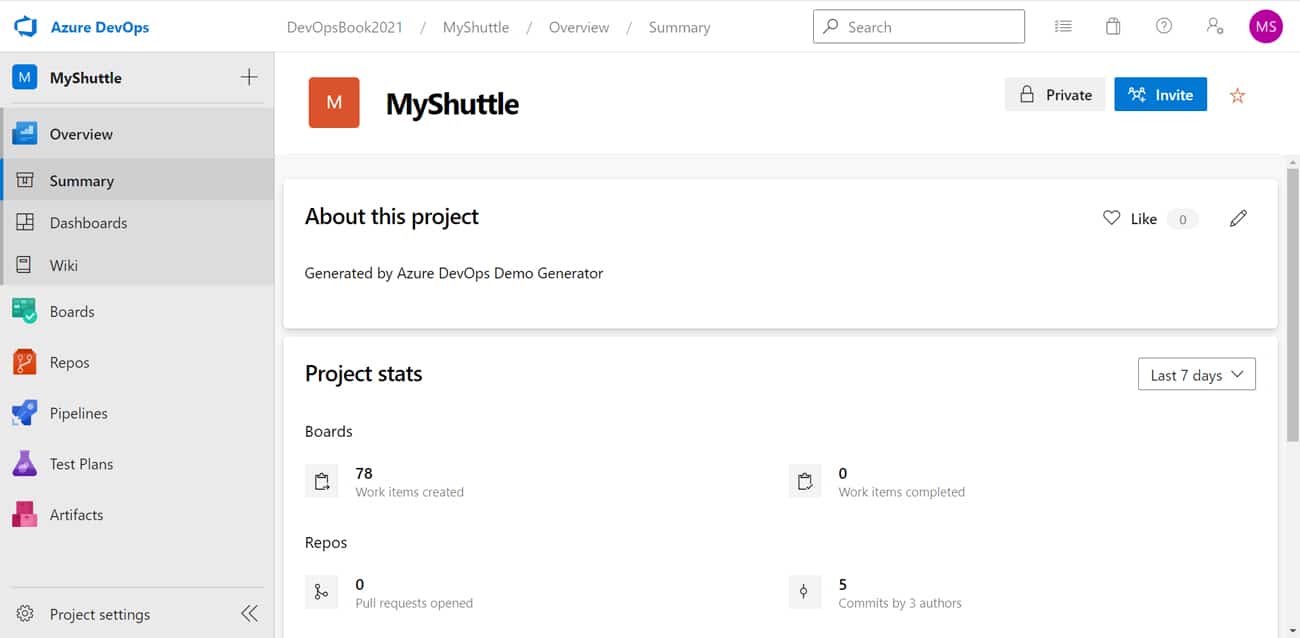
5. Go to https://dev.azure.com/, log in with your credentials if you have already created them, and go to the newly created project.
6. Go to the Dashboard in the left sidebar and explore all the possibilities to configure it.
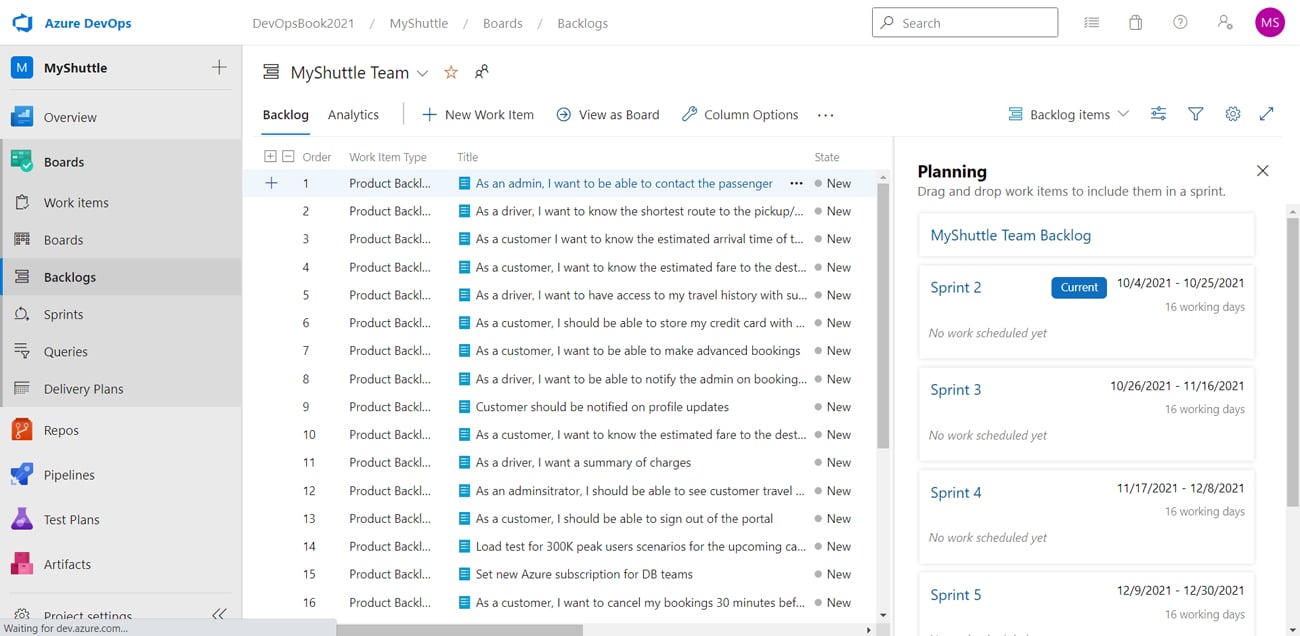
7. Verify the Backlogs, as shown in Figure 3.
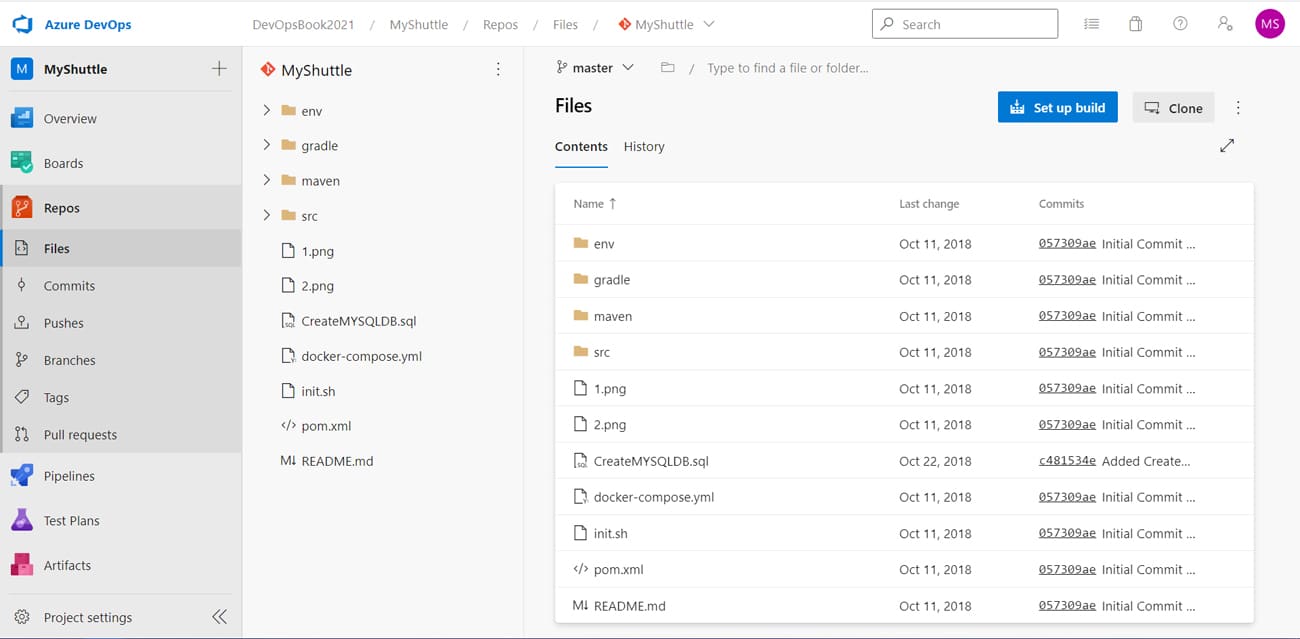
8. Once you are done with Backlogs, verify the Repository.
9. Next, to configure your pipeline, we need to go to Pipelines -> New Pipeline -> Select location of your code in ‘Where is your code?’ section (Azure Repos Git) -> Select a repository -> Select Starter Pipeline. The code is given below.
# Starter pipeline
# Start with a minimal pipeline that you can customize to build and deploy your code.
# Add steps that build, run tests, deploy, and more:
# https://aka.ms/yaml

trigger:
- master

pool:
  vmImage: ubuntu-latest

stages:
- stage: “ContinuousIntegration”
  jobs:
  - job: “QualityChecks”
    steps:
    - task: Maven@3
      inputs:
        mavenPomFile: ‘pom.xml’
        goals: ‘test’
        publishJUnitResults: true
        testResultsFiles: ‘**/surefire-reports/TEST-*.xml’
        testRunTitle: ‘Unit Tests’
        codeCoverageToolOption: ‘JaCoCo’
        codeCoverageFailIfEmpty: true
        javaHomeOption: ‘JDKVersion’
        jdkVersionOption: ‘1.8’
        mavenVersionOption: ‘Default’
        mavenOptions: ‘-Xmx3072m’
        mavenAuthenticateFeed: false
        effectivePomSkip: false
        sonarQubeRunAnalysis: false
        checkStyleRunAnalysis: true
        pmdRunAnalysis: true
        findBugsRunAnalysis: true
    - task: BuildQualityChecks@6
      inputs:
        checkCoverage: true
        coverageFailOption: ‘fixed’
        coverageType: ‘lines’
        coverageThreshold: ‘10’
  - job: “Build”
    dependsOn: “QualityChecks”
    steps:
    - task: Maven@3
      inputs:
        mavenPomFile: ‘pom.xml’
        options: ‘-Dmaven.test.skip=true’
        publishJUnitResults: false
        javaHomeOption: ‘JDKVersion’
        jdkVersionOption: ‘1.8’
        mavenVersionOption: ‘Default’
        mavenOptions: ‘-Xmx3072m’
        mavenAuthenticateFeed: false
        effectivePomSkip: false
        sonarQubeRunAnalysis: false
        checkStyleRunAnalysis: true
        pmdRunAnalysis: true
        findBugsRunAnalysis: true

    - task: CopyFiles@2
      inputs:
        Contents: ‘**/*.war’
        TargetFolder: ‘$(build.artifactstagingdirectory)’
        OverWrite: true
    - task: PublishBuildArtifacts@1
      inputs:
        PathtoPublish: ‘$(Build.ArtifactStagingDirectory)’
        ArtifactName: ‘drop’
        publishLocation: ‘Container’
- stage: “ContinuousDelivery”
  dependsOn: ContinuousIntegration
  jobs:
  - job: “DeploytoAzureApps”
    steps:
    - task: DownloadPipelineArtifact@2
      inputs:
        buildType: ‘current’
        itemPattern: ‘**/*.war’
        targetPath: ‘$(Pipeline.Workspace)’
10. Click on Run in the Run pipeline dialog box, select the branch/tag and again click on Run.
11. Next, click on Stage and you will be directed to Pipeline logs runtime.
12. Wait until the Pipeline is completed.
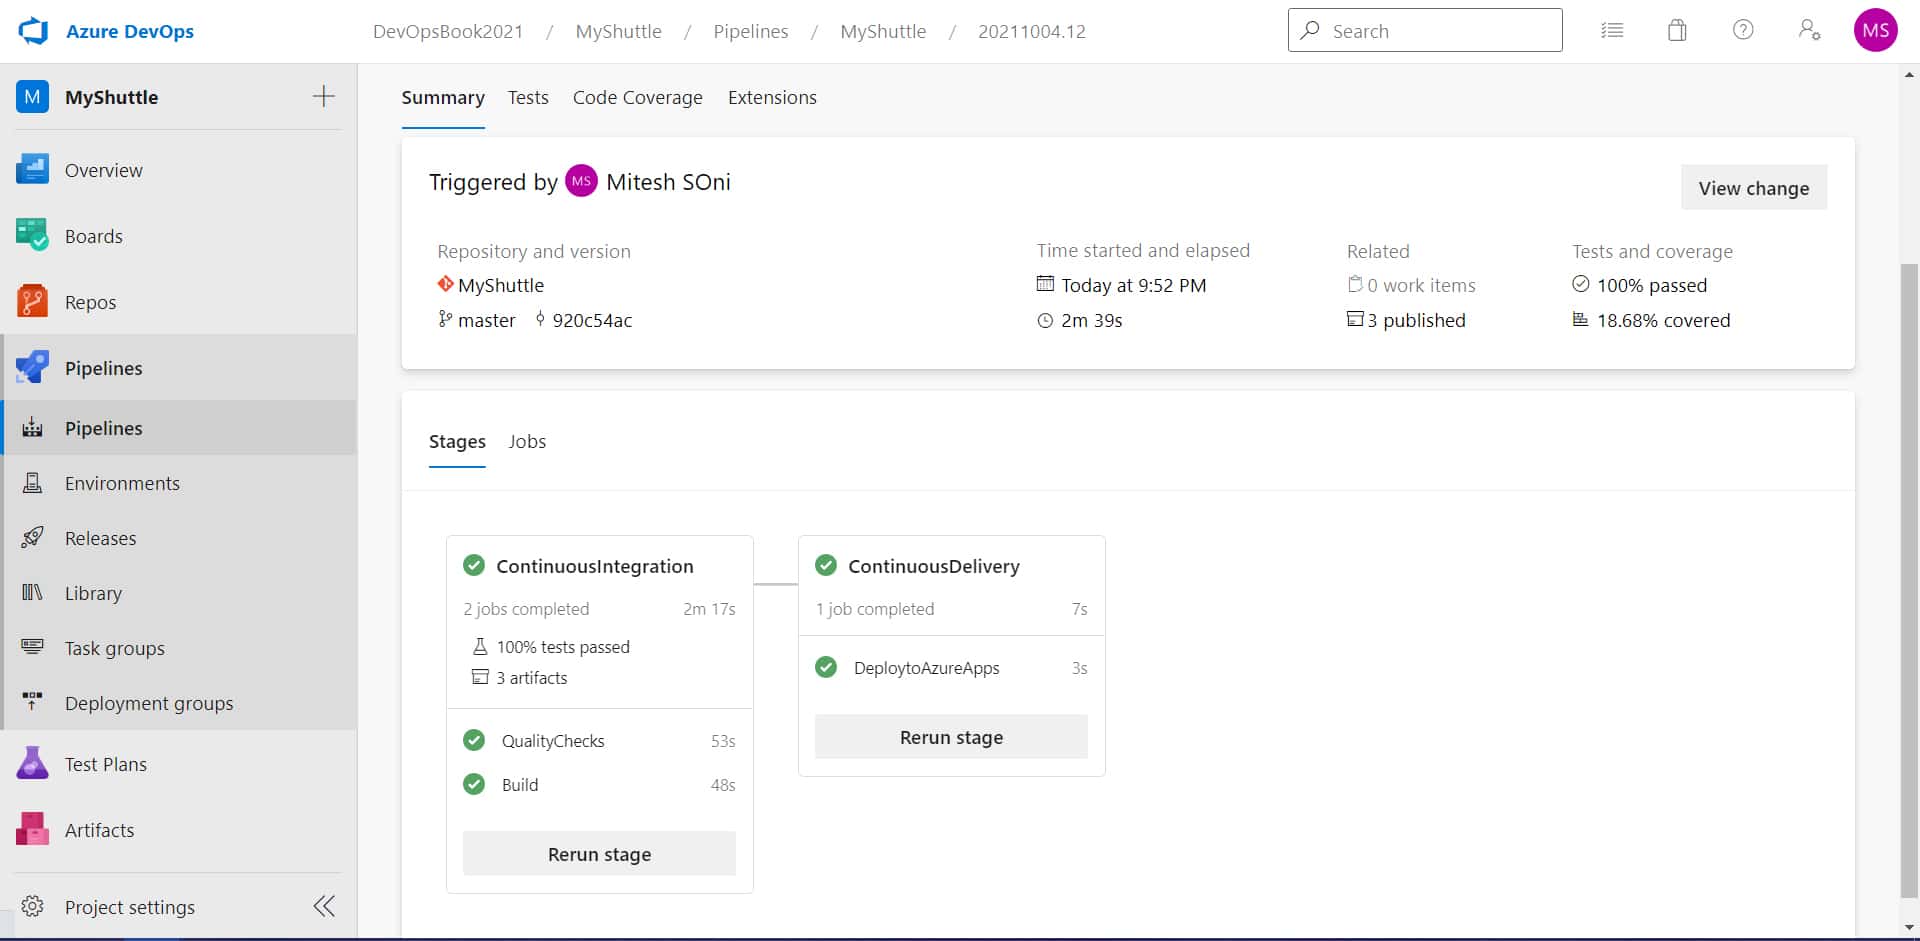
13. Verify the Stage results, as shown in Figure 5.
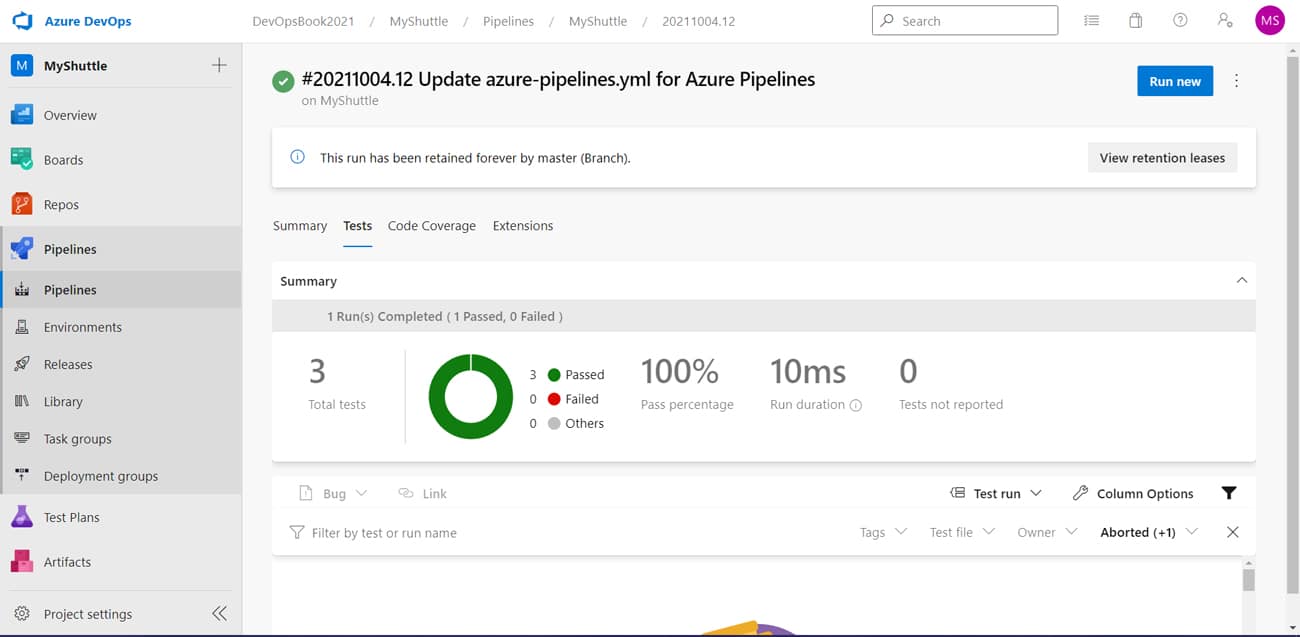
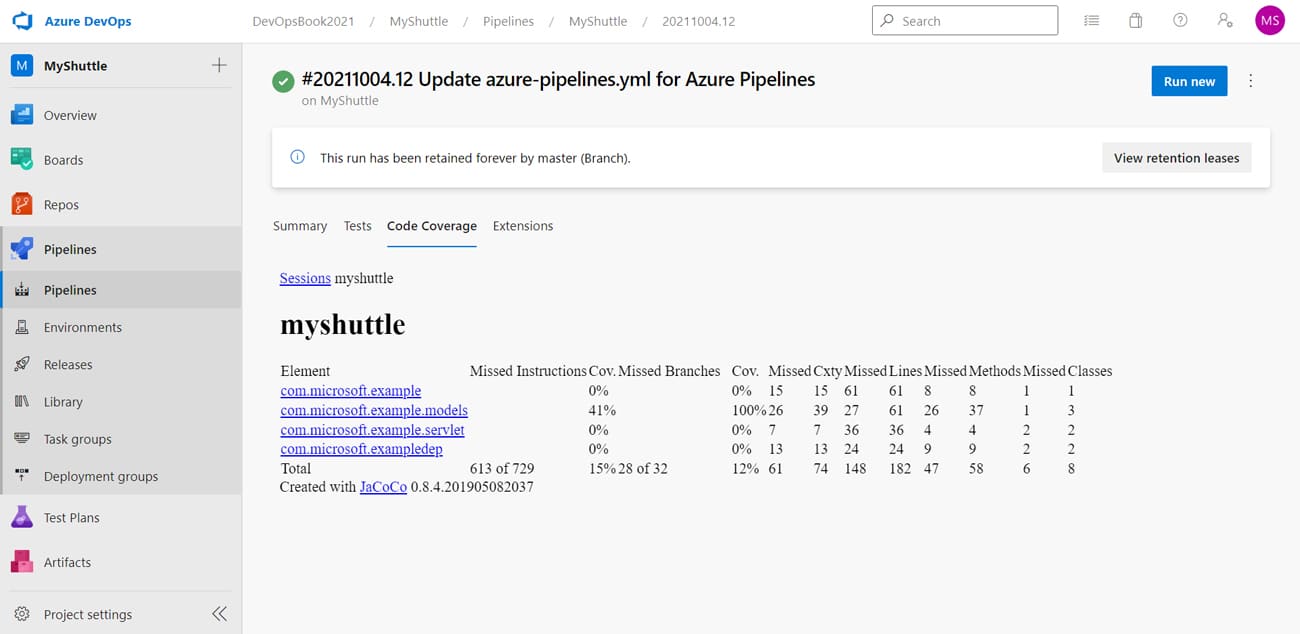
14. Verify the status of unit tests, code coverage results and quality checks, as shown in Figures 6, 7 and 8.
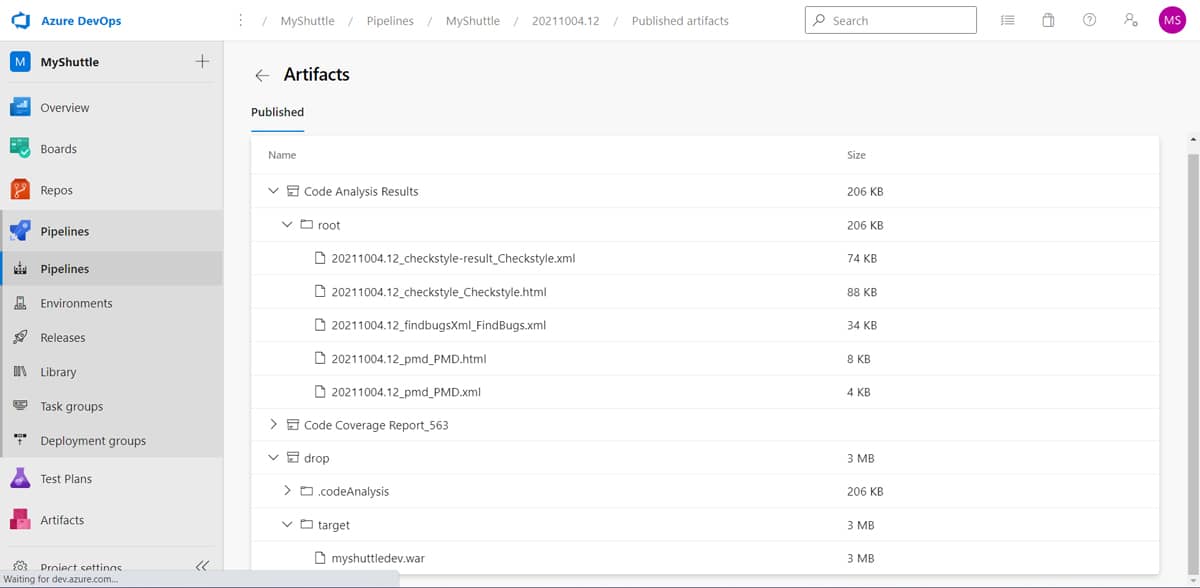
15. Verify Artifacts, which provide package files as well as different reports.
Once you have verified everything, you can make out that you are done with the process.
Branch policies
Branch policies are an important part of verification and validation of quality in the Git workflow, as they help to implement features or fix bugs in an isolated manner in short lived branches and not in main branches.
Branch policies help you to configure approvers, execute the build pipeline created in the Pipelines section, and also verify Quality Gates so that if quality is not up to the mark then changes won’t be merged in the main branch.
We can also assign code reviewers automatically from the given list, which helps to enforce best practices.
We leave the discussion here, and hope the concept and sample pipeline creation will excite you to try your hands with DevOps on Azure.


