We will try to appraise this interesting and feature-rich Linux distro in a series of articles. This first part covers basic Openfiler installation and configuration, and its various storage options for a 64-bit standard installation. Openfiler can convert any computer system complying with the minimum requirements to a storage server. The specifications, from the Openfiler website, are in the following table.
| Minimum Specifications | Recommended Specifications (over the minimum specs) |
|
|
The website further mentions that Openfiler is compatible with 32-bit and 64-bit industry standard server hardware too. It can also be installed in a virtual-machine environment such as VMWare or XenServer, as a guest OS. Future releases of Openfiler may only support 64-bit processors, so they are highly recommended for new Openfiler installations. Some important advantages of using Openfiler are:
- No licensing cost
- Multiple NIC bonding
- Support for iSCSI targets
- Software RAID support
- Remote replication for Disaster Recovery
- High Availability (HA) cluster fail-over capability
Openfiler also has various other features available on standard Network Attached Storage (NAS) boxes, including access via FTP, Web server and SMB/CIFS services; authentication against a local (or remote) LDAP server, or integration with a Windows domain controller; user/group-wise access control and quota management; configuration via an easy Web-based GUI; free updates and patches. Help is available via excellent community support.
Getting started
To start exploring this wonderful distro, download your desired image from the Openfiler website. Various images are available: 32/64 bit ISOs, and various appliances for VMWare, VMWare ESX and Citrix XenServer. Our installation is based on the Openfiler 2.3 Installation ISO image (for x86/64). The hardware used here is a simple PC with an Intel 2.8 GHz dual-core CPU, with 1 GB of RAM and an 80 GB SATA hard disk.
Start the installation by booting from a CD prepared from the downloaded ISO image. Openfiler supports a text- as well as GUI-based installation; continue with the latter. There are practically no surprises during this installation process. The most important steps during installation are hard-disk partitioning and networking, which are explained here.
Disk partitioning
If you have two hard disks installed in the computer, select the first hard disk for installation. Partition the hard disk manually, if you have a single hard disk.
Create three partitions, as detailed in the table below. Tick the “Force to be a primary partition” check-box while creating all the three partitions.
| Partition | Mount Point | Minimum Size | Recommended Size | Filesystem | Purpose |
| Boot | /boot | 100MB | 256MB | ext3 | Kernel and other files needed for booting |
| Root | / | 1024MB | 2048MB | ext3 | OS installation |
| Swap | N/A | 1024MB | 2048MB | N/A | Swap space |
Network configuration
Ensure you enter correct values for hostname, default gateway and DNS servers. These settings are important for patching Openfiler. Though Openfiler can get an IP address from a DHCP server, use the Edit tab at the top right corner to specify a static IP address and subnet mask. Don’t forget to tick the “Activate on boot” check-box.
Continue through the rest of the installation, and reboot to complete the first phase of installation. The Openfiler box can now be accessed in these ways:
- Use the username root and the password configured during the installation process for access at the Openfiler PC console, or via SSH from another system.
- Access the Web administration interface by navigating to
https://ipaddress:446(the IP address of the Openfiler PC) from any node. Here, the default login name is openfiler, and the password is password.
Updates
Immediately after the first reboot, patch the new installation. Log in at the console, and run the command conary updateall. The time required for updates depends on your Internet connection speed. Repeat the same command till you get a “Nothing to be updated” message. Now the installation is at the stage where you can create volumes, shares, groups and users, and start using the Openfiler box.
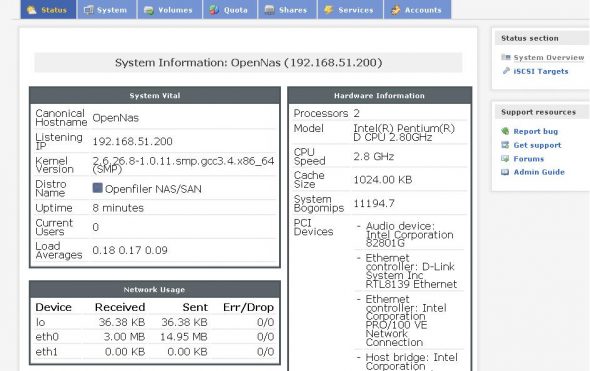
Log in to the Web administration interface. The first screen you see is status (Figure 1), where hardware and important system information is displayed.

Initial set-up
Proceed to the System tab (Figure 2), which has the options to (re-)configure Openfiler system parameters like network configuration; clock setup (define a Network Time Protocol (NTP) server address and time zone); UPS setup (Openfiler, if connected to an intelligent UPS, can be configured to shutdown when the UPS signals low battery state); backup/restore configuration; and secure console (SSH access).

Complete the “Network Access Configuration”. You can allows access to a single host, or the full subnet. Under our test setup, we allowed access to the 192.168.51.0/255.255.255.0subnet (Figure 3).

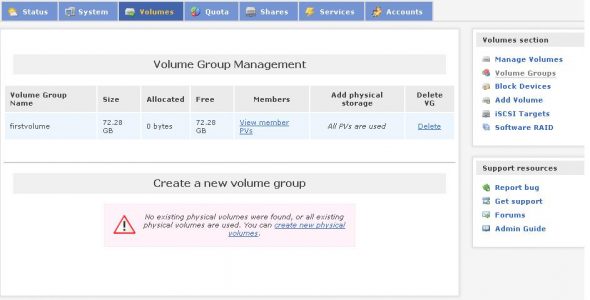
The next step is to create a volume group on the desired hard disk, using the Volumestab (Figure 4).

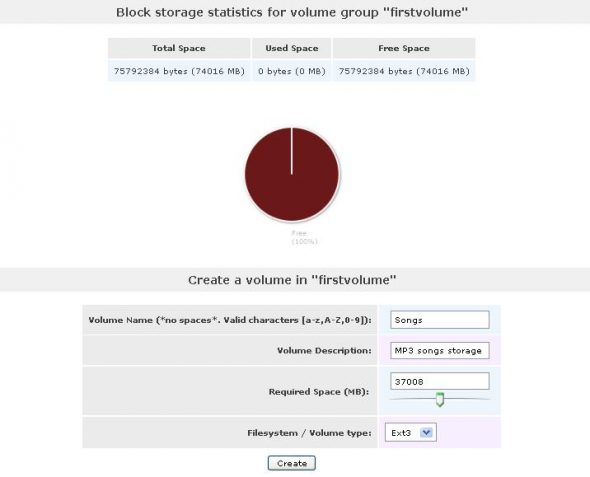
Under the test setup, the group name was firstvolume. Continue by selecting firstvolume from the Add Volumes tab. The new volume should be defined along with disk-space allocation and volume type (ext3/XFS or iSCSI). Here, we defined Songsas the volume name (Figure 5), allotting 37000 MB of disk space. We preferred ext3, from the data-recovery perspective. The time required to complete this step will vary depending on CPU and hard disk speed.

Groups and users
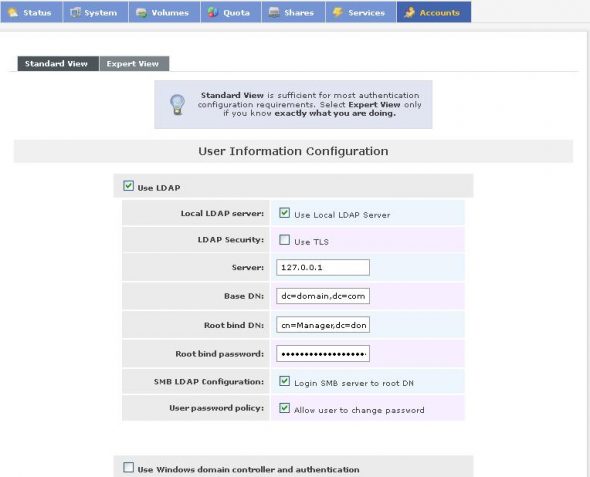
Next, we create groups and users. The LDAP service must be active to do this. From the Accounts tab, select the Authentication menu. Fill in the LDAP settings (Figure 6), and tick the “Use Local LDAP Server” check-box. Submit the configuration information, wait for about a minute, and under the Servicestab, verify that the LDAP service is enabled.

Instead of LDAP, you can configure authentication with a Windows domain controller from this page. Administrator credentials are required to enable access control based on preconfigured groups and usernames. LDAP service configuration may give a few surprises, which will result in failure to create groups and users. Try the following if you are facing problems at this juncture:
- Clear and rebuild the LDAP server from the Services –> Setup menu.
- Make sure that you have updated Openfiler fully using
conary updateallas discussed earlier. If not, do so now. (Community forums report that there was a bug in the original distro, which was fixed by updates. While preparing screenshots for this article, I had taken a shortcut of not updating the distro. Ultimately, LDAP failed, and I had to complete updates before proceeding (Figure 7).

Create a new group, overriding the GID. Here, a GID range starting from 501 is used for the SongLoversgroup. Additional groups can be created as and when required, for granular access control. Go on creating user accounts with their passwords, and assign them their primary group (Figure 8).

Quota allocation and shares
After creating groups and users, the next task is to allocate quotas. Here, for the SongLovers group, we assign a 20 GB quota. User-wise quota definition is also possible.
We also created the shares: Firstvolume –> songs –> marathi and Firstvolume –> songs –> hindi.
A new share is accessible only after granting specific access. Click the share name and configure the three required parameters — listed below:
- Share access control mode: Public guest access or Controlled access
- Group access configuration: Primary group and type of access — No access/Read only (RO)/Read-Write (RW)
- Host access configuration: Type of access to be granted (from 5 possible services: SMB/CISF, NFS, HTTPS, FTP and RSYNC). Select all which you want, and set the share’s type of access (No/RO or RW).
Here, we defined the “marathi” share with Controlled access, giving the primary group SongLovers RW access. Further, we enabled RW access via SMB/CISF and FTP protocols (Figure 9). (Remember to use the Servicesmenu to enable the FTP service if using FTP shares!)

That is all, folks!! Start browsing the shared resources by the IP address. You should see your shares—in our case, firstvolume.songs.marathi—as a shared folder. Enter your user credentials, and start using your NAS!
In future articles, we will continue to discuss various interesting features of Openfiler.
References
- Installation screenshots are available here
- Openfiler forum
- Openfiler download page
Special thanks to my friend Achyut Ghare, BE, CISA for introducing me to, this great distro!


