A sysadmin’s job must include automation and simplification of day-to-day tasks and more, so that there is time to tackle new projects and assignments. When dealing with hundreds of servers (or even when it’s just a little more than two machines), it becomes tedious managing all the files, users, groups and the systems. It gets even worse if we have multiple operating systems in use in a single data centre/location.
Windows eases the burden with Active Directory and group policies, but it isn’t that easy with UNIX machines. The Free Software directory services available at present can, at the most, help manage users, groups and machines, but not files, services, packages — or even support for monitoring.
Here’s where configuration-management engines come to our rescue. Some of those available in the market are CFEngine, Puppet, Bcfg2, Etch, Pcfengine and FusionInventory. The top contenders are CFEngine and Puppet, with support for all OSs (development for Puppet’s support for Windows is in progress). CFEngine might fare better than Puppet in many areas, except for the fact that the Nova module of CFEngine is not available for free download, while Puppet is completely free software, downloadable and distributable under the terms of the GPL. Besides, Puppet’s abstraction layer concept is also a strong feature.
Let us, therefore, look at it in detail.
Puppet features
- A full-fledged client/server model.
- It is written completely in Ruby.
- A platform-independent declarative language for configuration.
- A platform-dependent Resource Abstraction Layer. For example,
Useris the configuration syntax used foruseraddin GNU/Linux, andadduserin FreeBSD. - It depends on an independent Ruby package called Facter, which is a full-fledged hardware knowledgebase.
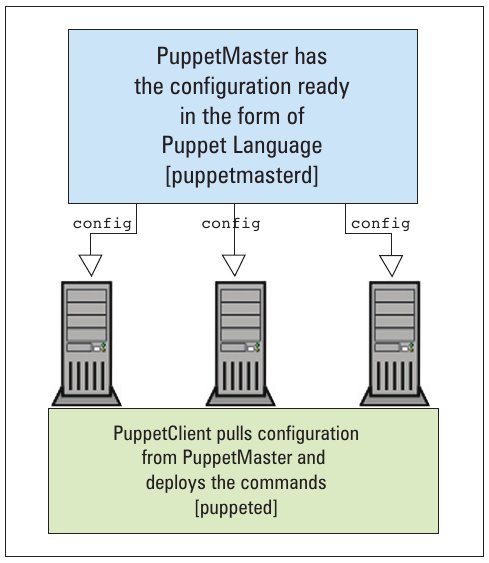
- It uses a pull technology, where the onus is on the client to pull configuration details from the server, instead of the server pushing to all clients.
- Completely encrypted communication and data transfer.
- It is available on all UNIX/GNU/Linux platforms:
- Red Hat/Fedora and SUSE packages:
puppetandpuppet-server - Debian/Ubuntu flavours:
puppetandpuppetmaster
- Red Hat/Fedora and SUSE packages:
The Puppet wiki’s downloading page should give you more details.
Installing Puppet
There are three methods of installing Puppet (the version you should install is 2.6.x), and the preferred method varies by distribution:
- Source (untar and compile)
- Package managers or prebuilt packages
- Ruby GEM
I would always prefer the second method that uses prebuilt packages, since the others might need a lot of tweaking, depending on the OS. Even configuration files won’t be in the right places, if not configured properly.
Pre-built packages
RPM/DEB files
If your distribution doesn’t have a package manager with automatic dependency resolution, then download the following RPMs or DEBs, and install them in this order:
- Ruby (if not already installed, or not the latest version)
- Facter
- Puppet Master (for the server) or Puppet (client)
Yum
I would always go with this; it has the facility of even creating a repository for i386 or x64 architectures. This can be done in two ways:
- Fedora and EPEL Yum repositories already have it as part of the Fedora project. This can be downloaded and installed as RPMs, which will create the right repository, and you can install from there.
- I would prefer downloading the RPMs one by one, testing them for their dependencies, and creating my own Yum repository with the
createrepocommand. Please refer to online tutorials to set up Yum.
DEB packages for Ubuntu
Please don’t install the default packages that come with Ubuntu — they are legacy packages. Download the source tarball and install from it as shown below:
$ wget http://puppetlabs.com/downloads/puppet/puppet-latest.tgz# untar and install it$ gzip -d -c puppet-latest.tgz | tar xf -$ cd puppet-*$ sudo ruby install.rb # or become root and run install.rb |
Three major commands
puppetmasterd(server daemon that runs as the Puppet user)puppetca(CA Server; part of thepuppetmasterd)puppetd(client daemon)
Setting up PuppetMaster
DNS resolution
Either the local /etc/hosts entry has to have an alias “puppet”, or the global DNS server must have a CNAME that points to the Puppet server. Why? This architecture only understands the DNS resolution that starts with the word “puppet”, and will not accept anything else.
Start the server daemon
This can be done in two ways: run /etc/init.d/puppetmasterd start with default values in /etc/syslog/puppet.conf (only in RPM formats), and set it to start at boot time with chkconfig or relevant commands in different OSs.
…or, run the following code snippets:
puppetmasterd --mkusers --onetimepuppetmasterd --masterport=8140 --logdest=/var/log/puppet/puppetmaster.log |
(This will create /etc/puppet and its contents, if Puppet was installed from source.)
Certificate authorisation
Nothing has to be done as part of setting up a CA server — other than listing and signing client certificates:
puppetca --list [-l] (this we get only when we start puppetd daemon on the client, atleast once)puppetca --sign [-s] <client-certificate that we see in the step above> |
Initial /etc/puppet/manifests/site.pp
(This also can be init.pp)
file{ "/tmp/puppet-test": ensure => present, owner=>root, group => bin} |
Setting up PuppetClient
DNS resolution
This is the same as in PuppetMaster, and we need to be careful that our hostname is a fully qualified domain name. For example, just 127.0.0.1 debian puppet won’t do; 127.0.0.1 debian.myhome puppet is required, and the hostname must sync with the entry in /etc/hosts.
Start the client daemon
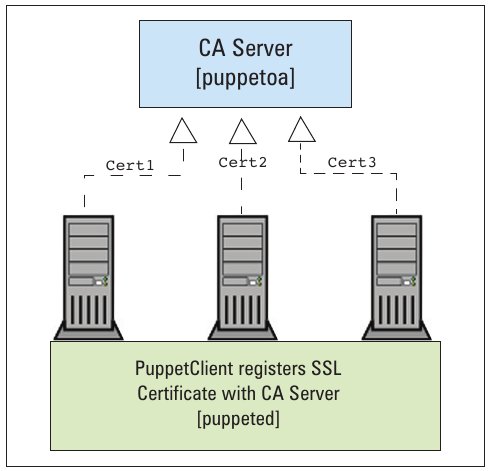
To start with, we need to register with the CA server (that is part of puppetmasterd), since encrypted communication is mandatory.
puppetd --server=puppet --waitforcert=60 -dt#(d = debug, t=test) |


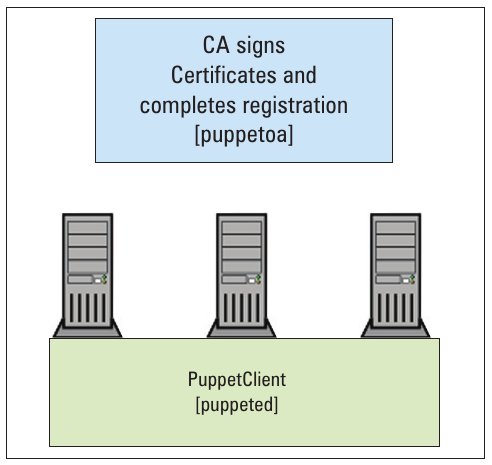
After this, we must sign the certificate to confirm the registration, as mentioned in the PuppetMaster section:
puppetca --sign debian.myhome |
Schedule
It is better not to depend on puppetd to run as a daemon, since we wouldn’t have control over the time that it needs to be run at, on hundreds of machines. It’s better to set up a cron service via crontab -e to sync with the server every 15-30 minutes, or every one hour:
*/30 * * * * puppetd --server=puppet --onetime |

In Part 2 of this series, we will deal with user and group creations.


abhi tum log bachapane ke articles hi chapo duniya
puppet (satellite node control)se bahut age nikal gayi hai
and still people are using Puppet and looking for articles :)