A Web framework provides infrastructure to create Web applications without repetition of code. It contains apps to perform most of the common tasks that are required by the Web applications. Before getting your hands dirty on Django, you need to know something about Python. It is an open source general-purpose high-level programming language. It can be used for Web development, games creation, data visualisation, software development and much more.
Python installation
Python needs to be installed on the system in order to work with Django, which requires Python 2.3 or newer versions.
On Windows
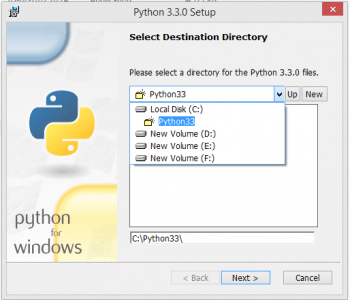
You can download Python from https://www.python.org/downloads/. Run the downloaded file and it can be installed like any other Windows software (see Figure 1) .
Once Python is installed, you need to add its executable file to your systems path.
On Linux
Most of the open source UNIX clones such as Linux or the BSD come with Python installed as a part of their core system.
Testing
Open a terminal and type the following command:
python. |
Now, its time to get started with Django, which is a Web framework written in Python. Using the former, we can build high quality and robust Web applications with minimal effort. Django is also known as the Web framework for perfectionists with deadlines.
Django installation
Download the Django code from www.djangoproject.com/download/ and once thats done, open a terminal, navigate to the folder where Django has been downloaded and locate the file named setup.py.
On a Linux system, type the following command:
sudo setup.py install |
On Windows, type:
python setup.py install |
This setup.py script is a standard installation procedure for Python modules and it takes care of installing the module into the correct locations. After this, you need to set the path for Django-admin, which is in the Django bin folder.
My first Django project
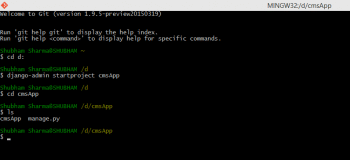
To create a Django project, open the terminal, navigate to the directory in which you want to create the project and type the following command:
django-admin startproject cmsApp |
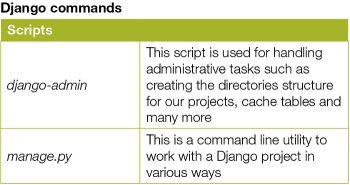
It will create a directory named cmsApp in the destination folder. This cmsApp folder will contain a folder named cmsApp and a manage.py script.
Besides this, the manage.py script and four other scripts are created inside the cmsApp folder.
1. settings.py: This script contains the default configuration for the project, like database information, debugging flags and important variables
2. Urls.py: This file contains the configuration that maps the URL patterns to the task performed by the applications
3. __init__.py: This file makes the project directory a Python package
4. wsgi.py: It exposes the WSGI callable as a module-level variable named application.
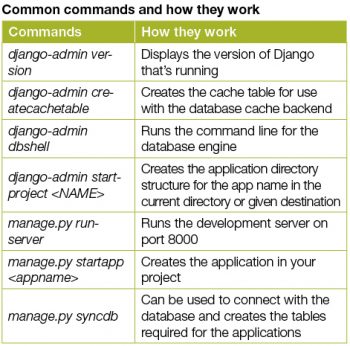
Now issue the manage.py runserver command to see something like whats shown below:
$ manage.py runserverPerforming system checks...System check identified no issues (0 silenced).August 04, 2015 - 12:16:15Django version 1.8.2, using settings cmsApp.settingsStarting development server at http://127.0.0.1:8000/Quit the server with CTRL-BREAK. |
Open the link http://127.0.0.1:8000/ in your Web browser and you should see the screen shown in Figure 4:

A CMS application
Creating a simple CMS application is one of the most common tasks in Web development. It allows users to edit and create dynamic Web pages.
1. Issue the command python manage.py startapp CMS to create a CMS application in your project. Open settings.py and add CMS to the INSTALLED_APPS variable.
2. Open models.py which is in your CMS application folder with a text editor and add the following code:
class IntroductionPage(models.Model):title=models.CharField(max_length=100)body=models.TextField()time=models.DateTimeField() |
3. Now create tables for our CMS application by issuing the command python manage.py syncdb to get the following output:
$ manage.py syncdbc:\Python27\lib\site-packages\django\core\management\commands\syncdb.py:24: RemovedInDjango19Warning: The syncdb command will be removed in Django 1.9warnings.warn(The syncdb command will be removed in Django 1.9, RemovedInDjango19Warning)Operations to perform:Synchronize unmigrated apps: staticfiles, messagesApply all migrations: sessions, admin, sites, flatpages, contenttypes, auth, CMSSynchronizing apps without migrations:Creating tables...Running deferred SQL...Installing custom SQL...Running migrations:Rendering model states... DONEApplying CMS.0001_initial... OK |

4. Now the application needs to instruct Django which model should be shown for editing. Open models.py of the CMS application and the add following line at the beginning of the script:
import django.contrib import admin |
5. Now add following line at the end of models.py:
admin.site.register(IntroductionPage) |
The modified models.py will look like whats shown in Figure 5:

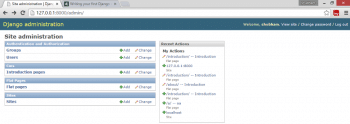
6. Now run the server by issuing the command manage.py runserver and enter your login credentials to see the screen shown in Figure 6.
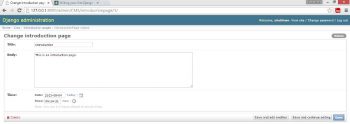
7. Add contents to the page by clicking on Add on the introduction page.
8. Now we need to create a client-side template for our application.
Create an HTML file archive in cmsApp/CMS/templates/archive.html and add the following code to it:
{% for content in contents %}<h2>{{content.title}}</h2><p>{{content.body}}</p>{% endfor %}} |
9. Now to create a view function in our CMS app’s views.py file, use the following code.
from django.template import loader,Contextfrom django.http import HttpResponsefrom cmsApp.CMS.models import IntroductionPagedef archive(request):contents= IntroductionPage.objects.all()t=loader.gettemplate(archive.html)c= Context({contents:contents})return HttpResponse(t.render(c)) |

10. The next step is to map the task to the URL. Open the urls.py of the project, add the following line of code to catch any requests that begin with introductionpage/ and pass them to urlConf.
url(r^introductionpage/, include(CMS.urls)), |
Now create a urls.py file in the CMS folder and add the following lines of code:
from django.conf.urls import urlfrom . import viewsurlpatterns = [url(r^$, views.archive, name=archive),] |
11. Open http://127.0.0.1:8000/introductionpage/.
References
[1] Python web development with Django, Addison-Wesley
[2] The Django book – www.djangobook.com






Hi,
thank you for the tutorial.
I haven’t worked with Django yet and I’m rather beginner in Python. Going through the tutorial I went on few issues.
I thought it would be useful to correct some of them, if someone with similar background like me would like to use it.
So here are my hints.
1. Link to Django download page doesn’t work.
2. The latest stable release is Django 1.9. Thus, the warning from manage.py syncdb is already the reality:
warnings.warn(The syncdb command will be removed in Django 1.9, RemovedInDjango19Warning)
The solution was for me “manage.py makemigrations, manage.py migrate”.
3. The command “import django.contrib import admin” is incorrect
should be “from django.contrib import admin”.
4. Figure 5 is completely unreadable. I had some problems with the register command in models.py. Instead I added it to admin.py.
5. In code
url(r^introductionpage/, include(CMS.urls)),
url(r^$, views.archive, name=archive),
there are missing quotation marks.
6. Finally, after deployment I got
Exception Type: AttributeError
Exception Value:
‘module’ object has no attribute ‘gettemplate’
Exception Location: $DIR/views.py in archive, line 8