Systems administrators and other Linux enthusiasts use multiple CDs or DVDs to boot and install operating systems on their PCs. But it is somewhat difficult and costly to maintain one CD or DVD for each OS (ISO image file) and to carry around all these optical disks; so, lets look at the alternativea multi-boot USB.
The Internet provides so many ways (in Windows and in Linux) to convert a USB drive into a bootable USB. In real time, one can create a bootable USB that contains a single OS. So, if you want to change the OS (ISO image), you have to format the USB. To avoid formatting the USB each time the ISO is changed, use Easy2Boot. In my case, the RMPrepUSB website saved me from unnecessarily formatting the USB drive by introducing the Easy2Boot option. Easy2Boot is open source – it consists of plain text batch files and open source grub4dos utilities. It has no proprietary software.
Making the USB drive bootable
To make your USB bootable, just connect it to your Linux system. Open the disk utility or gparted tool and format it as Fat32 (0x0c). You can choose ext2/ext3 file systems also, but they will not load some OSs. So, Fat32 is the best choice for most of the ISOs.
Now download the grub4dos-0.4.5c (not grub4dos-0.4.6a) from https://code.google.com/p/grub4dos-chenall/downloads/list and extract it on the desktop.
Next, install the grub4dos on the MBR with a zero second time-out on your USB stick, by typing the following command at the terminal:
sudo ~/Desktop/grub4dos-0.4.5c/bootlace.com - -time-out =0 /dev/sdb |
Note: You can change the path to your grub4dos folder. sdb is your USB and can be checked by the df command in a terminal or by using the gparted or disk utility tools.
Copying Easy2Boot files to USB
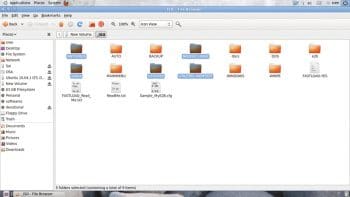
Your pen drive is ready to boot, but we need menu files, which are necessary to detect the .ISO files in your USB. The menu (.mnu) files and other boot-related files can be downloaded from the Easy2boot website. Extract the Easy2Boot file to your USB drive and you can observe the different folders that are related to different operating systems and applications. Now, just place the corresponding .ISO file in the corresponding folder. For example, all the Linux-related .ISO files should be placed in the Linux folder, all the backup-Linux related files should be placed in the corresponding folder, utilities should be placed in the utilities folder, and so on.
Your USB drive is now ready to be loaded with any (almost all) Linux image files, backup utilities and some other Windows related .ISOs without formatting it. After placing your required image files, either installation ISOs or live ISOs, you need to defragment the folders in the USB drive. To defrag your USB drive, download the defragfs-1.1.1.gz file from http://defragfs.sourceforge.net/download.html and extract it to the desktop. Now run the following command at the terminal:
sudo umount /dev/sdb1 |
sdb1 is the partition on my USB which has the E2B files.
sudo mkdir ~/Desktop/usb && sudo mount /dev/sdb1 ~/Desktop/usbsudo perl ~/Desktop/defragfs ~/Desktop/usb -f |
Thats it. Your USB drive is ready with a number of ISO files to boot on any system. Just run the defragfs command every time you modify (add or remove) the ISO files in the USB to make all the files in the drive contiguous.
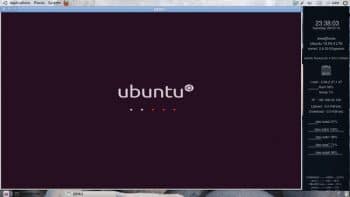
Using the QEMU emulator for testing
After completing the final stage, test how well your USB boots with lots of .ISO load on it, using the QEMU tool. Alternatively, you can choose any of the virtualisation tools like Virtual Box or VMware. We used QEMU (it is easy but somewhat slow) in our Linux machine by typing the following command at the terminal:
sudo qemu m 512M /dev/sdb |
Note: The loading of every .ISO file in the corresponding folder is based only on the .mnu file for that .ISO. So, by creating your own .mnu file you can add your own flavour to the USB menu list. For further details and help regarding .mnu file creation, just visit http://www.rmprepusb.com/tutorials.
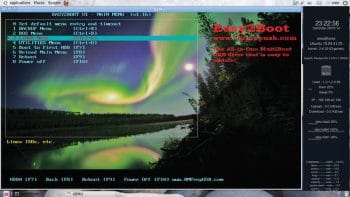
Your USB will boot and the Easy2Boot OS selection menu will appear. Choose the OS you want, which is placed under the corresponding folder. You can use your USB in real time, and can add or remove the .ISOs in the corresponding folders simply by copy-pasting. You can use the same USB for copying documents and other files by making all the files that belong to Easy2Boot contiguous.
References
[1] http://www.rmprepusb.com/tutorials
[2] https://code.google.com/p/grub4dos-chenall/downloads/list
[3] http://www.easy2boot.com/download/
[4] http://defragfs.sourceforge.net/download.html


