In Part 1, we covered what The Art of Illusion is about. We learnt how to create profile curves and tables. Now it’s time to create a wall, add texture to the created object, and finally compose the scene before setting up the lights and rendering. So let’s start with creating the wall.
Creating the wall
Creating our wall is as simple an affair as creating our table. The Boolean function of union was used to join all the legs of the table to the top. A similar Boolean function could be used but instead of union, we will use subtraction to create the opening in the wall that is to be our window. Go ahead and create a cube covering the whole of the front viewport. Scale it to a rectangular shape. Now shift to the top viewport and scale down the cube to shape it like a wall that appears from the top, as in Figure 1 and Figure 2.
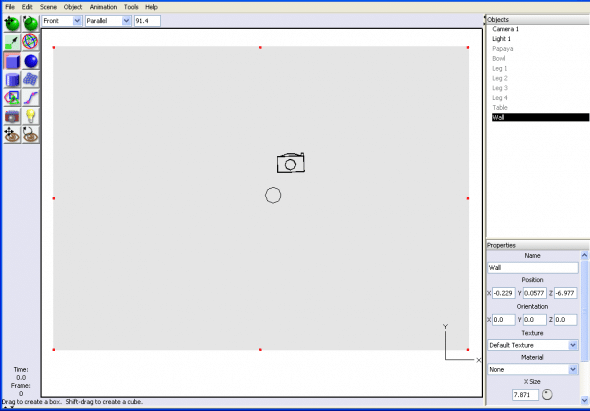
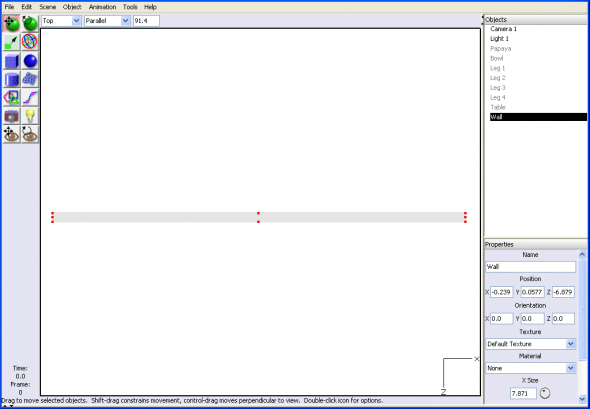
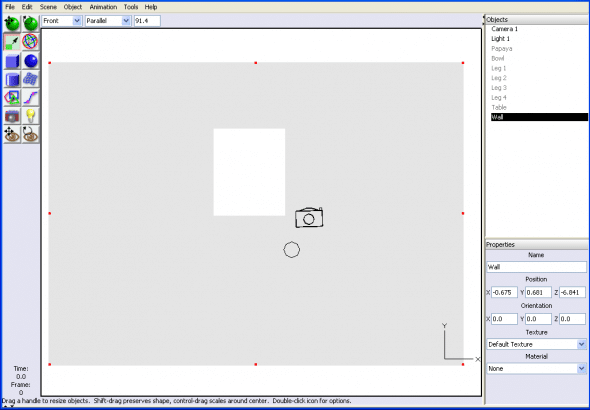
Viewing it from a different perspective shows you the cube in the shape of a rectangular wall. Shift back to the top viewport and create a cube so that it is centered in the viewport and shows up on both sides of the wall. Go to the front viewport and scale it to give it the shape of a window as in Figure 3.

Now we are ready for a Boolean operation. Shift select the second cube (window shape) and then shift select the first cube (the wall). Go to the Tools menu and click the entry that says “Boolean Modeling”. A dialogue box pops up asking you to specify the kind of Boolean operation you wish to apply to the selected geometry. Select Second-First from the drop down menu (this is because we have selected the second cube first). When you accept the settings and click OK, a preview is shown in a small window and you know that the operation has been successfully carried out as shown in Figure 4.
Now we have an aperture for the window. We need a few cylinders to create the window bars. Make an elongated cylinder shape and copy it several times to make the bars. Place these bars in the appropriate positions in the window as shown in Figure 5.

Since we will have only the close-up rendering of our scene, we need not worry about making the whole monastic cell. Let us add the appropriate texture to the wall so that it gives the appearance of belonging to an ancient stone cell. The floor also need not be created because it will be kept out of our scene. Without creating any more objects (which would otherwise complicate the scene, making it tedious for a novice), let us now concentrate on texturing the objects we have created so far.
Figure 6 shows you our scene without any textures applied to it.

Texturing the objects
Before we begin to texture the objects that we created, we should understand the methods of texturing that The Art of Illusion has to offer. Artists not familiar with this program will be surprised to find that texturing is great in The Art of Illusion, with the one exception that UV map creation and exporting is still under development.
Texturing is done in two ways. The first is by using a simple texture and the second is by employing layered textures. It is possible to work further on each of these two methods in four different categories — Uniform, Image Mapped, Procedural 2D and Procedural 3D.
We are going to apply simple image mapped textures to all our objects. This is by far the simplest method of texturing objects. Before trying to understand the way images are applied as textures, let us either shoot high resolution textures with a camera or download suitable texture files for the objects we are working on. Since we are not professionals, we could satisfy ourselves with downloading suitable textures.
Go to images.google.com and type “Papaya skin texture” in the search box. Look for a good papaya texture file and download it. Similarly, download a texture for your basin called “rusted metal”. For the wall you could download a stone wall texture and for the table top you could download a texture called “rotten plank”.
Now select the papaya fruit and click Set texture either by using the RMB or by going to the object menu. A dialogue box displaying a default white sphere pops up asking you to specify the texture parameters. Click on the New Texture button. Another small box opens allowing you to name the texture and specify the type of texture under the simple texture category.
Let us select Image mapped from the drop down dialogue box, name our texture as Papaya texture and click OK to accept the settings as shown in Figure 7.

A big dialogue box appears. It stacks the various parameters of Image Mapped Texture that we need to deal with, one on top of the other. Instead of complicating matters, let us simplify things by selecting the slot next to the entry that says Diffuse color. This brings up a dialogue box that asks us to load the texture file of our choice.
Let us navigate to the directory in which we have stored our texture files that we downloaded earlier. Select the papaya texture.jpg and click OK to load it. It loads onto one of the slots, showing us a preview. Click OK again to accept the texture. It shows us the texture applied onto the default sphere as in Figure 8.

If the mapping appears weird, click the button that says Edit Mapping. The Texture Mapping dialogue box opens up and here you could specify the type of mapping that you want for your object.
The mapping types included with the software are Projection, Cylindrical, Spherical and UV. If the spherical and cylindrical do not give the papaya the proper aligned texturing, then you could select UV texturing and even adjust the UV layout. Once you are satisfied with aligning and fixing the seams that might show up in your texturing, click OK to accept the settings and close the dialogue box. Make a quick render to see the result as shown in Figure 9.

If you are satisfied with the appearance of the fruit, go ahead and texture all the objects in a similar fashion till you are done with the texturing.
Composing the scene
Before we render the scene, let us arrange the objects and compose the scene with a few lights and the default camera. Switch to the front viewport and place the table in front of the window such that the base of the window is aligned to the table top.
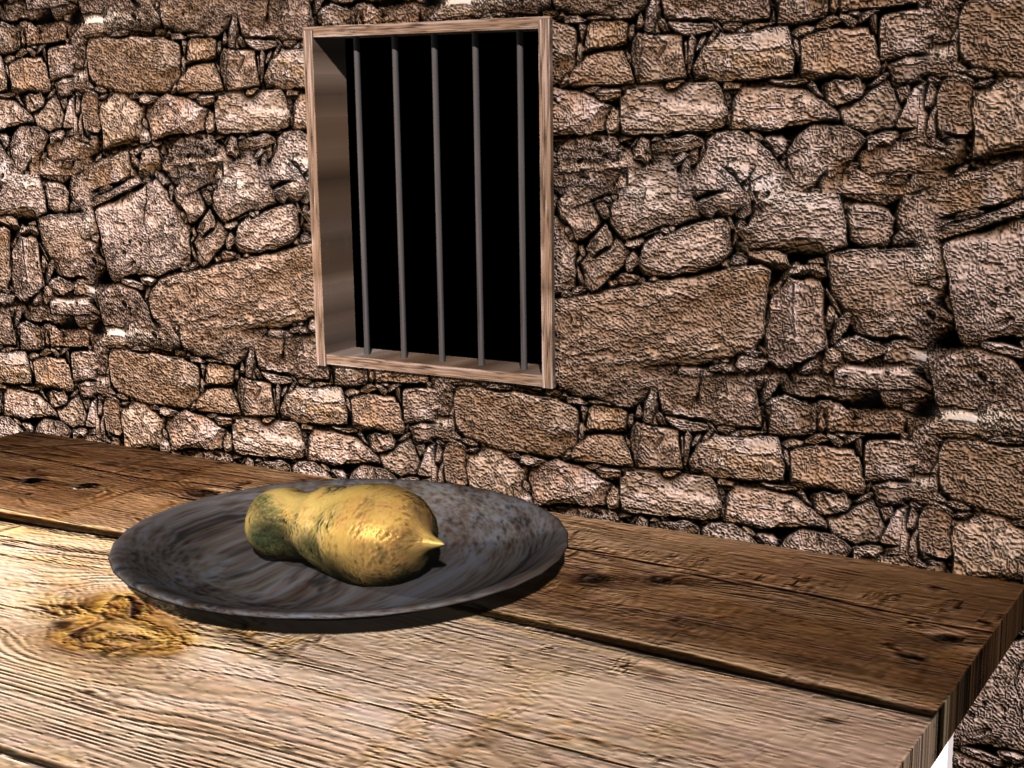
Now place the fruit bowl in the centre of the table and place the papaya in the bowl in a reclining position. Switch to the camera view and zoom in so that only a part of the wall, including the window, the table, the bowl and the papaya, are visible. We have just composed our scene, which we can call, “Papaya in the Monastic Cell”. This completed scene that we have composed is now ready to be rendered (after we have set up the lights).
Setting up the lights and rendering
Setting up the lights and the camera are the most significant tasks of shooting a scene. The light has to be appropriate and sufficient in intensity. The type of light to be used will again differ based on the effect we want for the scene. We require just two lights for the spot just a little above the table. Move the default setting to the right, placing it next to the fruit bowl.
Create another light and position it to the extreme left, near the edge of the table. Set the intensity of your lights to somewhere between 1 and 2. Do a test render. It appears okay but not satisfactory as in Figure 10.

Another great quality about The Art of Illusion is that it has some inbuilt filters for post processing (which is usually done in Photoshop or the Gimp).
In the picture that you have just rendered, click the button Filter and adjust the parameters like Brightness, Saturation, Exposure Correction and Tint till you are satisfied with your image. Now do a render. It is magical and enhances our realism as in Figure 11.

In this way, by adjusting various parameters while rendering, you could achieve great looking professional-quality effects. Bye for now. I hope you liked this short guide on creating digital art the easy way in The Art of Illusion.


