


Learn how to use PyCaret, a low-code Python library, to automate the management of machine learning models.
Machine learning (ML) and other data science technologies are today being used in almost every field. A basic awareness about these technologies is therefore important. However, developers may not be interested in or be good at developing or writing large pieces of code. Tools that help us automate ML processes are of immense help in this scenario. One such open source tool is PyCaret.
PyCaret is a low-code Python library that helps in end-to-end ML and model management. It not only helps novice coders but also saves a lot of time for experienced machine learning developers. It can be used to simplify the training, testing and tuning of ML models. PyCaret can replace hundreds of lines of code written using other libraries with just a few commands. It is wrapped around many popular ML libraries and tools like XGBoost, scikit-learn, Spacy, and LightGBM, amongst others. With the advent of such tools, data scientists without deep knowledge in AI and ML can also develop effective machine learning models for a wide range of use cases.
Let us look at the working and major functionalities of PyCaret. You can use any IDE for this purpose. I will be using Google Colab, which is the easiest for a beginner because you don’t have the extra burden of setting up an environment on your local system. You can just open the link at https://colab.research.google.com/ and create a new notebook there. Once you do that, click on the ‘Connect’ button. This will connect your notebook to a kernel, which will help you run your code.
The first step is to install the library. This can be done using the following command:
!pip install pycaret
You can type this command and then press ‘Shift’ and ‘Enter’ together to run the cell.
The next step is to load a dataset. The library already comes with a lot of standard datasets. Let us explore a diabetes prediction dataset. We can load this dataset using the following command as shown in Figure 1.
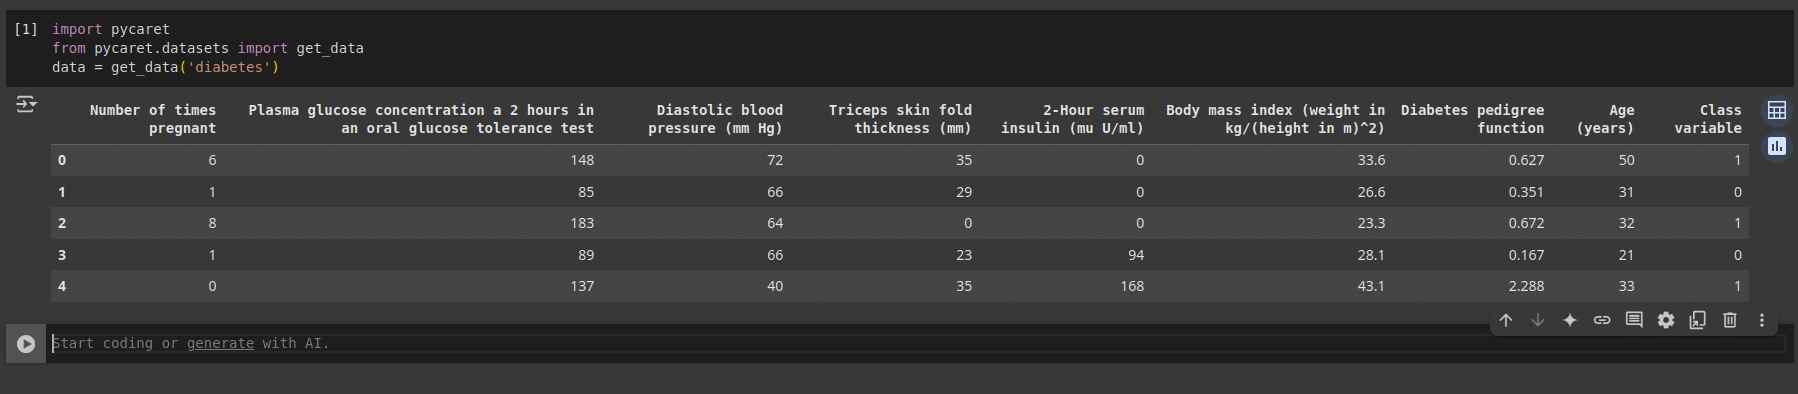
import pycaret
from pycaret.datasets import get_data
data = get_data(‘diabetes’)
In this dataset we have eight features or columns, and the label column is the ‘Class’ variable as shown in Figure 1.
In a data science lifecycle, once the dataset is ready, the next step is to perform the data preprocessing. This includes data cleaning, taking care of the null or empty values, encoding the category label variables, data scaling, and a few other things. In our case PyCaret takes care of all of this by using the following lines of code as shown in Figure 2.
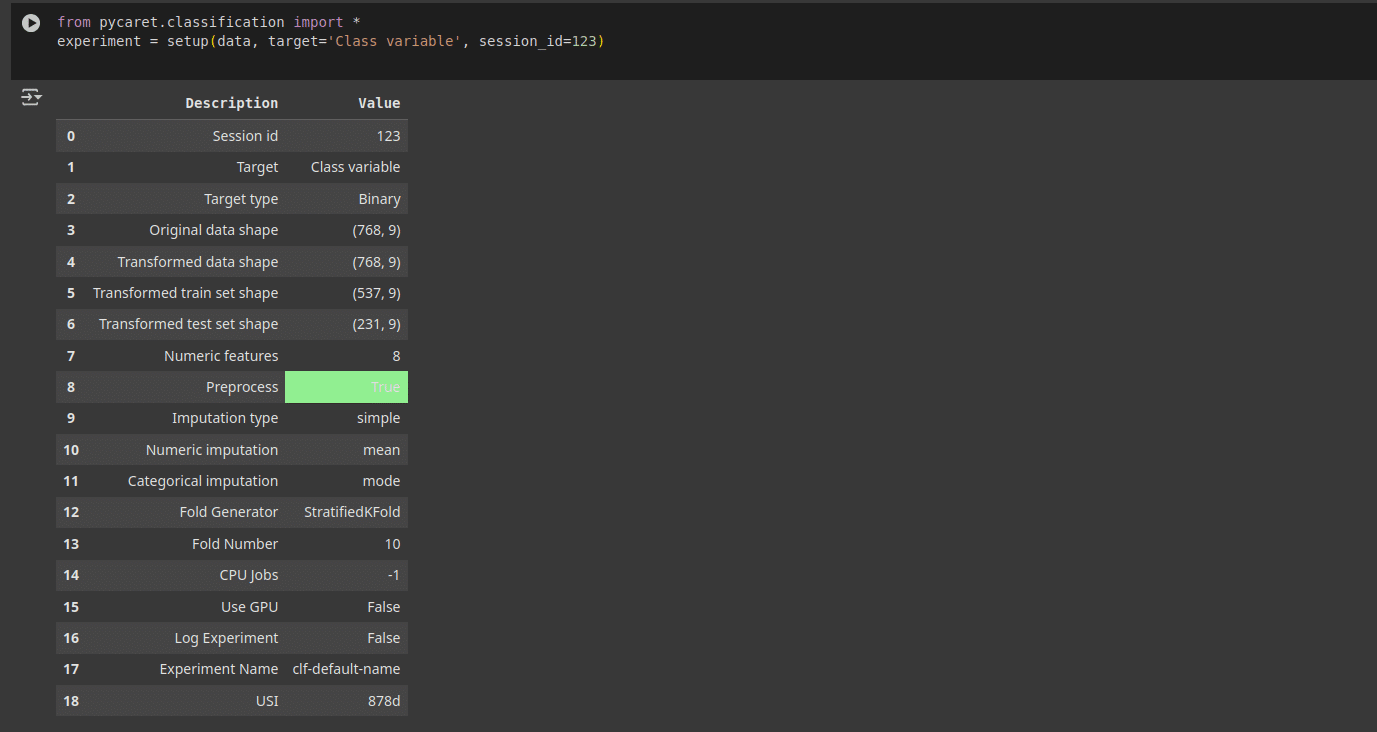
from pycaret.classification import *
experiment = setup(data, target=’Class variable’, session_id=123)
The next step is to choose the best algorithm for our use case, which is to predict if a person will get diabetes based on a set of features. Typically, data scientists do a little trial and error on a few algorithms that they believe will work for the use case. This step is also taken care of by PyCaret. A comparison of algorithms can be done using the following line of code as shown in Figure 3.
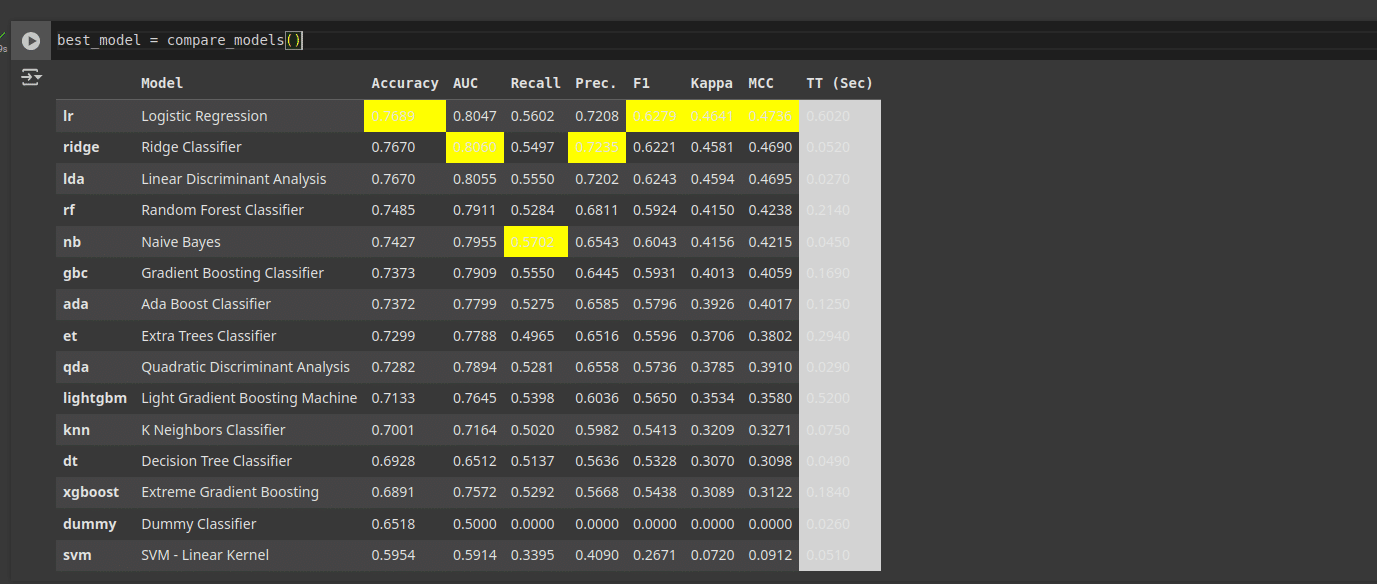
best_model = compare_models()
This is a very interesting session where you get to see the progress as PyCaret goes through each algorithm. This tool also highlights the best parts of each algorithm, in terms of training time, accuracy, precision, recall, etc.
However, if you already know which algorithm you want to use, you can give the following command as shown in Figure 4.
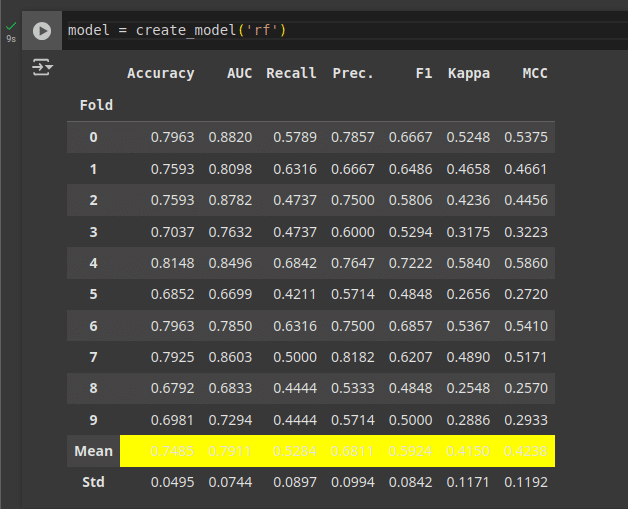
model = create_model(‘rf’)
In this case rf is the RandomForest algorithm; you can replace this by dt if you want a DecisionTree classifier, and so on.
The next step is to fine tune the model as shown in Figure 5.
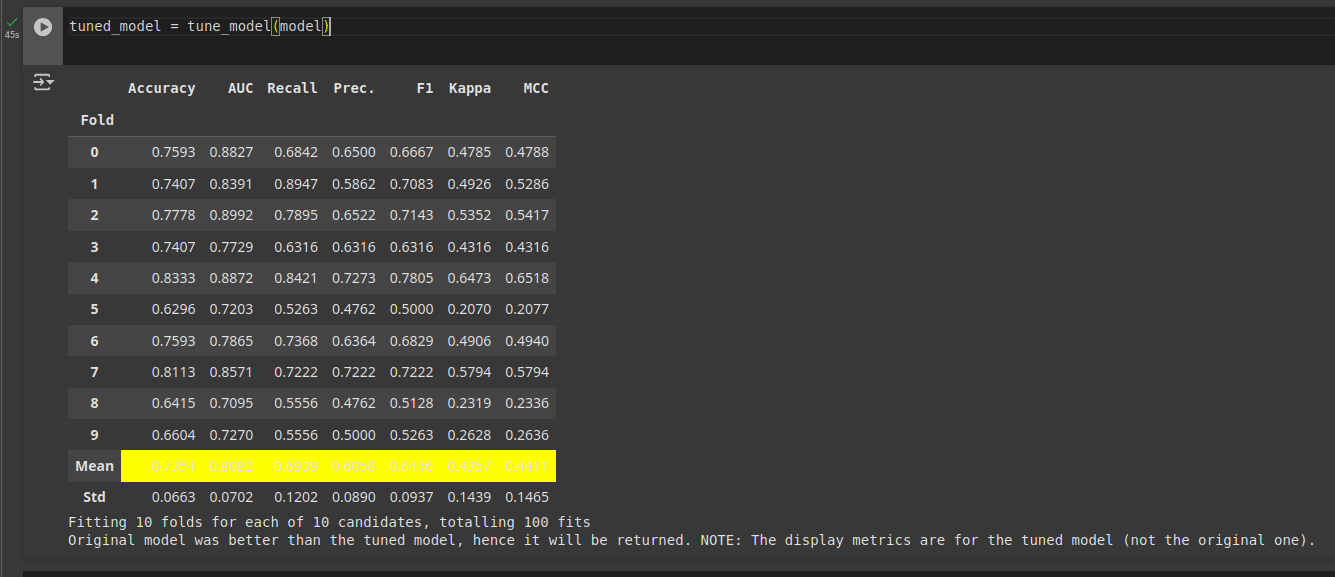
tuned_model = tune_model(model)
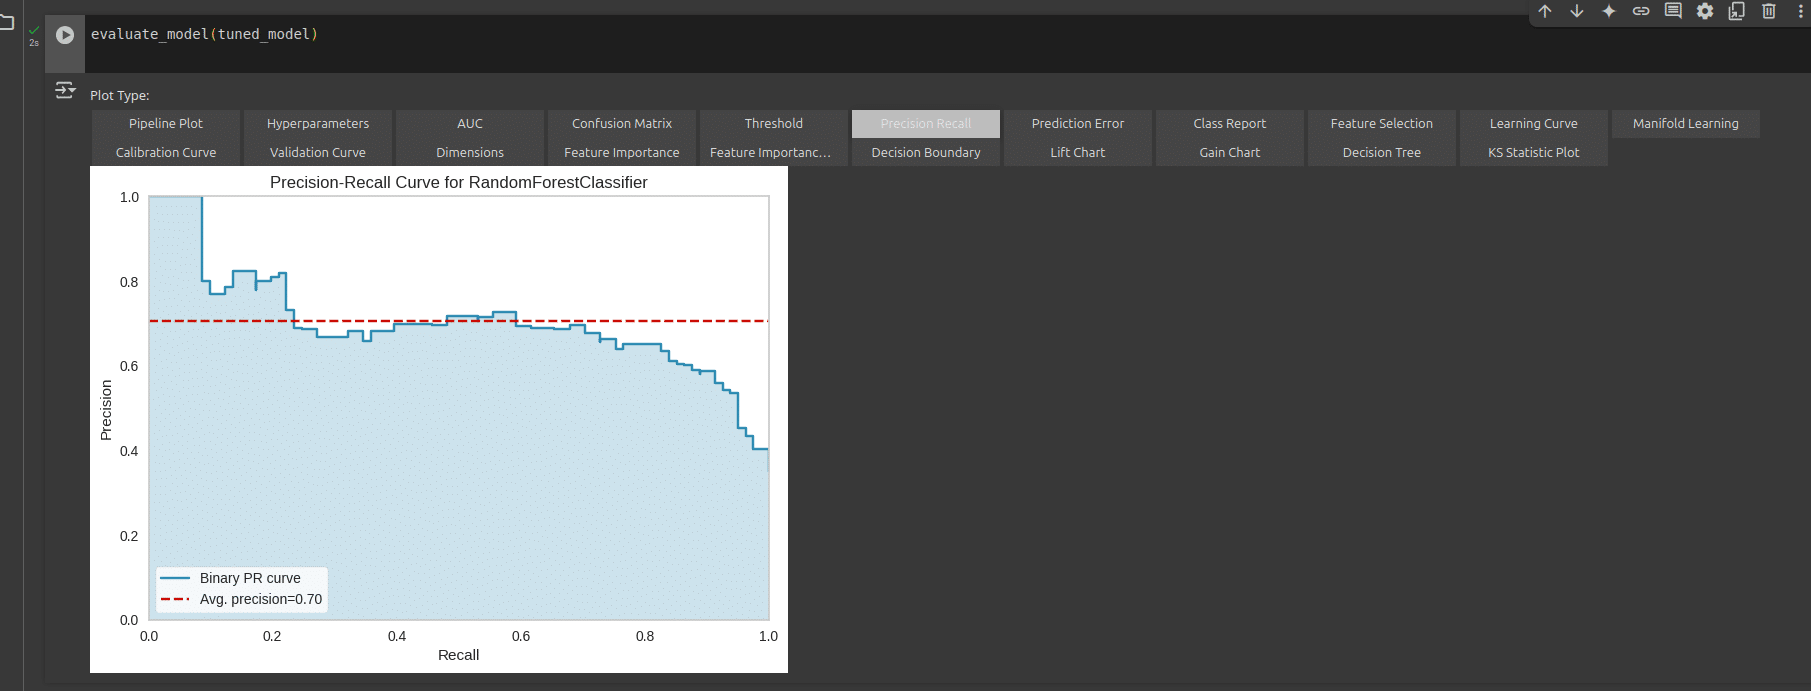
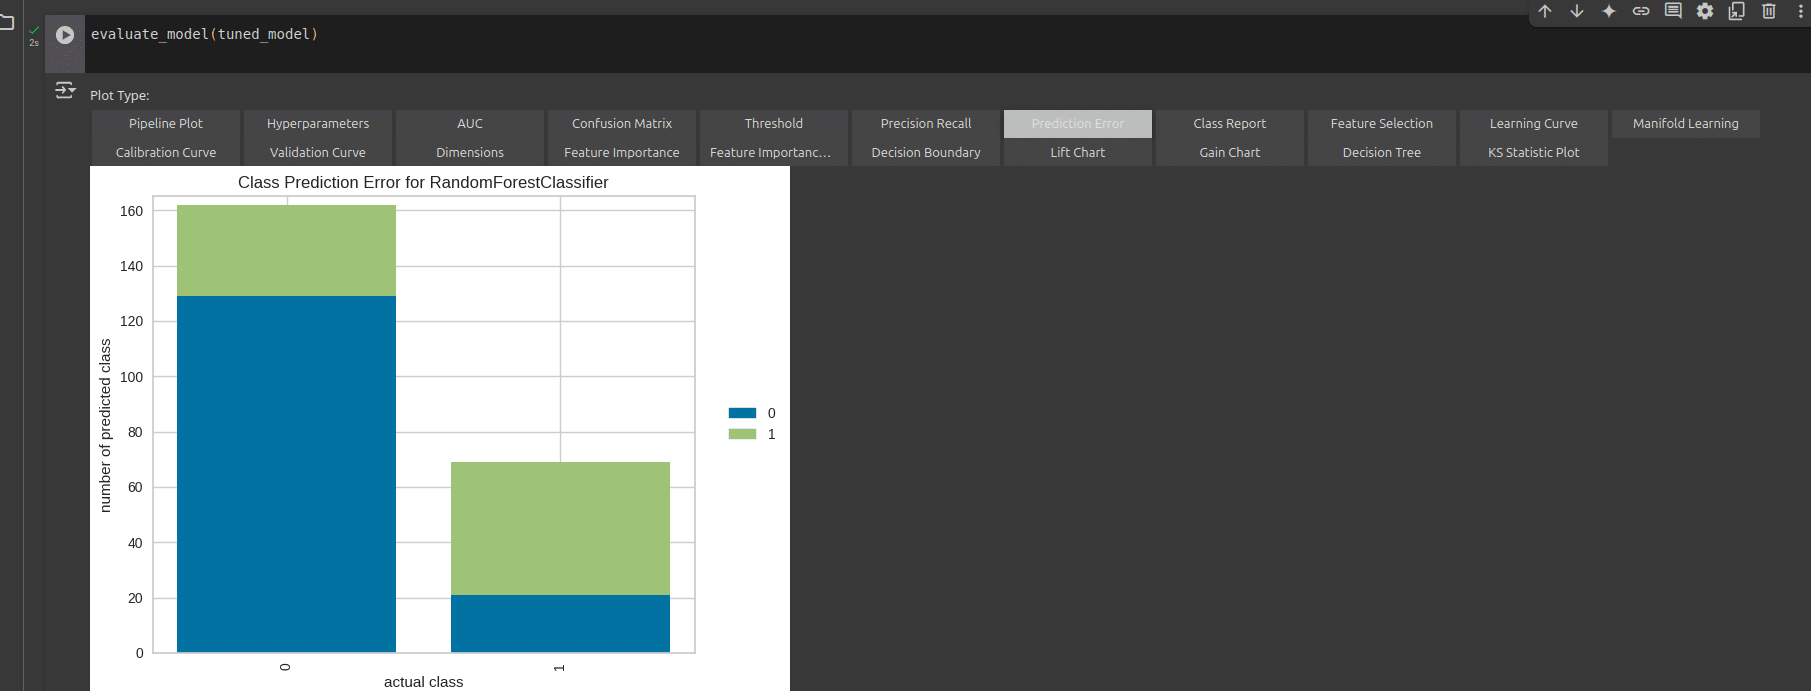
Finally, we can evaluate the performance of our model. This can be done using the following line of code as shown in Figure 6.

evaluate_model(tuned_model)
We can also explore the different parameters of performance visually. We can look at the prediction error and precision recall as shown in Figure 7 and Figure 8 (and more) by clicking on their respective tabs.
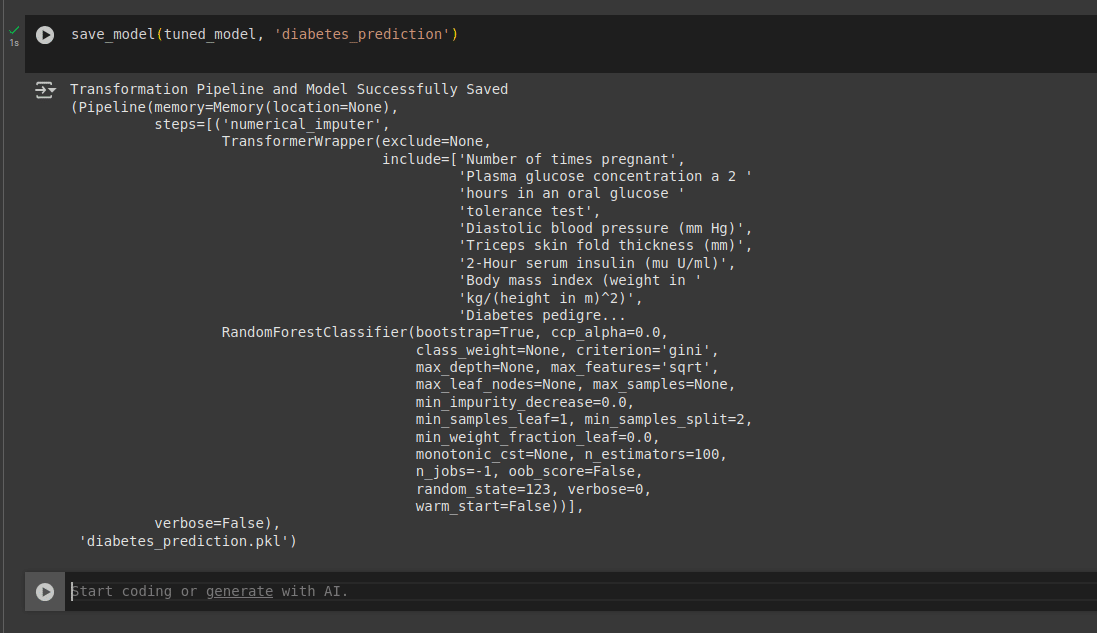
To save this model, we can use the following code:
save_model(tuned_model, ‘diabetes_prediction’)
This model is saved as a pickle file that can be used anywhere in any environment, as shown in Figure 9.

We can then load the same model back using the following code:
loaded_model = load_model(‘diabetes_prediction’)
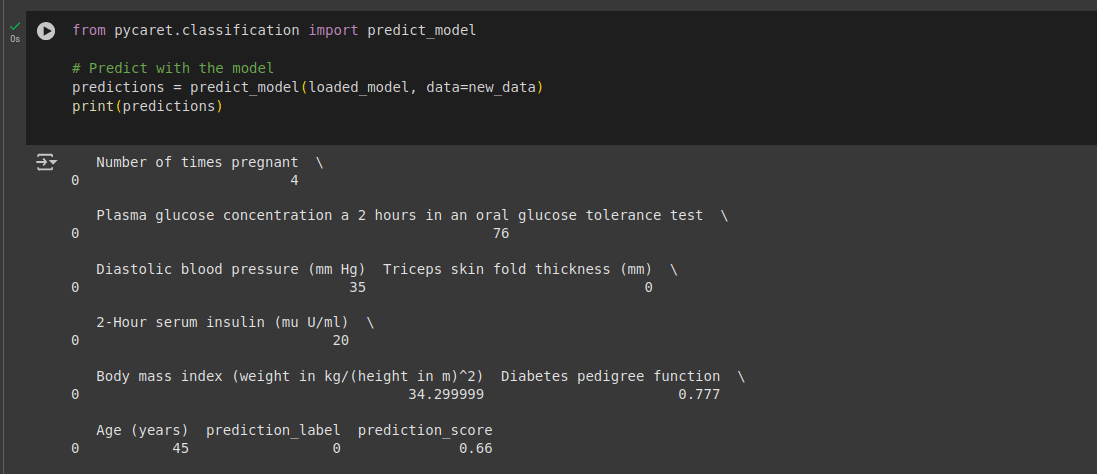
As a last step, if we want to predict based on a single instance of data whether a case may turn diabetic or not, we can use the following code, where the parameter values can be modified as needed. The output is shown in Figure 11.
import pandas as pd
new_data = pd.DataFrame({
‘Number of times pregnant’: [4],
‘Plasma glucose concentration a 2 hours in an oral glucose tolerance test’: [76],
‘Diastolic blood pressure (mm Hg)’: [35],
‘Triceps skin fold thickness (mm)’: [0],
‘2-Hour serum insulin (mu U/ml)’: [20],
‘Body mass index (weight in kg/(height in m)^2)’: [34.3],
‘Diabetes pedigree function’: [0.777],
‘Age (years)’:[45]
})

from pycaret.classification import predict_model
# Predict with the model
predictions = predict_model(loaded_model, data=new_data)
print(predictions)
As we can see in the figure, the predicted class says 0.66. This means that for the values we gave, the probability that the person may turn diabetic is more than 50%.
Building an ML model using PyCaret is as simple as this. You can explore other datasets, algorithms and use cases to gain further experience and learn more.


