Pluggable authentication modules help to separate the tasks of authentication from applications. Learn how to build a login mechanism that is API based and uses a custom PAM module for authenticating user identities.
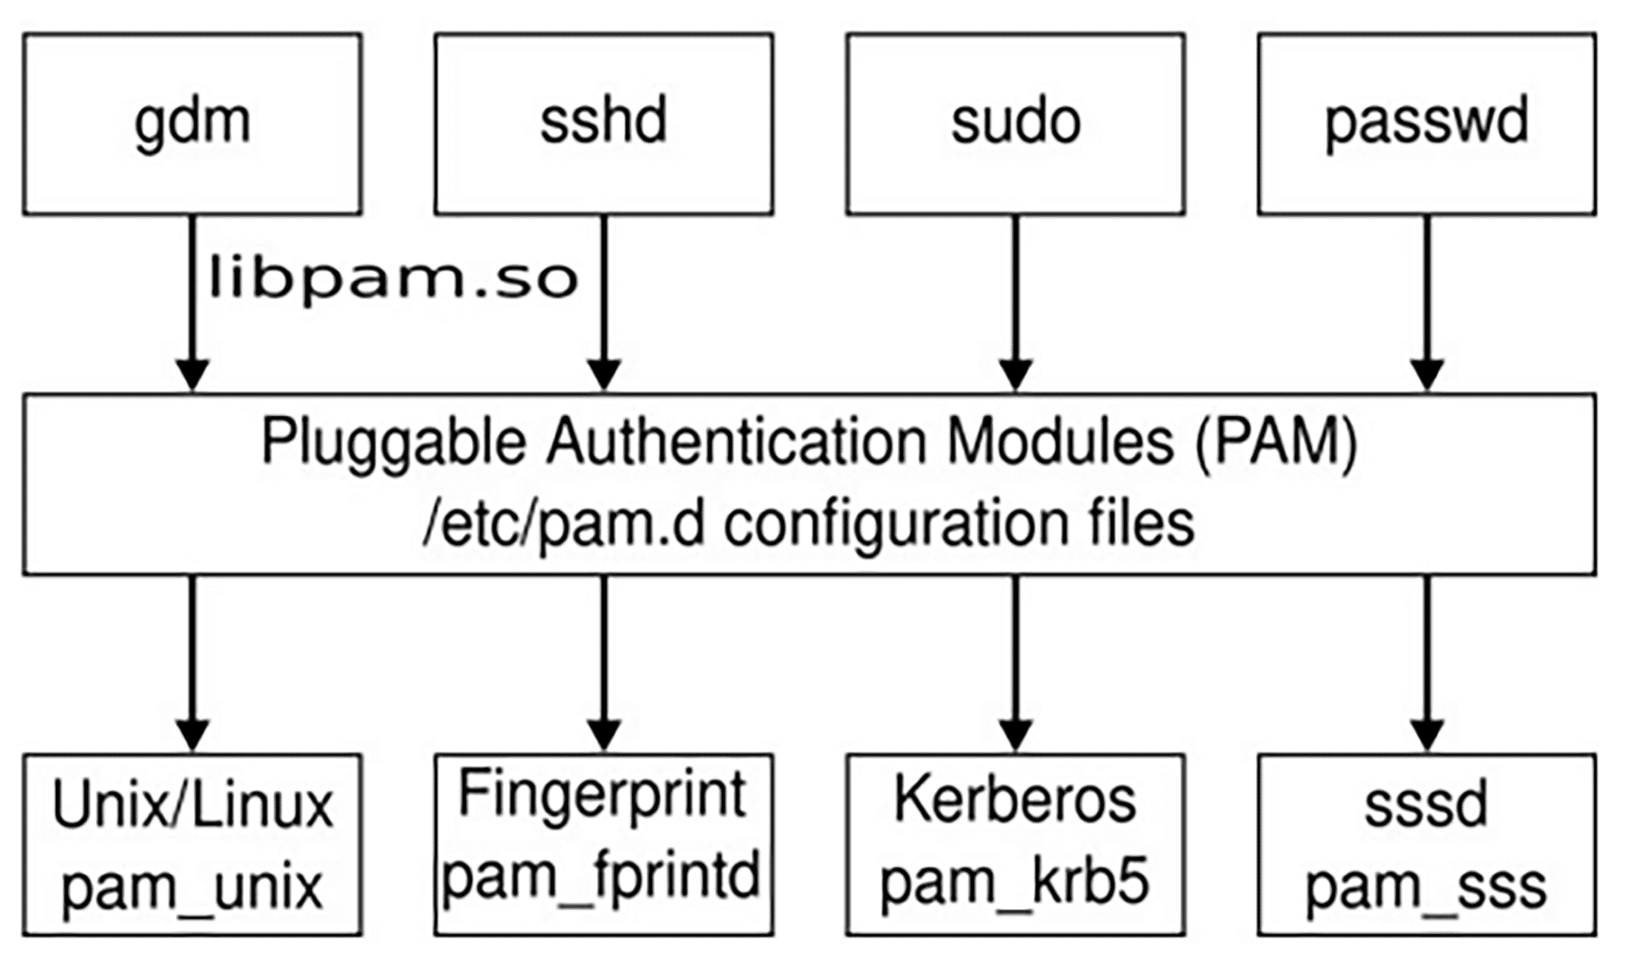
Pluggable authentication modules (PAM) help with user identification in Ubuntu or any other Linux flavour (through the user interface, terminal or other means) by separating the general and specific tasks of authentication from applications.
Many programs—like login, gdm, sshd, and ftpd—need to verify user identities, but there are multiple ways to accomplish this. For instance, a user may provide a user name and password, which can be stored locally or managed through LDAP (Lightweight Directory Access Protocol) or Kerberos. Alternatively, a user can authenticate with a fingerprint or certificate. Requiring each application developer to implement new authentication methods is inefficient. Instead, PAM allows applications to rely on its libraries, leaving the details to authentication experts. PAM’s pluggable design lets different applications apply different authentication tests, while its modularity makes it easy to add new methods through additional libraries.

Let’s now create a login mechanism that is API based. The PAM module will be sending the request to the API server for validation and will authenticate based on the output received from the API. We can create a new login scheme with this sample PAM module and server.
Architecture
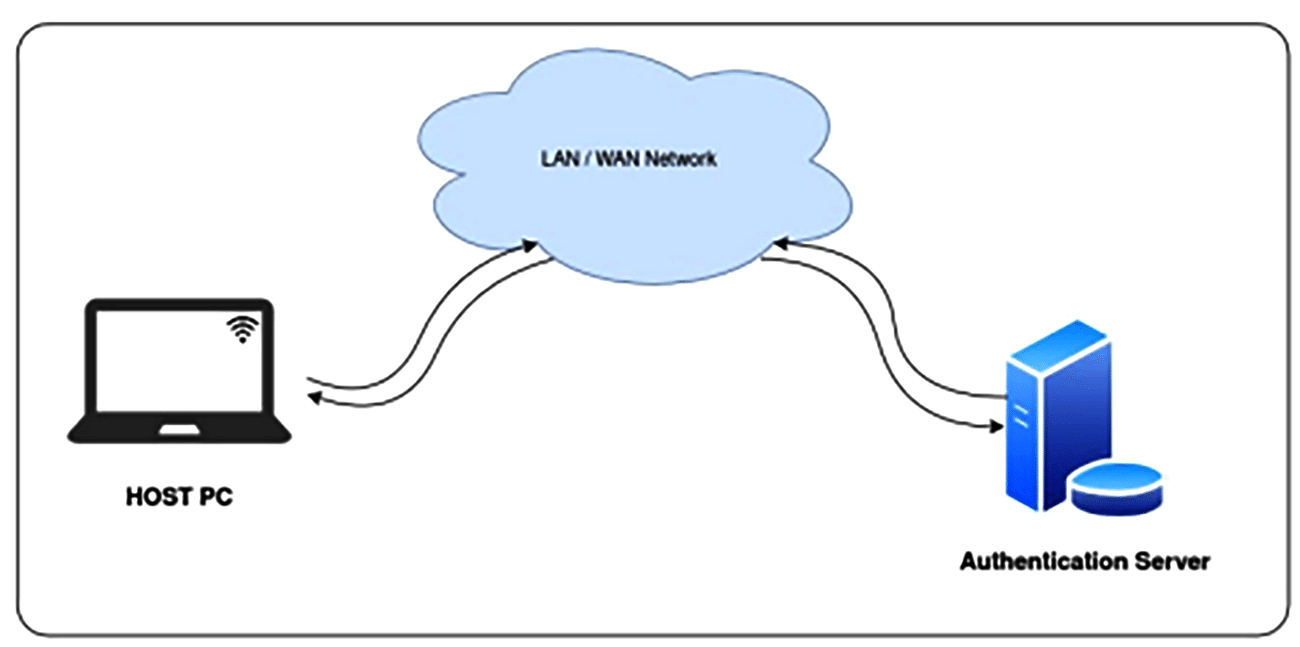
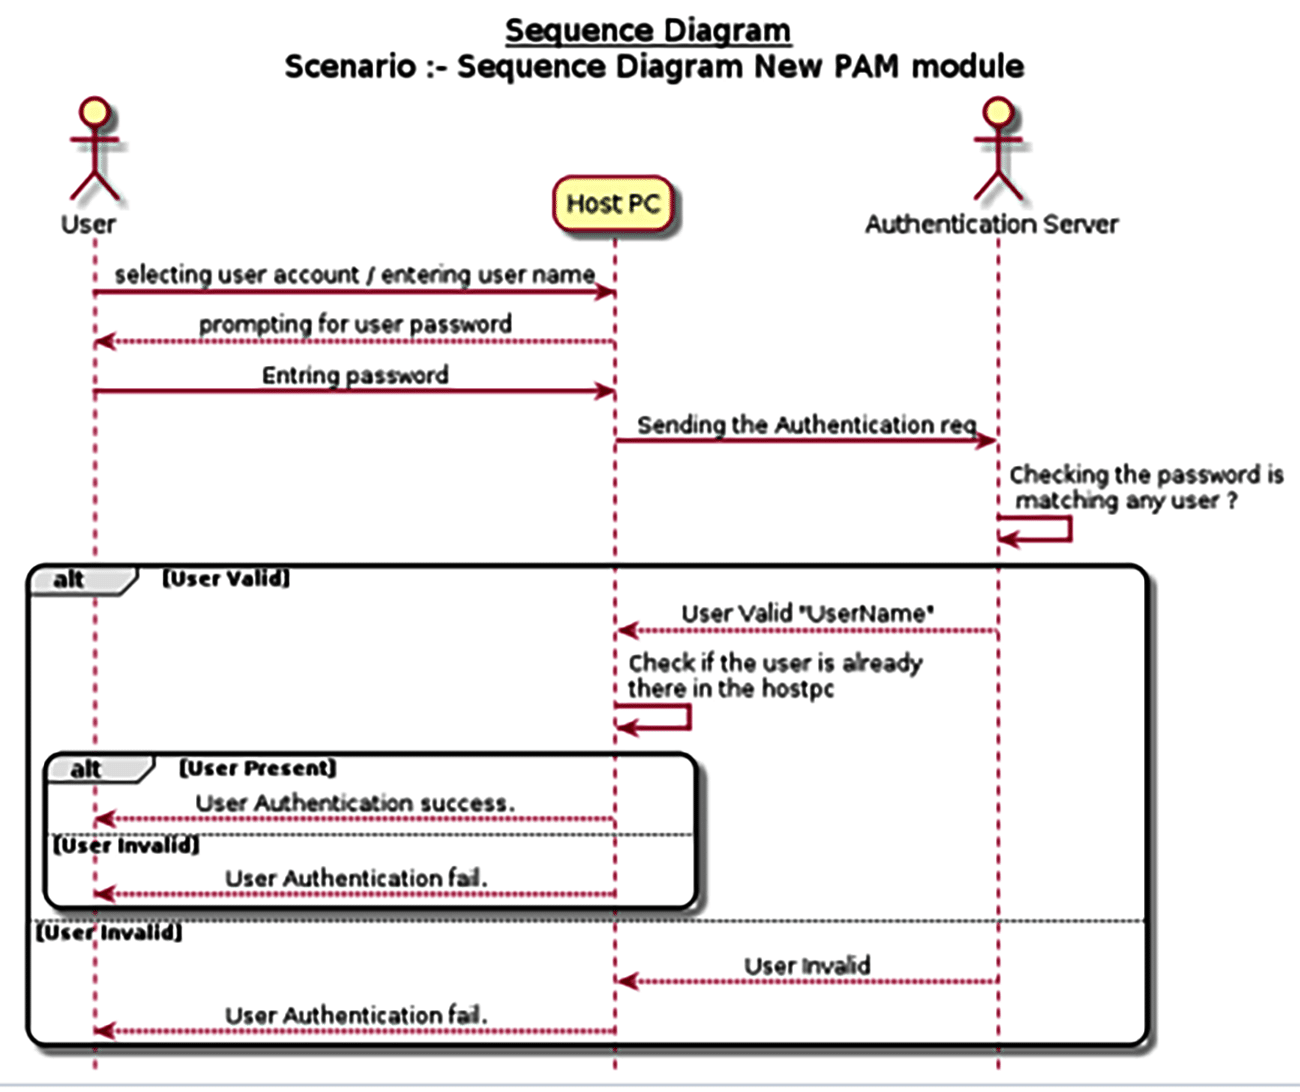
For getting the customisable login, we will be adding a new PAM module to the host PC to read the password from the user and send it to the cloud authentication server (hosted in LAN/WAN). If the server says the password is valid in the cloud, the latter will reply with the user name, so that the host PC can check if the user name received matches with the user’s input. If it does, the user login from this PAM module is a success.
Sequence diagram and code structure
Here are the steps to be followed. First, the user will be prompted to enter the password or key. Once that is done, the PAM module will send the request to the API server, which will validate the details and send the response back to the host PC.
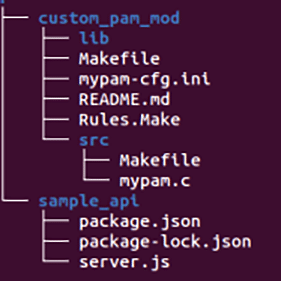
The repository shown in Figure 4 contains the source for the server that responds to the API requests from the PAM module, as well as the PAM module source. Once you have completed the build, the output will be stored in the lib directory (you can find the repo link at the end of this article).

Setting up an authentication server
This remote server hosts the API, which accepts requests from the host PC and sends authentication responses. Node.js and npm are to be installed in this server.
You can run the sample_api with the following command:
cd sample_apinode server.js |
|
Note: Check the IP address of the server and port that this API service is running. This will be needed to complete the building of the PAM module to work with this server. |

Building the PAM module
For building and installing the PAM module, go to the custom_pam_mod directory and follow the steps listed below.
First, run the following command to install dependencies for building and running the PAM module.
make install_deps |
Now, modify the build configuration. Inside the INI file (mypam-cfg.ini), you’ll find various configuration settings specified in key-value pairs. The two main keys you may want to modify to work according to your needs are server_url and replace_logins.
server_url: |
This key represents the URL of the server. Modify its value to the appropriate server URL.
replace_logins: |
This key controls the replacement of logins. If you want to replace multiple logins, separate them with commas (,).
options available: gdm,login |
Here’s an example build configuration:
server_url = https://example.com/apireplace_logins = login,gdm |
To build the module, go to the directory custom_pam_mod, and run the following command:
make pam_mod_build |
|
Note: Proceed to the next step only if the build has succeeded without any error. |
To install this module to the host PC and use it for logins we mentioned in the configuration file, use the following command:
make install |
To validate or test this setup, follow these steps:
Ensure the server is running the server.js script.
Make sure your host PC and the server are able to communicate with each other (ping to access that port of the server from the host PC).

Ensure you have configured the users in GitHub. Boot the host PC and when asked to log in, try to login with the password set inside the server.js.
That’s all! The PAM module is now customised for API based authentication. You can try other options as well based on use cases by modifying the PAM module for an Ubuntu (or any Linux-based) PC. I have put out the code in GitHub (see References below) so that you can try it on your own.


