Learn how fat containers and the Multipass tool can help create cloud virtual machine stacks on your laptop, thus accelerating productivity while cutting cloud costs.
The concept of partitioning static hardware resources into dynamic units of computing through virtual machines (VMs) revolutionised how businesses ran IT. Similarly, further dynamic repartitioning of user space through containers is revolutionising how businesses are running modern distributed infrastructure.
The principles of Dev(Sec)Ops are based on the good old test driven development (TDD) methodologies, which state that we need to consider how we’ll test first before even writing a single line of code. Today, it’s all about ‘fail early and fail often, and continuous improvements’.
Therefore, the ability to bring up an environment consisting of different VMs running various software is today a necessity for on-demand development and testing (also as a vital part of CI/CD). Waiting to get VMs in data centers (DCs) takes at least a few days and public cloud-based dev/QA/POC accounts are subject to various limitations and approvals, especially if a company is spending substantial money on public cloud infrastructure.
Fat container VMs
Virtual machines were always about emulating the whole machine through a hypervisor taking control of the entire underlying hardware. This makes VMs heavyweight entities requiring more computing resources. Containers are lightweight as the devices and kernel are shared and only the user space is sandboxed. While they require VMs to run on (they can run directly on hardware too) they can be nested better than VMs, at least for dev/QA/POC purposes.
If you have used a combination of Vagrant and VirtualBox, you may have realised that the virtualisation provided is heavyweight, requiring special hardware acceleration and significant computing resources. In my experience, only four to five VMs are enough to make a 4 core/16GB MacBook Pro scream like a steam engine. So our first tool to explore here is known as bootloose, built around Docker containers (that look like VMs) by running systemd as PID 1 and ssh daemon to log into the container machines. The advantage is that there are not many dependencies except the Docker daemon and no need for any virtualisation support from hardware. bootloose can run both on GNU/Linux and MacOS, and even Dockerd can be run in the created container machines.
bootloose usage
Running bootloose is easy as there is no installation step; just grab the static binary and move to any location configured in your system path like
/usr/local/bin, etc. The following command downloads the latest version of bootloose, moves to the system path location, and makes that executable (requires sudo privileges on the GNU/Linux):
curl -sSLk “https://github.com/k0sproject/bootloose/releases/download/$(curl -sSLk https://github.com/k0sproject/bootloose/releases 2>&1|grep releases|grep tag/|awk ‘{print $7}’|awk -F ‘”’ ‘{print $2}’|awk -F’/’ ‘{print $NF}’|head -1)/bootloose-linux-amd64” -o /usr/local/bin/bootloose \&& chmod +x /usr/local/bin/bootloose |
If you don’t have the sudo privileges on your GNU/Linux machine, the following command will download bootloose in the current directory and you can use it from there:
curl -sSLk “https://github.com/k0sproject/bootloose/releases/download/$(curl -sSLk https://github.com/k0sproject/bootloose/releases 2>&1|grep releases|grep tag/|awk ‘{print $7}’|awk -F ‘”’ ‘{print $2}’|awk -F’/’ ‘{print $NF}’|head -1)/bootloose-linux-amd64” -o ./bootloose \&& chmod +x ./bootloose |
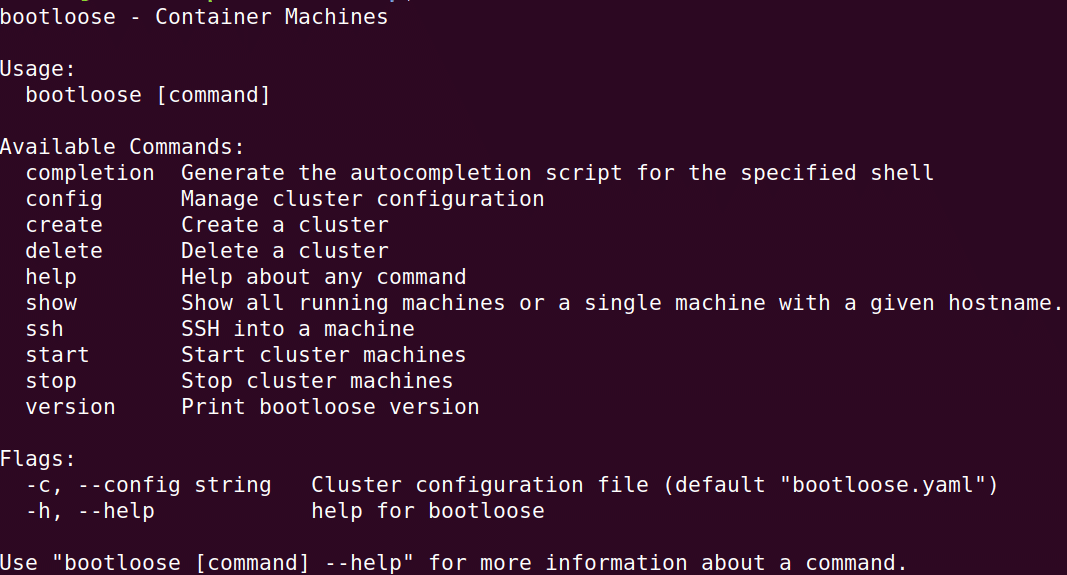
Going forward, you can either prepend every bootloose command with ./ or add the current directory in your system path. Let’s verify if the downloaded binary is all good and works by executing the bootloose command. You should see something like what is shown in Figure 1. This figure is a screenshot taken on my Ubuntu 18.04 LTS laptop.
The creation of container machines is driven by a configuration file, declaring various properties for the machines required by bootloose. Execute the command bootloose config create to create a configuration bootloose.yaml in your current directory. On my laptop, it looks like what’s shown in Figure 2.
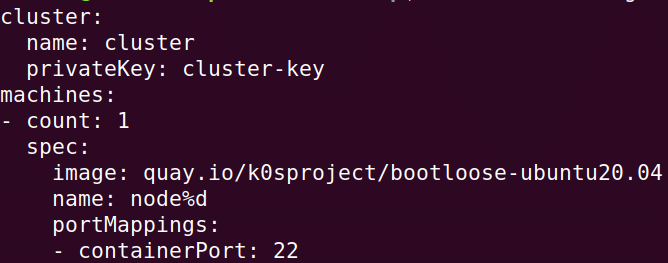
The basic configuration properties required by bootloose are self-explanatory. The privateKey is the ssh private key created by bootloose to let you ssh into the created container machine(s). The count denotes the number of desired container machine(s) to be created. The created container machines are named as the combination of cluster name, machines name and count index starting from 0. The image is the Docker image already having systemd and ssh daemons to instantiate the container machine(s). The portMappings is about exposing your container port(s) on the localhost to access those. You can further configure the default values of the properties as desired through various flags passed to the bootloose config create command. Those flags are dumped using the -h or –help suffix to the command.
The bootloose project currently provides the prebuilt images of the container machines quay.io/k0sproject/bootloose-{alpine3.18, alpine3.19, amazonlinux2023, amazonlinux2, clearlinux, debian10, debian12, fedora38, rockylinux9, ubuntu18.04, ubuntu20.04, ubuntu22.04 }. But you are not limited to the prebuilt images. You can use any custom Docker image with systemd and ssh daemons installed (see References).
For example, I used the Dockerfile shown below to create a customised Ubuntu 24.04 LTS local image to instantiate my container machines, when I tried server migration from the old prebuilt Ubuntu 22.04 LTS:
<Start of Dockerfile>
FROM ubuntu:24.04ENV container docker# Don’t start any optional services except for the few we need.RUN find /etc/systemd/system \/lib/systemd/system \-path ‘*.wants/*’ \-not -name ‘*journald*’ \-not -name ‘*systemd-tmpfiles*’ \-not -name ‘*systemd-user-sessions*’ \-exec rm \{} \; && \apt-get update && \apt-get install -y --no-install-recommends \dbus systemd openssh-server net-tools iproute2 iputils-ping curl wget vim-tiny sudo && \apt-get clean && \rm -rf /var/lib/apt/lists/* && \true >/etc/machine-id && \true >/var/lib/dbus/machine-id && \systemctl set-default multi-user.target && \systemctl mask \dev-hugepages.mount \sys-fs-fuse-connections.mount \systemd-update-utmp.service \systemd-tmpfiles-setup.service \console-getty.service && \# Seems dispatcher is not a part of 24.04LTS# systemctl disable \# networkd-dispatcher.service && \sed -i -e ‘s/^AcceptEnv LANG LC_\*$/#AcceptEnv LANG LC_*/’ /etc/ssh/sshd_config# This container image doesn’t have locales installed. Disable forwarding the# user locale env variables or we get warnings such as:# bash: warning: setlocale: LC_ALL: cannot change locale#https://www.freedesktop.org/wiki/Software/systemd/ContainerInterface/STOPSIGNAL SIGRTMIN+3EXPOSE 22CMD [“/bin/bash”] |
<End of Dockerfile>
To give you a better idea of the bootloose configuration, the configuration shown below uses the locally created ubuntu2404lts image (created using the docker build . -t ubuntu2404lts command with the Dockerfile shown above) to build three container machines with host names kafka{0,1,2}. This will help to later install and configure Monit and Dockerd (need the privileged flag) in these machines. Several ports now expose multiple services running in each container machine. You can also mix and match various kinds of container machines under the machines section in the same configuration.
<Start of Kafka Config>
cluster:name: clusterprivateKey: cluster-keymachines:- count: 3spec:image: ubuntu2404ltsname: kafka%dnetworks:- cldinabox-demoportMappings:- containerPort: 22- containerPort: 2181- containerPort: 8080- containerPort: 9092- containerPort: 38080- containerPort: 52812- containerPort: 58080privileged: truevolumes:- type: volumedestination: /var/lib/docker |
<End of Kafka Config>
First create the required network using the command docker network create cldinabox-demo. You can then bring up the container machines with the command bootloose create and dump their information with the command bootloose show, as shown in Figure 3.

You can clearly see the localhost port corresponding to each exposed container machine port. Use the command bootloose ssh root@<HOSTNAME> to get into any of the created container machines and run any normal GNU/Linux command there.
You can also run any ssh (or scp) command using the cluster-key private key created in the current directory to transfer and execute commands remotely, to turn your container machines into full-fledged servers, such as the command bootloose ssh root@kafka1 true && echo ‘ PING kafka1 response :PONG’. Finally, you can clean up the created cluster with the command bootloose delete.
You should now be able to easily create and use your container machines.
Cloud VMs using Multipass
We have explored how to develop cloud-like virtual machine stacks on our laptops with fat container machines. This didn’t require a lot of computing resources and any hardware-based virtualisation support. But security is a downside of containers as these provide thinner isolation in comparison to the strong isolation offered by virtual machines. So is a lightweight and fast solution to create cloud VM stacks on our laptops possible? We also want the tooling that works out-of-the-box without a lot of dependencies. The answer is yes; you can have your cake and eat it too!
The tooling presented in the next section is for newer machines where the virtualisation capability is provided by the processor. Fat containers remain an option in case you don’t have such hardware available. I tested the snippets shown or referenced in this article on my 4 core/8GB COREi7 laptop running Ubuntu 18.04 LTS. But I have also used the tool on Mac OS previously in my professional setting.
Multipass usage
Multipass is a tool to build Ubuntu virtual machines that can be configured using cloud-init like public cloud VMs. It’s a lightweight virtual machine manager that is cross-platform and uses the standard underlying hypervisors on the respective platform to keep the overhead minimal. So it’s possible to build a public cloud-like VM environment anywhere on demand using this tool.
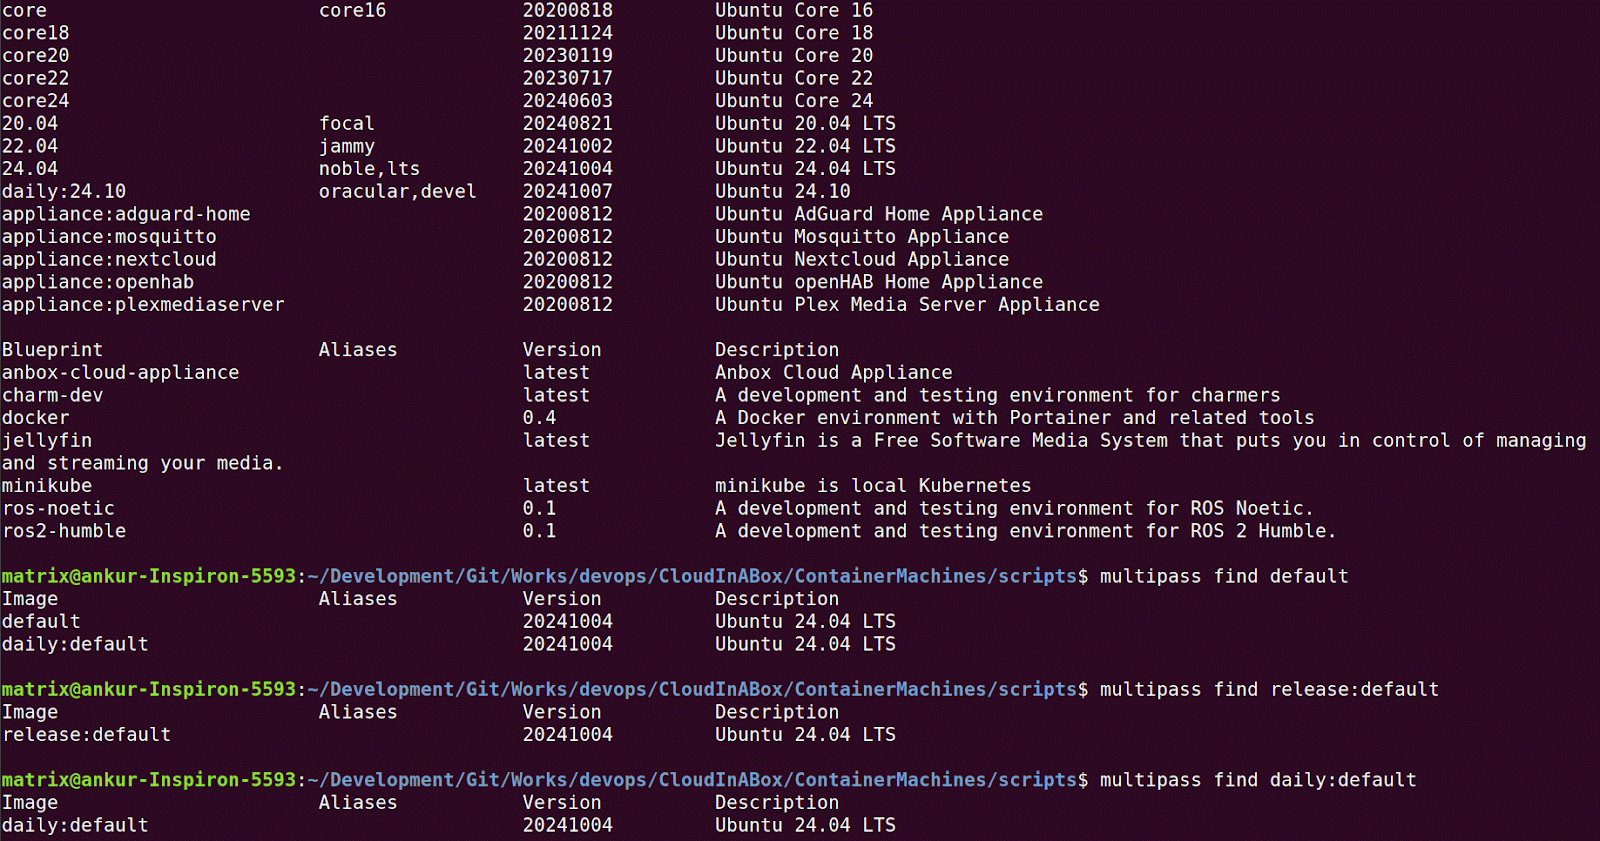
Find an appropriate Ubuntu cloud image to instantiate your first VM. Execute the command multipass find to dump all the available and supported images, as shown in Figure 4. You can append the option –unsupported in case you are experimenting with old unsupported versions of Ubuntu. You can also filter the images listing by appending the remotes release: or daily: to the command. And you can get familiar with the default images by including default with or without remotes.
Now, we’ll look at building local cloud VMs and manipulating them. The command multipass launch will bring up a local Ubuntu VM using the default image. Append the desired image/alias to the command to instantiate the VM with that particular image. You need to append the command with –n <NAME> to avoid naming your VM instance with an auto generated random name. You also need to append with -c <NumOfCPUs> to allocate more than the default CPUs (1 for current version), -m <AmountOfMemory> to allocate memory other than the default memory (1G for current version), and -d <DiskSpace> to allocate disk space other than the default disk (5G for current version), respectively. You can also provide a timeout (default is 5 minutes for the current version) using –timeout <TimeoutInSecs> to limit the maximum time it takes to build the VM instance. For example, the command multipass launch -n mycloudvm -c 2 -m 2G -d 10G –timeout 600 builds a local VM with the default LTS release version of Ubuntu (22.04 as of writing) named mycloudvm. It has 2 CPUs, 2GB memory and a 10GB disk with the launch operation timeout of 10 minutes.
You can use the command multipass list to dump the complete information about all the launched instances. The command multipass info –all also dumps information about all the instances, albeit with some extra runtime details. This information can be dumped in a table other than the default format table by appending –format <json|csv|yaml> to the list or info command. Once your instance is up, use the command multipass shell <VMName> to log in. Now your local cloud VM instance is ready to be used as per your need.
Please note that an instance name primary with default resources is created (if not done already) in case you don’t provide the VM name to the shell command. The primary instance auto mounts your home directory into it, but you could unmount that using the multipass unmount primary command. If you want to set the name of the primary instance other than the default, then use the command multipass set client.primary-name=<CustomPrimaryName>. Similarly, the command multipass start launches a primary instance if not created already.
You can execute any shell command on a running instance through multipass exec. Logically, you could combine transfer and exec to copy and execute your configuration scripts to create some automation around the instances. The Multipass commands stop, start, restart, suspend, and delete are self-explanatory, and perform those operations on the named instances (–all for all the instances). The Multipass command recover is for recovering the deleted instances and purge cleans everything for these deleted instances. Multipass commands have some other options too, and you can dump detailed information about any command using multipass help <Command>.
Advanced tooling with Multipass
Multipass helps use cloud-init to fully configure local VMs as is done in various public clouds. This means you can prototype your public cloud launches locally, and for free. Isn’t that a great ability, which is not found in any other similar tool? The cloud-init is used to initialise the VM instances without using any external tool for configuration, to build the fully configured machines out-of-the-box. For example, I’m using this functionality to build fully configured single instances running many standard cloud components on my laptop. It enables me and others to quickly experiment/verify/clean up combinations of various stacks, sometimes a few dozen times a day, before the final public cloud push.
Let’s quickly develop the cloud-init configuration using the cloud-config data format, showing the various required sections. You can download and check the script from the cloud-config examples link given under References at the end of the article. We’ll use it with Multipass to bring up a fully configured instance running Apache Kafka without the need for Zookeeper due to Kraft, and its web UI, out-of-the-box. Now let’s dissect this cloud-init configuration section by section. The users section is configuring a user Ubuntu with sudo privileges, ready to use your desired ssh keypair for the ssh login. Please note that the public key is a place holder and you need to replace it with the public key content of the key pair. If you don’t have a ssh key pair, then you generate one by using the command ssh-keygen and following its question prompts. The package_update section is about resynchronising the package index files from their sources. The package_upgrade section is about installing the newest versions of all packages currently installed on the system. The packages section takes a list of the packages that need to get installed on the system. Our example configuration is installing the avahi-daemon so that we can resolve <hostname>.local to the instance address.
The section write_files generates the files listed by taking the content, path, owner and permission for each file. In our example configuration, we are generating a Docker Compose manifest to bring up Cassandra and its web UI stack. The runcmd section takes a list of the shell commands to run in order to complete the configuration of the instance. Finally, the output section generates different logs, capturing stdout and stderr during various stages of the cloud-init, to debug in case the instance is not configured as per the cloud-config data provided. The cloud-init cloud-config provides more functionality through many other sections. Please refer to the cloud config examples link in the References section at the end of the article to see these in action.
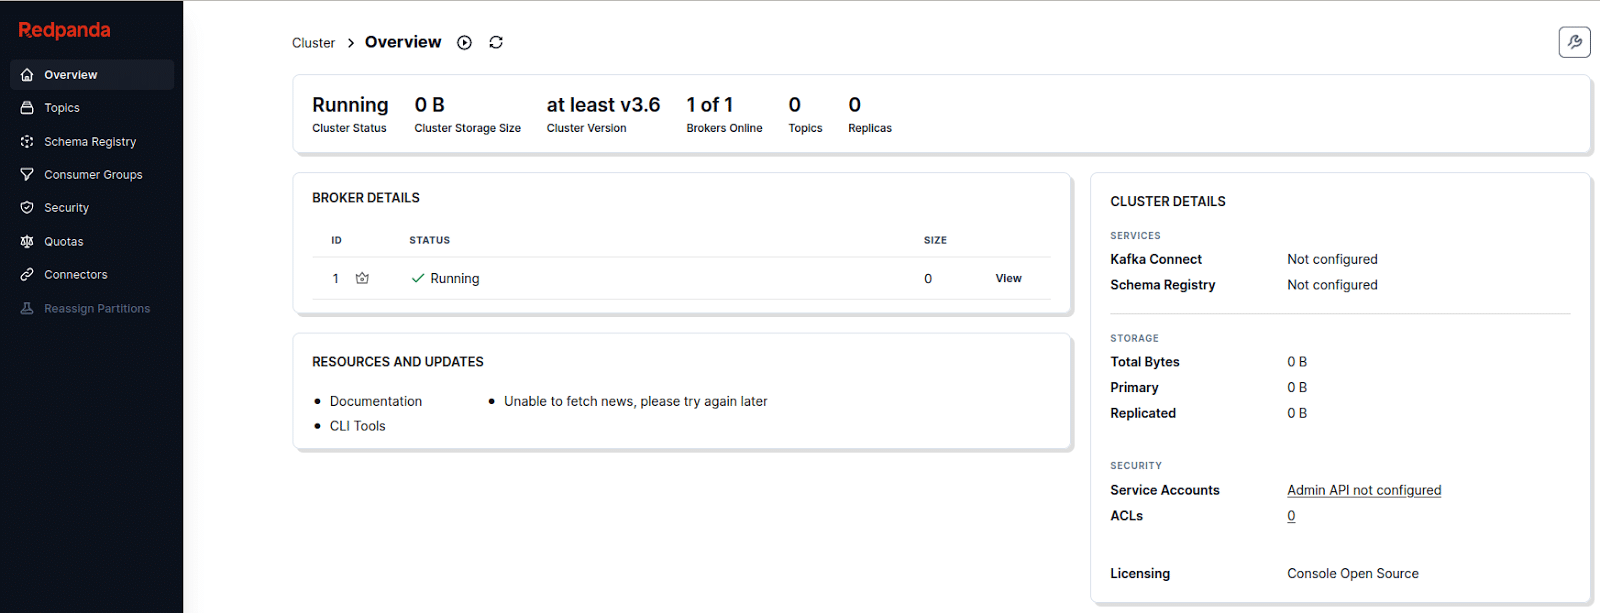
Execute the command multipass launch -m 2G n kafka-kraft –cloud-init ./cloud-config-kafka-kraft.yaml to bring up a fully configured cloud VM instance locally. You can try to access the Kafka cluster web UI by typing kafka-kraft.local:8080 in your browser once the instance is up. Some of the web UI screenshots from my laptop are shown in Figures 5 and 6.
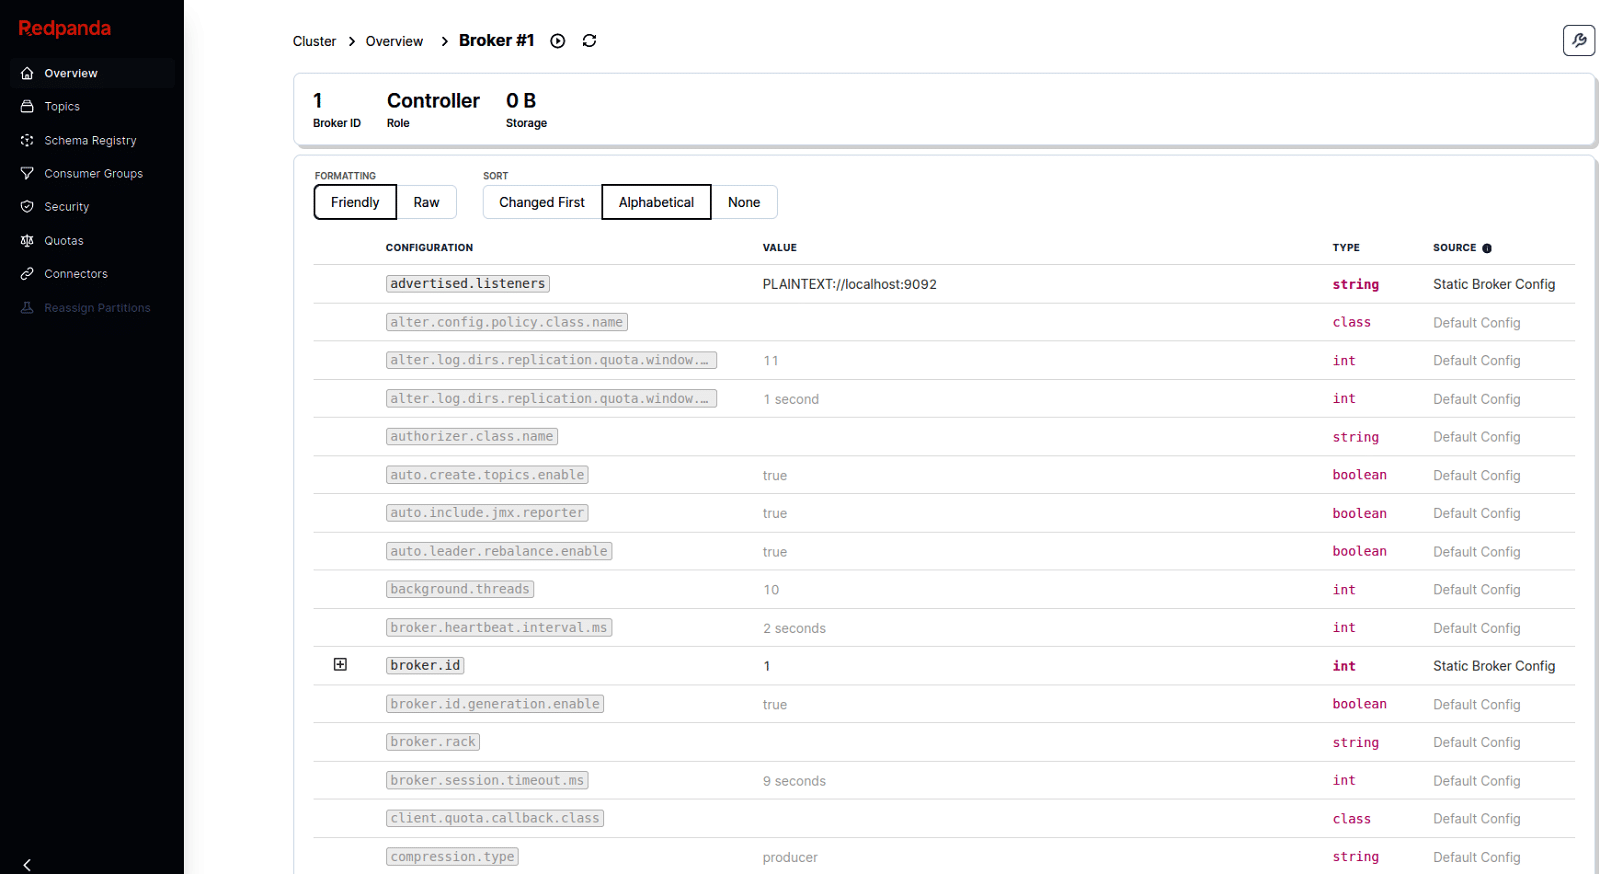
You can log in to the kafka-kraft instance using the ssh -oStrictHostKeyChecking=no ubuntu@kafka-kraft.local command. Execute the command multipass delete kafka-kraft && multipass purge && ssh-keygen -R kafka-kraft.local to clean up everything when done with the local cloud VM.
I’ve created a wrapper script and various cloud configs to bring up fully configured local cloud VMs, based on Ubuntu 22.04 LTS, running Cassandra, Consul, OpenSearch, Kafka, Nomad, Spark and Vault through a single command. To get started with the wrapper, just download the sources through git clone https://github.com/richnusgeeks/devops.git and give the command pushd CloudInABox/Multipass/scripts (you could use cd instead of pushd but I prefer the latter for its intelligence). The wrapper script execution should show you a help screen (Figure 7).

All the local VM instances developed with the wrapper script are configured with Monit, Docker and Compose in addition to the chosen target role. Let’s build a fully configured consul dev mode local cloud VM with the command
./create_multipass_machines_stack.sh create consuldev. Once the local cloud VM instance is up, you can access the Monit and Consul web UIs on consuldev.localhost:2812 (credentials: guest/guest) and consuldev.localhost:8500, respectively.

You can get into the created instance using the command ssh -oStrictHostKeyChecking=no ubuntu@consuldev.local and clean up everything by giving the command ./create_multipass_machines_stack.sh cleandelete when done. The tooling around Multipass through the wrapper script makes developing and cleaning the fully configured local cloud VMs a cakewalk.
Fat containers are great to build a lightweight fleet of cloud VMs on your laptop, even without any hardware virtualisation support. Multipass is another must-have tool for modern cloud and infrastructure/platform developers. When combined with cloud-config data it is useful in building public cloud kind of fully configured Ubuntu instances locally. The usage of fat containers and Multipass accelerates developer productivity and slashes public cloud bills.


