Explore Stable Diffusion—an open source generative AI marvel that crafts images from text.
Generative AI centres on creating new and original content, text, images, synthetic data, or even deepfakes. It can generate output within the same interface as the input (e.g., from text to text) and across different interfaces (e.g., from text to image or from text to video). Well-known generative AI tools include Bard, DALL-E, Midjourney, ChatGPT, and Deepmind.
Generative AI counts on neural network techniques such as transformers, GANs (generative adversarial networks), and VAEs for problem-solving. In contrast, conventional AI algorithms often adhere to a predefined set of rules to process data and generate results using convolutional neural networks, recurrent neural networks, and reinforcement learning. An issue with conventional AI is that algorithms can magnify or reproduce pre-existing biases and prejudices present in training data. A notable example is Amazon’s AI-powered recruiting tool, abandoned due to gender bias.
Generative AI finds extensive applications across commercial domains, automatically generating new material and helping to interpret and understand already-existing content. Virtually any kind of content can be generated by employing it. Some of the use cases of generative AI include:
- Chatbots for customer services and technical support
- Writing emails, resumes, dating profiles, and term papers
- Simulating realistic human motions used in gaming, animation and virtual reality
- Assisting in the discovery of new drugs by recommending potential chemical structures
- Generating synthetic climate data to train a model that can predict weather
Generative AI developers are focusing on enhancing user interaction, allowing them to ask questions in plain language. After receiving an initial response, the results can be customised by suggesting the tone, style, and any other elements users want included in the created material.
Applications of Stable Diffusion
Stable Diffusion, an open source generative AI model, generates images based on text. It is built on the latent diffusion model by engineers and researchers from CompVis, LMU and RunwayML. Training in the early stages used 512×512 images from the LAION-5B database. Some of its applications include:
Image inpainting: The technique of repairing or replacing damaged areas in a picture is called inpainting. Images can be painted while keeping their general composition and substance intact by using Stable Diffusion.
Generative modelling: Stable Diffusion models can be applied for generative tasks like creating fresh, realistic samples from a given distribution. Tools like image synthesis can benefit from this.
Texture synthesis: In computer graphics and game development, Stable Diffusion may be used to synthesise textures which are detailed and look real.
Handling uncertainty: Stable Diffusion offers a probabilistic framework for managing uncertainty in the inpainting process. Compared to deterministic approaches, it offers a more robust approach and represents variations in the pixel values.
Noise reduction: Noise in images may take several forms, including random pixel changes and sensor noise. Stable Diffusion efficiently reduces noise while keeping crucial features.
How Stable Diffusion works
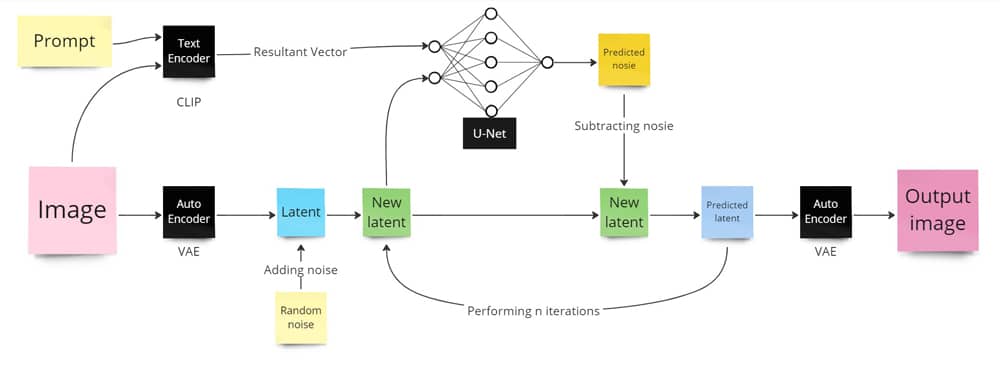
The principle of Stable Diffusion is to remove noise from a given image according to the prompt. A prompt is a text description of the operation to be performed. At Stable Diffusion’s core are three main models: VAE (variational autoencoder), text-encoder (CLIP’s text encoder) and U-net.
Text-encoder (CLIP’s text encoder): CLIP stands for contrastive language-image pretraining. It is trained on image-text pairs. Image and text are encoded into two different vectors. CLIP returns the dot product of these two vectors. The resulting vector signifies the relation between image and text. This vector serves as an input to U-net.
U-net: Originally designed for image segmentation, in Stable Diffusion, U-net predicts the image noise based on input vectors.
The main issue here is the size of the image. Suppose you have a 512×512 image with three colour channels — red, blue and green; then there will be 512*512*3 inputs for the image to the U-net, which requires a significantly large number of resources. The solution to this problem is VAE.
VAE (variational autoencoder): VAE converts image representation into a low-dimensional representation called latent and vice-versa. In the above example, VAE converts the 512x512x3 image into 64x64x4 latent.
As shown in Figure 1, you are first required to input an image and prompt. Next, the text encoder encodes the prompt and the images into a vector. Simultaneously, the image is converted to latent by VAE. Now, random noise is added in latent. The newly formed latent is fed to the U-net along with the vector. U-net predicts the noise. The prediction is subtracted from the newly formed latent. The resultant latent is again fed to U-net with the same vector for ‘n’ times, at least 20 times. In every iteration, some noise is removed. After these iterations, the final latent is converted to image by VAE. This image is your final generated image.
Employing image masking
Image masking is a method used in photo editing to separate or isolate specific areas of an image from the rest, permitting more explicit editing and manipulation. It works like this: you cover the portions of an image you wish to conceal or protect, exposing the remaining regions for editing. This cover is referred to as a mask image in computer vision. It is usually represented in a grayscale image with whiteness denoting the extent of modification permitted.
To adjust the specific area of an image, a mask image is provided along with an image to be modified. This mask image will guide the image generation along with the prompt given.
Installing requirements: diffusers, Torch, and transformers
In this section, we will configure the system to run a Stable Diffusion model: runwayml/stable-diffusion-inpainting.
To run this model, you will need to have Python 3.9 or an earlier version. You can download Python 3.9 from https://www.python.org/ftp/python/3.9.13/.
After acquiring the compatible version, run the following command in the command prompt or terminal to install the required libraries.
$ pip install torch
Torch will provide the tensor format and other dependencies for the model.
$ pip install git+https://github.com/huggingface/transformers@v4.29-release
This will install the required neural network architecture for the model.
$ pip install diffusers
Diffusers will provide a pre-trained model from Stable Diffusion.
$ pip install pillow
Pillow will be used to convert the image to its pixel array and vice-versa.
$ pip install accelerate
The above library is not necessary but is suggested, as it will assist PyTorch to utilise the maximum resources available in your system.
You can check the installation using the command pip show <library> as shown below.
$ pip show torch
| Note: If you have multiple versions of Python, execute the above commands with the prefix py –[python version] –m as shown in the example below. |
$ py -3.9 -m pip install diffusers
$ py -3.9 –m pip show diffusers
For checking the version of Python installed on your system, run the following command:
$ py -0
Now that you have installed the necessary libraries, you can dig into the code.
Digging into the code
Let’s walk through the key components of the code.
Importing the installed libraries: Start by importing the installed libraries into your code. This will enable your code to access all the modules essential for its functioning.
from diffusers import StableDiffusionInpaintPipeline
from PIL import Image
import torch
Initialising pipe: The pre-trained model that will be used to create the picture will be provided by the pipe. You can also use another model instead of runwayml/stable-diffusion-inpainting.
pipe = StableDiffusionInpaintPipeline.from_pretrained(
    “runwayml/stable-diffusion-inpainting”,
    variant=”fp16”,
    torch_dtype=torch.float32,
)
Specifying the parameters: The model mentioned above requires three parameters: input image, prompt, and mask image. Mask images consist of white and black pixels, where white pixels represent the area of generation. Promptly describe the image you want to generate or the changes you want to make in the input image.
In the input image, you should provide an image to be modified or a blank white image.
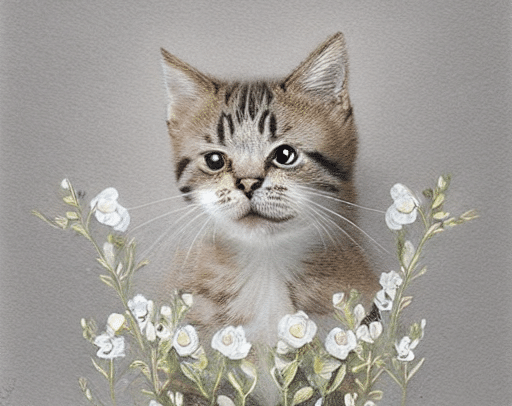
For generating an image from a blank white image, give the following commands:
prompt = “ cute little kitty with beautiful minimalist flowers, lots of white background”


input_image = Image.open(“white.jpg”)
mask_image = Image.open(“white.jpg”)
The input_image and mask_image consist of an image with only white pixels.
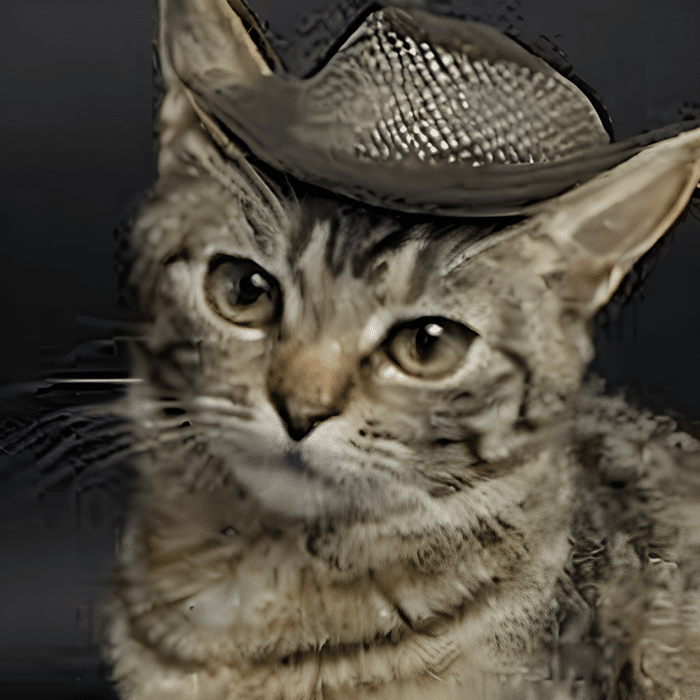
Image inpainting: For image inpainting, type:
prompt = “cat with a hat”
input_image = Image.open(“cat.jpg”)
mask_image = Image.open(“cat_mask.jpg”)
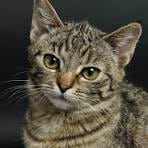
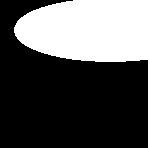
Calling pipe to generate an image: Pass the above specified three parameters to the pipe. Finally, the generated image will be stored in output_img.png.
image=pipe(prompt=prompt, image=input_image, mask_image=mask_image).images[0]
image.save(“./output_img.png”)
Final thoughts
Generative AI is a powerful, revolutionary tool that can bring about enormous changes in how we live—giving our thoughts an image or a voice to be heard. Stable Diffusion is just a torch bearer in the field of generative AI.
While generative AI brings numerous advantages, such as enhancing content creation and improving workflow, it also creates disorder if used incorrectly, like the use of deep fakes to falsify legal evidence and impersonate individuals without their consent. But the bottom line remains that generative AI is an accelerating force reshaping various fields, from medicine to content creation, by expanding the limits of artificial intelligence.


