Every time you log in to a website, you leave a footprint in the form of cookies. These can be used to gain unauthorised access to the information on your system. Let’s take a look at how AES 128 can be used to prevent cookie hijacking.
Cookies store small blocks of data created by a web server to help the site remember information about your visit. This is helpful for session management during logins and auto-filled form fields, user personalisation (where cookies retain information on user preferences and themes), and for tracking and analysing your web browsing pattern to recommend personalised ads, etc.
You may be wondering how long these cookies retain information. Well, there are different types of cookies. Session cookies store information only till you exit the browser, first-party cookies are stored directly on your computer and help with auto logins and more, secure cookies prevent unauthorised entry, and zombie cookies are present even when they have been deleted or the browser is exited.
The presence of these cookies can lead to unauthorised access to information or services in your computer system. If you look at your normal internet activity, you will find you visit quite a few websites every day. Since we enter sensitive information such as passwords, date of birth, bank account details, etc, when we visit these websites, there are chances this information may fall in the hands of an attacker who is trying to explore the vulnerabilities in the cookies. The attacker may steal the cookie using a fake login or link, put the cookie in the browser, and may fake your identity in the browser. This is known as cookie hijacking or session hijacking because it includes the exploitation of the session key (symmetric key for encrypting data). Common methods used by attackers for session hijacking include session fixation, session sniffing, cross-site scripting, brute force, etc.
In the project I am working on currently, we leveraged public key cryptosystem (RSA) and device attestation with FIDO2 specifications to ensure extreme security. However, the cookie hijacking vulnerability was still present and had to be dealt with on the server side. So I decided to use AES 128 to check for duplication of the user’s IP address. Unlike the RSA algorithm, AES (advanced encryption standard) requires that both the encryptor and decryptor use the same key, which makes symmetric algorithms much faster than the former. AES includes three block ciphers to encrypt and decrypt blocks of messages. Each cipher encrypts and decrypts data in blocks of 128 bits using cryptographic keys of 128 bits. Among the different modes of AES, we used fernet in CBC (cipher block chaining) mode because our project was auto logging off in one hour. So fernet, being smaller in size, was perfect for our use case and its use in the Flask application is given below.
from flask import *
from cryptography.fernet import Fernet

key = Fernet.generate_key()
f = Fernet(key)
app = Flask(_name_)
In the above code, we are importing Flask and fernet. The class helps with encryption and decryption using the keys generated, which contain bytes or string values. This key is an encoded 32-byte key, with which you may decrypt or encrypt messages.
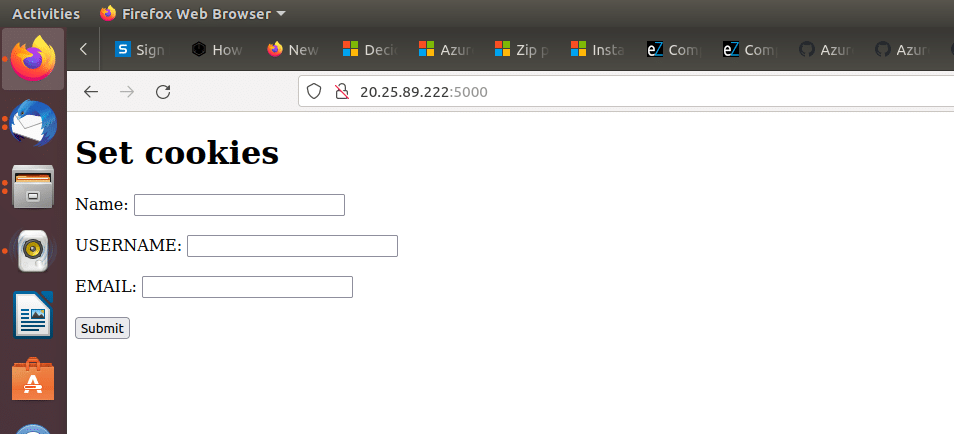
We may test this with the help of a simple HTML page, like the one shown in Figure 1.

@app.route(‘/login’, methods=[“GET”,”POST”])
def login():
name=request.form[‘name’].strip()
uname=request.form[‘uname’].strip()
eml=request.form[‘eml’].strip()
k=name+’$’+request.remote_addr+’$’+uname+’$’+eml
res=f.encrypt(k.encode()).decode()
resp = make_response(redirect(‘/dashboard’))
resp.set_cookie(‘username’, res, max_age=3600)
return resp
In the above code, we are reading from post requests where we get your name, user name and email, and save them after removing spaces.
We can then store the name, IP address, user name and email in the variable k, and encrypt it using the generated fernet key.
This gets redirected to the dashboard function. The respective variables containing the encrypted message are set in cookies and the maximum age condition is set as 3600.
@app.route(‘/dashboard’)
def dashboard():
username=request.cookies.get(‘username’)
k=f.decrypt(id.encode()).decode()
arr=k.split(‘$’)
name=arr[0]
ip=arr[1]
uname=arr[2]
eml=arr[3]
if ip==request.remote_addr:
return render_template(‘dashboard.html’,name=name,uname=uname,eml=eml)
else:
return render_template(‘error.html’,ip=ip,ip1=request.remote_addr)
app.run()
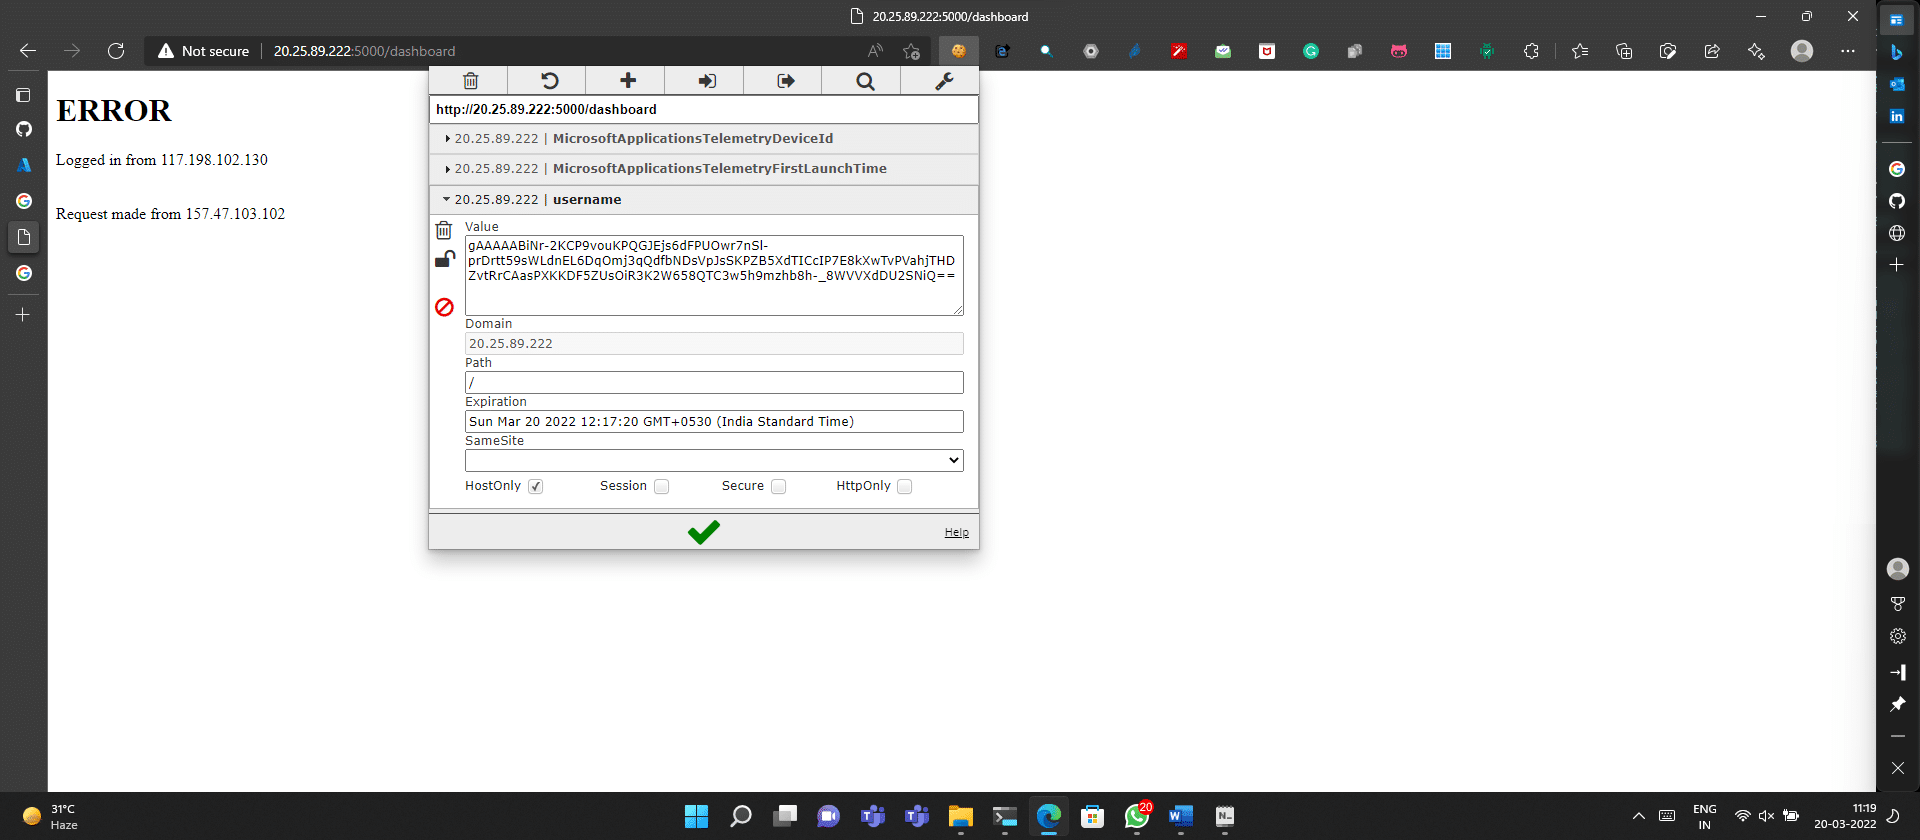
In the dashboard function we decrypt the message from cookies and save the data in the respective variables. Next, we check if the IP address provided in the cookie matches the current IP address of the user system. If any case of cookie hijacking is found, you’ll see an error page pop up in which the two different IP addresses are displayed and the user gets logged out of the page.

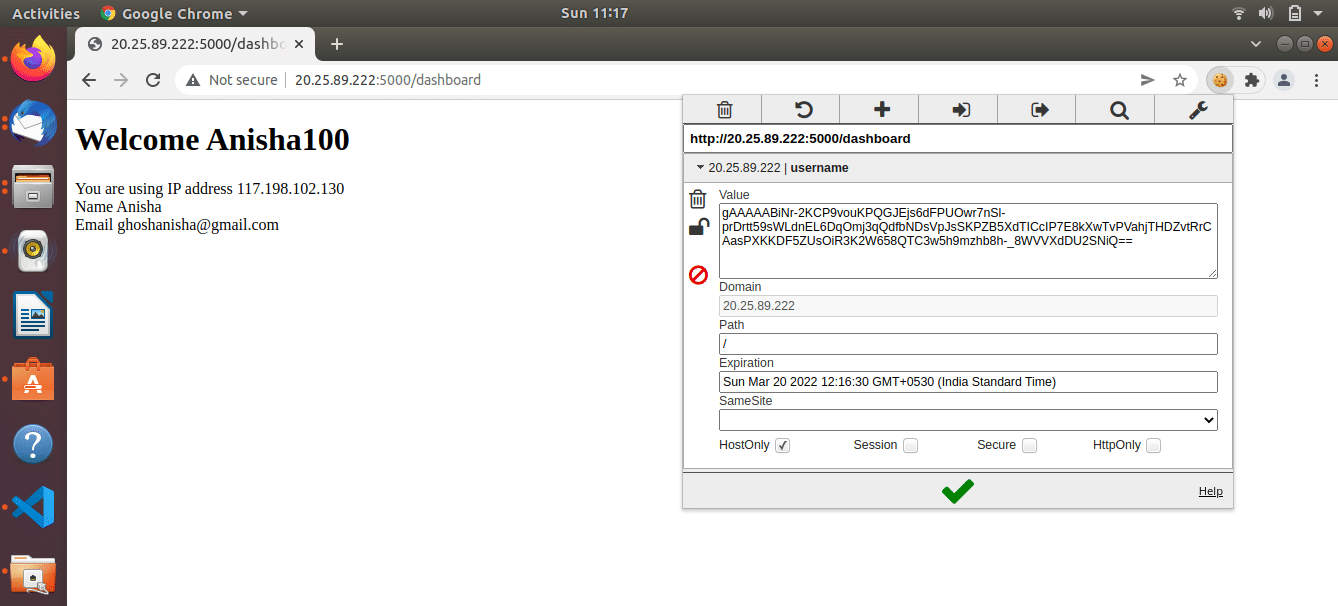
Figure 2 shows the sample page displayed to users after they enter their details. The IP address of the user machine is displayed along with other form details. These details may be misused by gaining unauthorised access to cookie details. In the page shown in Figure 2 we are sending cookie data to another device. In case the attacker gains access and tries to log in by pretending to be the user, the error page is displayed as shown in Figure 3 and cookie hijacking is prevented successfully.


