Git is a popular distributed version control system that allows developers to manage their source code history. It is a great tool for collaboration between the several developers who work independently on a particular module, and helps track changes in code. GitHub is the online hosting service that hosts the Git repositories. This article is aimed at developers who use Windows as their primary operating system.
Software development is not about writing a piece of code at one go and compiling it into a binary, but is a process of making continuous and iterative changes.
Keeping track of things is often difficult when there are too many bits and pieces of code to deal with. This gets even more difficult when several versions of the code are required, just in case the developer wants to go back to a previous version if something is broken in the current one.
Software engineering is a job that involves considerable social interaction. Although developers may work alone at their desks, they usually work together in well separated modules to get the entire application running. Hence, they need to be able to collaborate and have a single working version while they all add their versions to the source code.
These requirements ushered in version control systems that allow developers do just that. Over several years, many version control systems have emerged, each with its own set of features and nuances. Some popular examples are Git, Subversion and Mercurial. These are widely used in the software industry. This article looks at Git as a source control management system to keep track of code history.
Why Git?
Git is one of the most popular distributed version control systems, which allows developers to collaborate and keep track of the code history throughout the software development process. Its aim is speed, data integrity and distributed collaboration between non-linear workflows.
Git is open source and easy to get started with. It was originally authored by Linus Torvalds, the man behind Linux – one of the world’s biggest open source collaboration projects. Today, it’s a necessary skill in the software industry, as most companies rely on Git (or some other form of source control mechanism). While Git can be used to coordinate work among developers, it needs a centralised server to host the source code, dependencies and global history.
GitHub
GitHub is an online service that provides Git repository hosting and can be accessed from anywhere. It’s the most popular Web based Git hosting service with more than 40 million users. It hosts millions of open source and closed source repositories. GitHub has a simple and intuitive UI that allows users to get started with it easily without any prior knowledge of Git.
Let us look at two ways to use Git and GitHub to manage projects in Windows.
Creating a repository
Repositories are like folders for your projects and they contain your source code, configuration files, etc, which are stored in both GitHub servers and your local machine. GitHub allows you to create unlimited public and private repositories.
First, create an account at https://github.com/ and verify your email address.
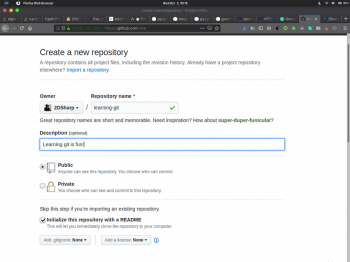
Then, to create a repository, click on the ‘+’ button on the top navigation bar or go to https://github.com/new. The GitHub wizard will help you create your first repository.
Write a repository name that describes the purpose of this project. You can change it later. Then you can write an optional description of the project in the textbox below.
After that, you are given a choice of creating either a public or private repository. Private repositories are only accessible to the owner and other collaborators of the repository. For now, we will create a public open source repository for everyone to access. You can make it private later on, in the settings.
GitHub then asks you to include a README file. This is an important file that describes the purpose of your repository with brief instructions on how to use it. It’s a good practice to have a README in each repository, so click the checkbox that states: ‘Initialise this repository with a README’.
Then you can add a .gitignore file. Select none from the list — we will create it manually in later steps. You can also choose a licence, though this is not necessary. You can add a licence to state the exact terms under which users of your project have to work.
You can visit https://choosealicense.com/ for more information about choosing licences.
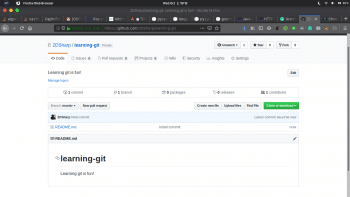
Go ahead and click ‘Create repository’ once you are done. GitHub will prepare a brand new repository for you, which is now publicly accessible at https://github.com/your-username/repository-name. You should be presented with a page similar to what’s shown in Figure 2.
This is the page where all your files are hosted. You can check the history, branches, collaborators and everything else about them that you will need for your project.
Configuring Git on Windows
Now, let us first check out the Git CLI tool for Windows. Just visit https://git-scm.com/download/win to download the Windows client installer.
Once it’s downloaded, run the installer and the client installation wizard will take you through the steps necessary.
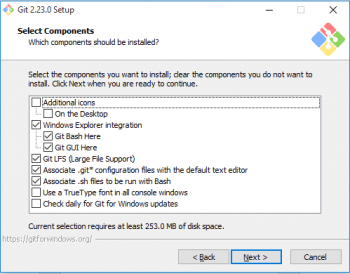
1. Select the desired location for installation; then, on the next page, you will be prompted to make a few selections. Check Figure 3 for a safe set of choices.
Make sure you select Git Bash here in order to be able to easily access it from Windows Explorer. Hit Next and Select if you want to have a start up option for Git.
2. After this step, you will be prompted to choose the default editor. If you haven’t used Linux enough, chances are that you don’t already know Vim, which is selected as default. Go ahead and select ‘Use the Nano editor by default’. Nano is a relatively easy and simple text editor that will get things done really quickly.
3. For the next step, you will be asked to adjust your PATH environment. Just select the default recommended option.
4. Then you will be asked to select an HTTPS transport backend. OpenSSL is the default option. It is a popular choice and also the preferred way to do things in the Git world. So keep it at the default ‘Use the OpenSSL library’ and hit Next.
5. The next option will specify how the Git client should handle line endings. The preferred way is to use the recommended default option, which allows you to locally handle line endings in Windows-style but while committing, you’ll use UNIX-style line endings for interoperability. In that way, you can use the repository in both Windows and Linux without any issues.
6. Now you’ll be asked to choose which terminal emulator to use – and anything is fine. MinTTY works great with Git; so we will go ahead with it for this tutorial.
7. For the extra options, keep the default settings and hit Next.
8. Once you are done, hit Install. You have the option to ‘Enable experimental, built-in add -i/p’ but since it’s experimental, this might not be stable yet. So keep this option unchecked and hit Install.
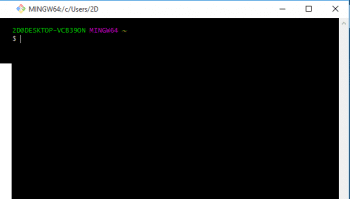
Launch the Git client and you will be presented with a screen similar to the one shown in Figure 4.
Now we have two options – we can either create a directory from scratch and then upload it to GitHub, or we can import an already created GitHub repository and start working from there.
If you have selected to include a README file or a licence in your repository, the latter will already have been populated by now and will be ready to be imported.
So, we can simply go ahead and write:
git clone https://github.com/username/repository
In my case this is:
git clone https://github.com/2DSharp/learning-git
This command will download the repository onto your local system for you to work on.
If you have created a private repository, a separate GitHub GUI client will pop up asking for your credentials; so enter your user name and password to proceed.
Now if you type ls and press Enter in the Git console, it will show you the list of files and folders available in the current directory. You can find your repository name there as well. To enter into that directory, run the command cd <repository-name>.
If you haven’t created the README or the licence file, you will need to initialise the repository first and add the remote server location where it is hosted. You can do this by typing the following:
git init
git remote add origin https://github.com/username/repository.git
Tip: By default, the directory is set to C:\Users\Windows Username. If you want to change the location where Git is cloned, simply cd into that directory and type git clone. Now, whatever changes we make in this folder will be tracked by Git.
So let us add a new file in the directory by going to Windows Explorer. One shortcut to opening up Windows Explorer to that directory is by running the following code:
explorer.exe .
Notice that the ‘.’ in the code means ‘current location’. This will directly open Windows Explorer in the current working directory.
Here you can make a new file with your favourite text editor. For example, let’s create a simple C source file called hello.c
You can also use Nano for this and run the following command:
nano hello.c.
You can save the file after editing it by pressing Ctrl+O and exit Nano by pressing Ctrl+X.
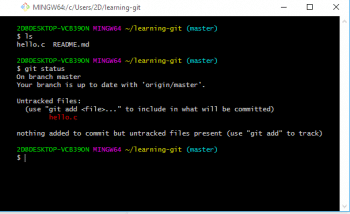
Once you are done saving the file in your repository folder, go to the Git CLI and run Git status.
You can open the Git Bash CLI from Windows Explorer by going to your desired directory, right clicking and selecting Git Bash here.
As you can see, your hello.c file is untracked, which means it has not been added to Git yet. To add it, simply run the following command:
git add hello.c
To remove a file from Git, use the following command:
git rm <filename>
If you want to remove a file name only from the server but not from your computer, type the command shown below:
git rm --cached <filename>
This way your file will be removed from the server but will remain in your computer as long as you don’t add it again.
Now you can see that the file has been added and is ready to be committed. A commit is a collection of changes in your repository. Think of it as adding a new feature or fixing a bug. Since we have added a new file to our repository, we will have to commit that change for it to be logged in the Git history.
Later on if we want to revert to a previous version, we can use a command to return to a specific commit.
To commit your changes, run:
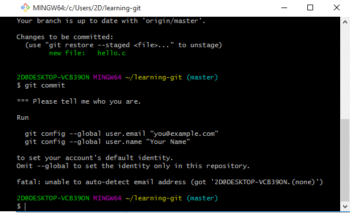
git commit
If this is your first time on Git, you will get a message like the one shown in Figure 6.
So you have to tell the Git client who you are by giving your credentials. These credentials will be linked to all of your commits, so Git will know who made what changes in a collaborative environment.
Next, run the following commands:
git config --global user.email “<your email address linked to git>”
git config --global user.name “<Your name in Github>”
Now run Git commit again and you will see the Nano editor open up. Here you’ll have to write your commit message explaining what exactly a particular change will do.
For example, your commit message can say ‘Add new hello.c file’.
Tip: Make sure your commit messages are short (about 80 characters) and meaningful. If you have to write a long description, first write your short commit message and then press Return twice to go to the third line and start writing as long a description as you want.
Now save and exit the editor by pressing Ctrl+O and Ctrl+X.
After you are done making the changes, it’s time to push them to the remote server for everyone to access.
Run the following command:
git push origin master
Git will ask you to enter your user name and password. Go ahead and do so. Once you are done, you will see that your files have been uploaded to GitHub with the new commit messages.
Now if you are working on the same repository with someone else, chances are that they have made some changes before you uploaded your changes.
To download all of their new changes, simply run the following command:
git pull origin master
This will re-synchronise your local repository with the copy on the server. This is the typical workflow while on a project. However, you may need to do a lot of other things sometimes like checking out a previous commit, or modifying the Git history.
To see the history of commits in your repository, run:
git log
This will list out all the changes made along with their commit hashes and commit messages.
If you want to go back to a previous commit but still have the files intact (which means, the new changes will be untracked), use the command given below:
git reset <commit-hash>
The commit-hash is the long string of characters after the word commit in the Git log. This can be used to uniquely identify a commit.
If you want to go back to a specific commit by undoing all the changes after it, you can run:
git reset --hard <commit-hash>
Warning: Use this feature sparingly – only when you are sure that you have no other choice but to lose your current changes.
Sometimes we just want to see the state of the files in a previous branch without having to lose all our future changes. So, to simply go back in time temporarily and come back, you can run:
git checkout <previous-commit>
To return to the present, run:
git checkout master
Sometimes we need to exclude some files from source control so that others can’t see them – for example, configuration files containing sensitive information like database passwords and API keys, IDE configuration files like .idea for IntelliJ IDEA users, or auto-generated files that can be reproduced from the files present in the repository like binaries.
To do that, we create a special file called .gitignore. In this file, simply write the pattern of files or directories to exclude from the source control.
An example .gitignore file looks like what’s shown below:
.idea/
binaries/
db-config.yml
*.exe
.idea and binaries are folders that will be excluded entirely. They will not be uploaded to the Git server. db-config.yml is a file containing our database configuration, and any file matching that name will be excluded as well. *.exe tells Git to exclude all the files that end with .exe. Here, ‘*’ is a wild card character, which means that any set of characters can take its place.
This .gitignore file also has to be added to the repository by calling git add .gitignore, committing and pushing it to the server.
Warning: Do not add sensitive information like passwords and API keys to source control. Always add them to .gitignore. As a good practice, add a <config-filename>.example to the repository with fake values which other collaborators can rename with their own keys and passwords.
In this tutorial we have looked at the basic steps to get you started with Git and GitHub on Windows and to get you familiar with the version control system. Git is a very powerful tool and can be used in many ways. Covering all the aspects of it is beyond the scope of this tutorial.
I recommend that you go through https://git-scm.com/docs/gittutorial and start using Git for your next project so that you learn more about it.


