This article explains in brief how to create a Hello World API in Python, and publish it on the WSO2 API Manager. It is intended for first-time users of WSO2 API Manager and those who are new to the REST API.
WSO2 API Manager is an open source tool that supports complete API life cycle management. It provides support for creating, publishing, monitoring and managing APIs. An API Manager (APIM) provides various features for providing security, versioning, publishing, monitoring, life cycle management, governance, etc, for the APIs. APIM is available on multiple platforms like AWS Cloud Formation, Kubernetes, Docker, Docker Compose, Vagrant, Helm, CentOS, Mac OS, Ubuntu, Windows, etc.
This article is divided into two parts, the first of which explains how to create a Hello World API and then host it using the Flask server. The second part covers the essential steps for setting up the API manager to publish and access the APIs.
Setting up the Hello World API on Flask
The API (Hello World) to be published using APIM is set up on a Flask server. The API returns ‘Helloooo World!’ text on the GET request.
1) Install Python from https://www.python.org/downloads/windows/.
2) Install the Flask server using the command pip install Flask.
3) Create a ‘Hello World’ program in a normal editor like Notepad or Python IDEs like PyCharm with the following code:
from flask import Flask
app = Flask(__name__)
app.config[“DEBUG”] = True
@app.route(‘/hello’, methods=[‘GET’])
def hello():
return ‘Helloooo World!’
if __name__ == “__main__”:
app.run()
4) Save the above code as hello.py. The program can be executed using the command python hello.py. The following messages are displayed in the terminal when you run the program:
* Serving Flask app “hello” (lazy loading)
* Environment: production
WARNING: Do not use the development server in a production environment.
Use a production WSGI server instead.
* Debug mode: on
* Restarting with stat
* Debugger is active!
* Debugger PIN: 301-321-685
* Running on http://127.0.0.1:5000/ (Press CTRL+C to quit)
5) Access localhost:5000/hello using a browser and your ‘Hello World’ application is ready.

Setting up the API Manager (APIM)
WSO2 APIM can be downloaded from https://wso2.com/api-management/install/. For this article, APIM has been installed on Windows with a single node deployment. Before running APIM, you need to install Java and set the JAVA_HOME environment variable.
Start APIM using the command wso2server.bat –run from the path <installation Path>API Manager\2.6.0\bin. The following messages get displayed in the command prompt if APIM has started successfully:
INFO - StartupFinalizerServiceComponent Server : WSO2 API Manager-2.6.0
INFO - StartupFinalizerServiceComponent WSO2 Carbon started in 83 sec
INFO - CarbonUIServiceComponent Mgt Console URL : https://192.168.1.14:9443/carbon/
INFO - CarbonUIServiceComponent API Store Default Context : https://192.168.1.14:9443/store
INFO - CarbonUIServiceComponent API Publisher Default Context : https://192.168.1.14:9443/publisher
Publishing the ‘Hello World’ API using APIM
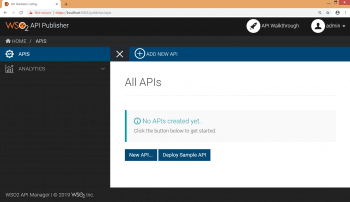
APIM’s ‘Publisher’ publishes APIs, provides documentation, etc. The API Publisher URL is https://<IPAddress or hostname>:9443/publisher. The default credentials are admin/admin. You need to access the Publisher URL to publish the Hello World API. Figure 1 shows the page when no other API is published on APIM. The page allows you to add a new API.
The steps for publishing a new API are as follows:
1) Select ‘ADD NEW API’ to start publishing the first API, as shown in Figure 1.
2) Select ‘Design a New REST API’ to add a new API.
3) You will get a Design API page, where you need to enter the general details of the API to be published like the name, context, version, etc. The context is the path in the URL that will be used to access the API. Access control and visibility of the API can be controlled by adding the appropriate values.
4) Next, define the API details like the URL pattern and resources. Note that the context and the version data given in the ‘General Details’ section is already reflected in the URL pattern. For the Hello World API, the resource can be selected as GET and the resource path can be given as ‘/’. Select ‘Add’ after entering the details.
5) Click on GET / to add details of the API like the parameters, content type, etc. Select Implement to add the URL details of the Hello World API to be published.
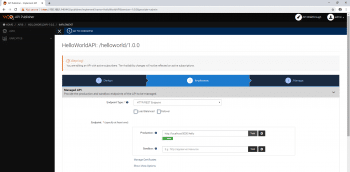
6) Select Endpoint Type as HTTP/REST Endpoint. Provide the production endpoint as http://localhost:5000/hello, the URL that is used to access the API endpoint on Flask. Click Test to check whether the APIM is able to access the URL. If Test is successful, then we will get the following output in the Flask server:
127.0.0.1 - - [26/Mar/2019 18:55:26] “HEAD /hello HTTP/1.1” 200 -
7) APIM will show the endpoint as ‘valid’ as shown in Figure 2.
8) Select Manage to provide details of API throttling, configurations, subscription tiers, etc.
9) Select Save & Publish to publish the API.
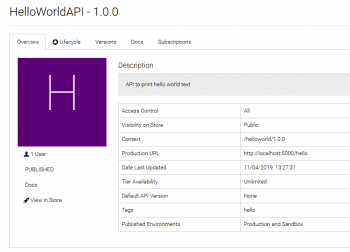
10) When the API is published successfully, the publisher will list the details as shown in Figure 3. The published API can be viewed in the API Store.
Get access to the Hello World API from APIM
APIs can be discovered and subscribed from the API Store, the URL for which is https://<IPAddress or hostname>:9443/store. The default credentials are admin/admin.
Create applications in APIM
APIs can be accessed using subscriptions against an ‘Application’. An application is a logical collection of APIs. Applications allow you to use a single access token to invoke a collection of APIs and to subscribe to one API multiple times with different SLA levels. The DefaultApplication is pre-created and allows unlimited access, by default.
Follow Steps 1 and 2 to add a new application to an API from Store.
1) Select Applications from the left-hand side of the page. It will display the list of applications.
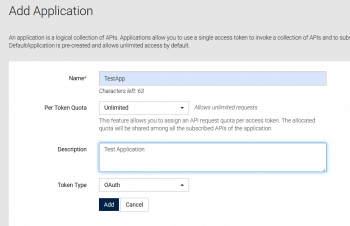
2) Select Add Application to add a new application. Enter the details of the application like the name and description, and then select the Token Type (OAuth and JWT) to be used for authentication, and the API request quota per access token. Select Add to add the new application. The new application’s ‘TestApp’ gets added to the list of applications available.
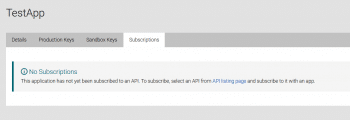
3) Select TestApp from the applications list and go to Subscriptions. As you can see, there are no subscriptions for the new application created. Before subscribing to APIs, an access token/key has to be generated once for every application. This access token needs to be present with every request sent to APIM to access the subscribed API. The APIM checks the token value before allowing access to the API.
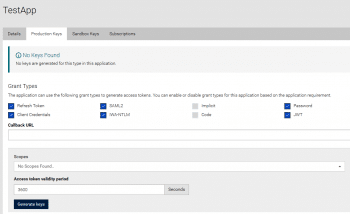
4) Go to Production Keys to generate keys. As you can see in Figure 7, no keys have been generated till now for this application. Select Generate Keys.
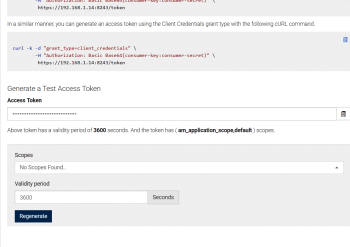
5) Keys will be generated as shown in Figure 8. The access token generated needs to be used in the ‘Authorization : Bearer’ of the Request Header. The keys generated have a validity period as mentioned in the Validity Period. The key has to be regenerated once the validity is over. The validity period can be changed as per the requirements.
Subscribe to an API from API Store
Now that you have created an application and access token, you can start subscribing to the Hello World API.
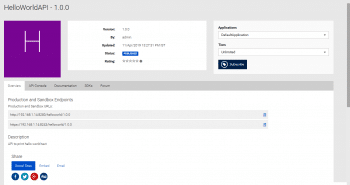
1) Select ‘APIS’ from the left-hand side of the page. It will display the list of APIs available. Select the Hello World API. The API details will be displayed as shown in Figure 9. The URLs used to access the APIs through APIM are listed in the ‘Overview’ section. Http URL is http://<ipaddress/hostname>:8280/helloworld/1.0.0. Https URL is https://<ip-address/hostname>:8243/helloworld/1.0.0.
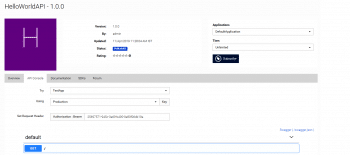
2) Select TestApp from the applications list in the top right corner of the page and click on Subscribe. Go to the API Console Tab and you can see the access token getting automatically reflected against the authentication part.
3) The API can be accessed via the cURL command as given below:
curl -k -X GET “http://<ip-address/hostname>:8280/helloworld/1.0.0” -H “accept: text” -H “Authorization: Bearer 25697571-945c-3a69-b490-9e80f06db19a”
4) You will get the following message in the Flask terminal:
127.0.0.1 - - [26/Mar/2019 18:55:26] “GET /hello HTTP/1.1” 200 -
5) You can also access the API using the Python code given below. For this code to work, you need to install the Python requests library by using the command pip install requests.
url = ‘http://192.168.1.14:8280/helloworld/1.0.0’
header = {‘Authorization’: ‘Bearer 25697571-945c-3a69-b490-9e80f06db19a’}
response = requests.get(url, headers=header)
print(“Response code: “ + str(response.status_code))
print(“content: “ + str(response.text))
This article introduces beginners in REST API and API gateways to how to add a REST API to an API gateway. The latter can be used to host organisational or community APIs in the respective cloud environment. It helps in the reuse, adoption and faster acquisition of developed cloud services.


