

Blue Ocean is a Jenkins plugin that enhances the user experience based on a personalised modern design. It has been built from the ground up to provide an interactive view of the Jenkins pipeline. It reduces the clutter and increases clarity for all users.
In Jenkins, pipelines used to be created using different plugins such as Build Pipeline or Build Flow, and so on. However, after the Jenkins 2.0 release, pipelines (including the Blue Ocean plugin) have been integrated with the initial configuration.
The Build Pipeline plugin has been one of the most popular. It allows the creation of different styles of build jobs, and then connects all the jobs using upstream and downstream configurations. Once these configurations are completed, the Build Pipeline view can be created and the first job can be configured as a Start job in the Build Pipeline configuration. Once configured successfully, visualisation is available as per the relations configured in upstream and downstream jobs.
Pipeline as a Code
Pipeline as a Code was introduced using the scripted pipeline, which is an expression through which all activities involved in application life cycle management can be automated using the script. A domain specific language is used to create the pipeline.
In Jenkins, a pipeline can be created using Jenkinsfile, which is a text file. If the name is different from the default one, then it has to be explicitly mentioned in the Pipeline configuration. This Jenkinsfile is committed in the source code repository such as Git or SVN.
Once the repository URL is provided, Jenkins searches for Jenkinsfile in each branch that is available in that repository. Once it finds this file in one or multiple branches, it starts execution.
You can filter branches based on wild cards to avoid multiple executions of pipeline code. A Jenkinsfile can be written using two types of syntax:
- Scripted pipelines
- Declarative pipelines

Scripted pipelines
These are available with Jenkins 2.0. The learning curve in this case is a bit steep for non-programmers. One or more node blocks are used.
node {
stage(‘Build’) {
steps {
//
}
}
stage(‘Test’) {
steps {
//
}
}
stage(‘QA Deploy’) {
steps {
//
}
}
stage(‘pre-prod Deploy’) {
steps {
//
}
}
}
Declarative pipelines
This is a new feature from Jenkins. It has an easy learning curve. Pipeline blocks define the entire work.
pipeline {
agent {
node {
label ‘master’
}
}
stages {
stage(‘Build’) {
steps {
//
}
}
stage(‘Test’) {
steps {
//
}
}
stage(‘QA Deploy’) {
steps {
//
}
}
stage(‘pre-prod Deploy’) {
steps {
//
}
}
}
}
In the next section, we will look at how to use Blue Ocean to create pipelines.
A demo on how to use Blue Ocean
Blue Ocean is a new experience for Jenkins users. It provides a UI to create pipeline syntax. Blue Ocean is available as a suite of plugins on Jenkins or as a part of Jenkins in Docker. It is not installed by default as a plugin.
Suite of plugins on Jenkins: Go to Manage Jenkins -> Manage Plugins -> Available Tab -> Blue Ocean Plugin. Blue Ocean and all its other dependent plugins are installed.
Jenkins in Docker: The Blue Ocean suite of plugins is also bundled with Jenkins as part of a Jenkins Docker image (jenkinsci/blueocean), which is available from the Docker Hub repository.
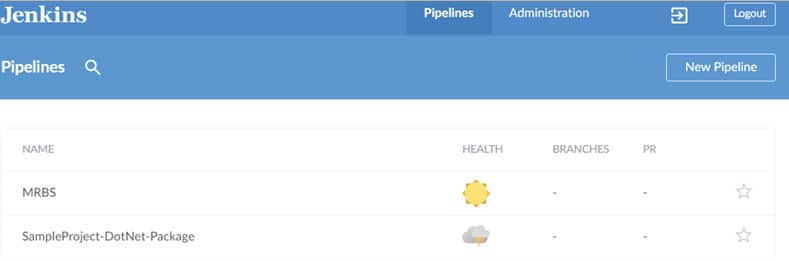
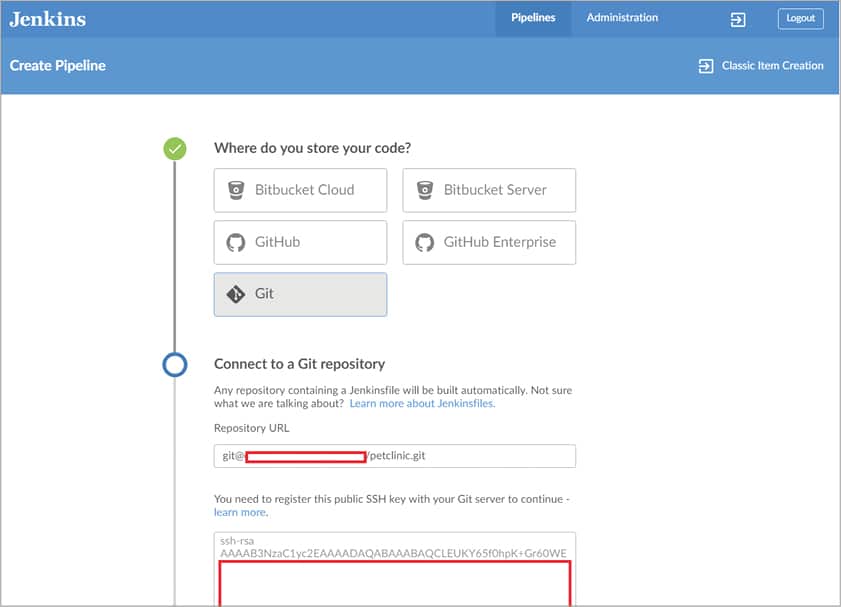
Let’s look at how to create a Jenkins pipeline in Blue Ocean. Go to Jenkins Dashboard and click on Open Blue Ocean. The Jenkins Blue Ocean dashboard displays all the pipelines and all the build jobs available in the traditional Jenkins dashboard. Click on New Pipeline.
We are going to use the Git repository, so select Git and provide the SSH URL. Now, copy the SSH key provided in the Jenkins dashboard. Next, configure the SSH key in the Git repository settings, and click on Create Pipeline.
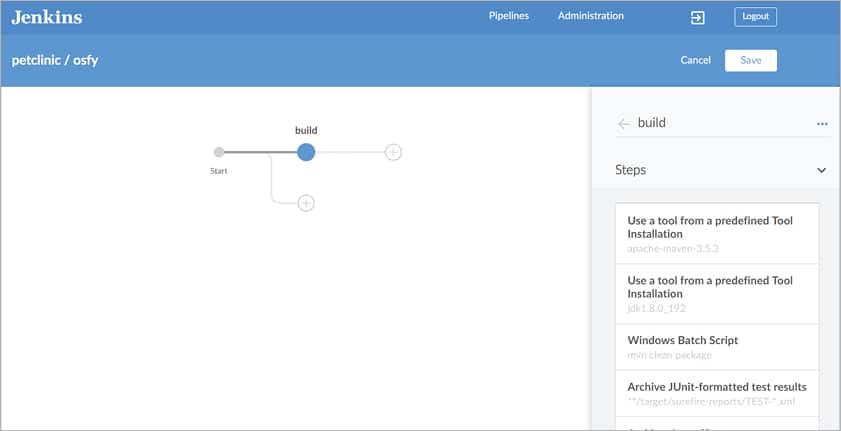
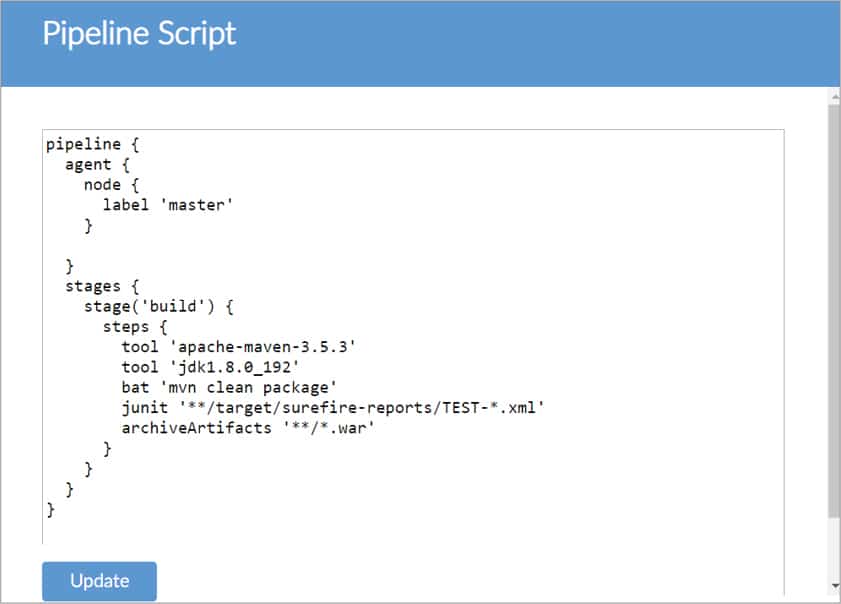
Now, configure the agent as the master. Stage is required in the pipeline, so click on the + sign.
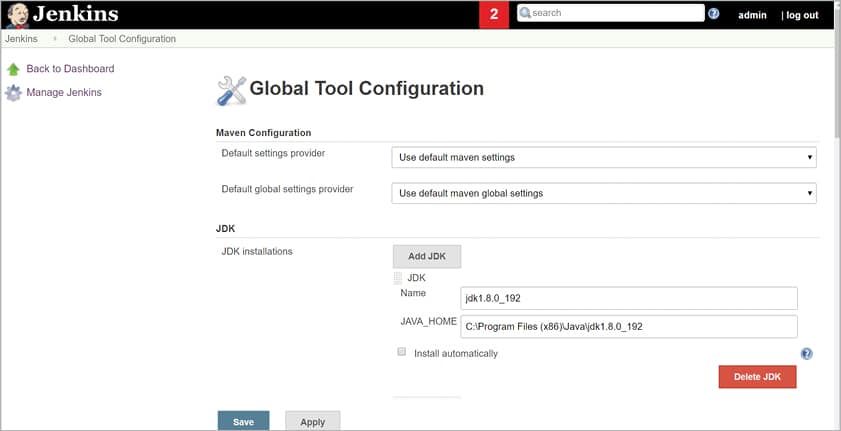
Go to Manage Jenkins -> Global Tool Configurations -> Note the name of the Java Configuration.
Go to Manage Jenkins -> Global Tool Configurations -> Note the name of the Maven Configuration
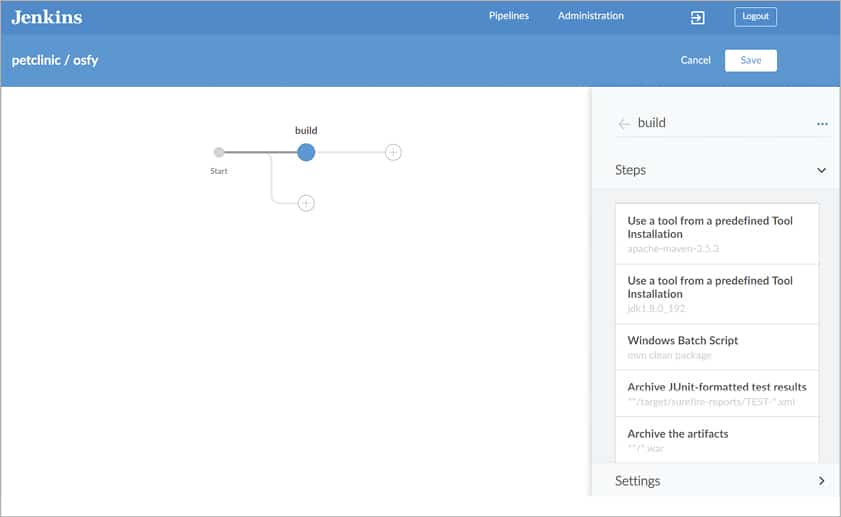
For a sample Java project:
Add Step -> Use a tool from a predefined tool installation -> Apache-Maven-3.5.3
Add Step -> Use a tool from a predefined tool installation -> jdk1.8.0_192
Add Step -> Windows Batch Script -> mvn clean package
Add Step -> Archive JUnit-formatted test results -> **/target/surefire-reports/TEST-*.xml
Add Step -> Archive the artifacts -> **/*.war
(As given in Figure 6.)
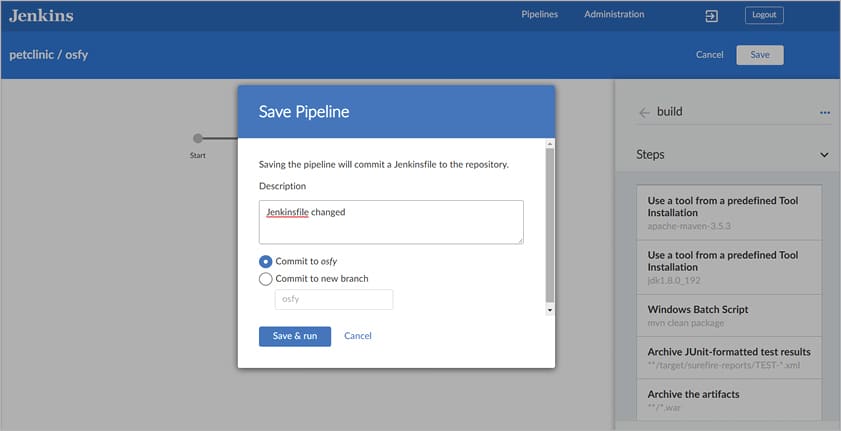
 Now, click on the Save button. Provide a description, select Commit to Branch*, and click on Save & Run.
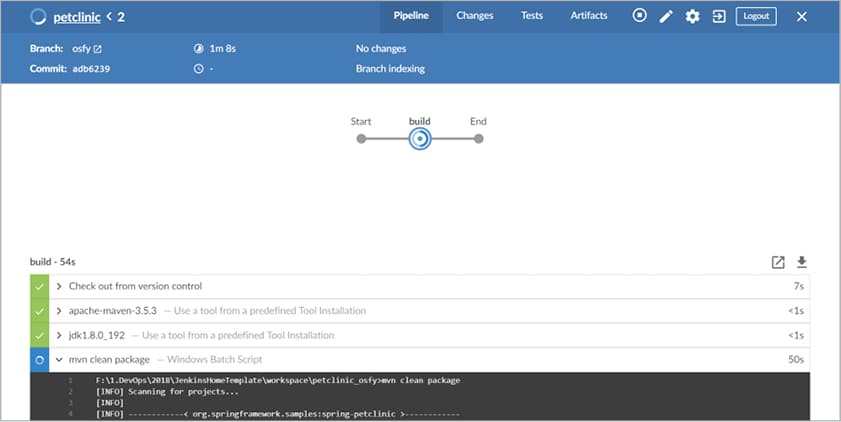
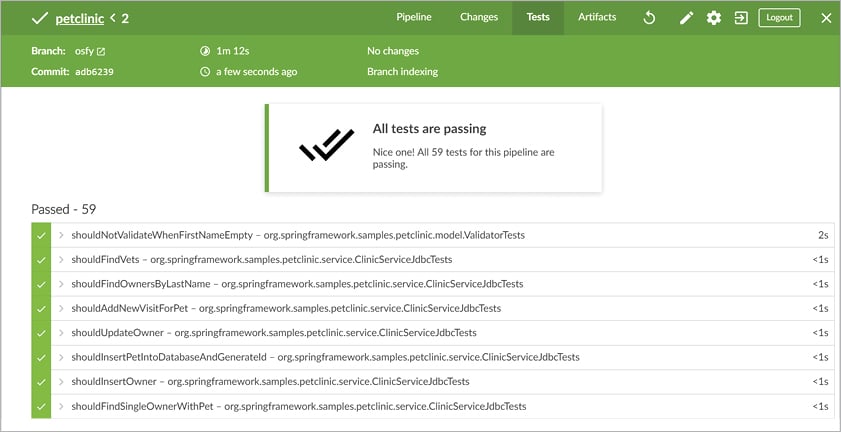
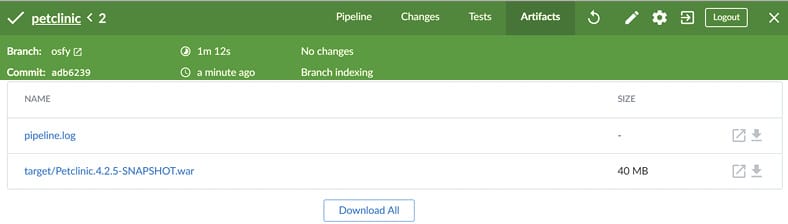
Verify the execution of the pipeline. Click on Tests in the Blue Ocean dashboard and verify all the results. Click on Artifacts in the Blue Ocean dashboard, and verify all the packages or artifacts.
By configuring the above pipeline in Blue Ocean, the Pipeline script shown in Figure 11 is generated and saved in the version control system.
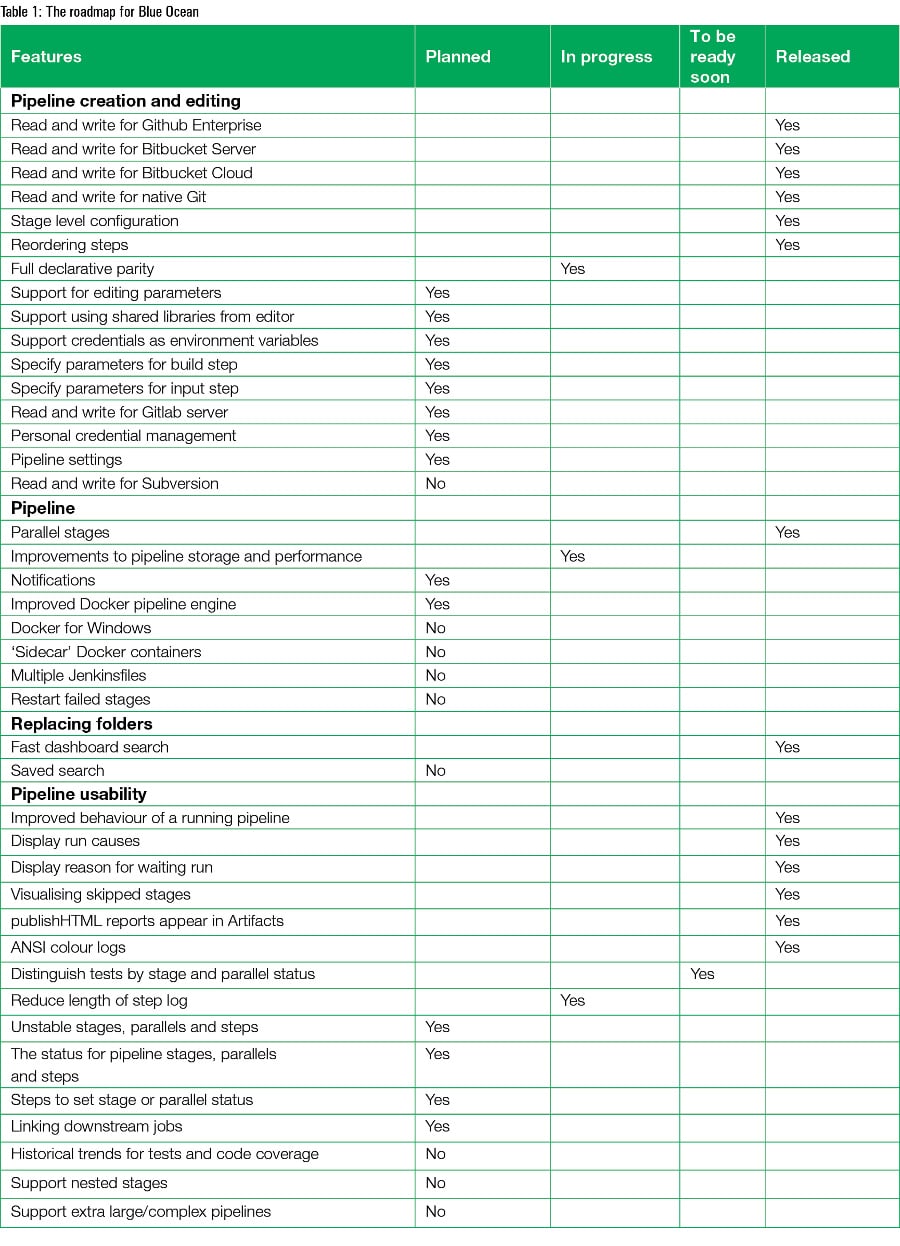
Table 1 gives the roadmap for Blue Ocean (Reference: https://jenkins.io/projects/blueocean/roadmap/).


