The powerful features of the Firebase ML Kit enable developers to take their apps to a new level. Firebase requires minimum expertise in machine learning but takes care of the nitty gritty. Firebase is a Google I/O product, and uses its cloud platform Cloud Vision.
Google I/O has introduced the Firebase ML Kit this year to those who are trying hard to excel in machine learning (ML). The kit comes with a number of ML features that can be added to your project, even if you have minimal expertise in machine learning.

In this tutorial, we will demonstrate the working of the algorithm in this kit, using the demo code and account provided by Google. The features in the kit include text recognition, face detection, object labelling, etc. This article will also demonstrate a ‘text detection’ application, which opens the Open Source For You website, when the text ‘OSFY’ is found in a scan.
Mobile application developers currently use TensorFlow and TensorFlow Lite to create ML models, which requires knowledge of machine learning. Google uses its Cloud Vision API to make things easier. The ML Kit uses the same, and is built on top of TensorFlow Lite along with the integrated Neural Network API. The ML Kit is user friendly and accesses these APIs through the Firebase interface to implement the features mentioned above, reducing the effort needed to create ML models.
Getting started
Firebase provides ML Kit sample code at https://github.com/firebase/quickstart-android, from which the ML Kit folder can be cloned. The code will provide a still image analysis and a live preview analysis, and many features as well. But to run the project we need to initialise Firebase.

Setting up Firebase
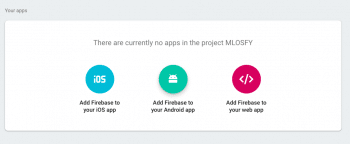
Open the Firebase console. Go to ‘Recent Projects’, and click on ‘Add Project’ (Figure 1).
Enter the details, such as the name of the project, location, etc. Inside the console, select your platform (Figure 2). In this case, it’s Android.
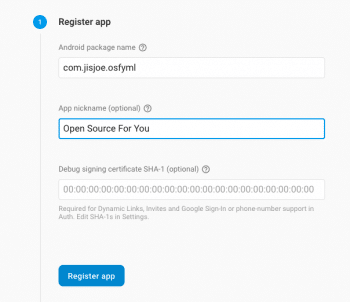
Fill in the package name and nickname for the project (Figure 3).
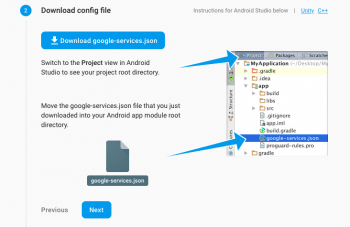
Download the .json config file and copy to the Android projects ‘app’ folder, after selecting ‘Project view’ (Figure 4).
Add the following line to the project level gradle file:
classpath ‘com.google.gms:google-services:4.0.1’ |
Add the following code to <project>/<app-module>/build.gradle):
implementation ‘com.google.firebase:firebase-core:16.0.1’ |
Add the following line to the bottom of the file:
apply plugin: ‘com.google.gms.google-services’ |
Finally, sync the project gradle file.
Now run the project. The Firebase console will verify and ensure that the configuration is correct.
Enabling Firebase for ML Kit
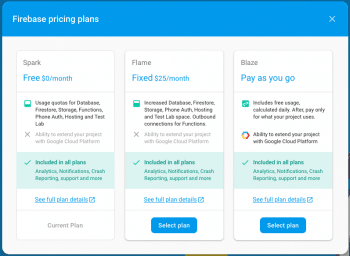
To use ML Kit, you need to switch to Google’s Blaze plan (Figures 5 and 6).
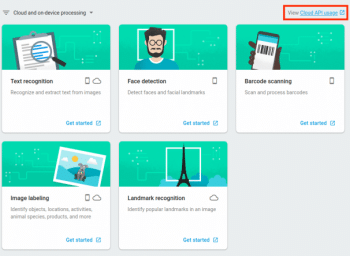
In order to run the application, the Google Cloud Vision API must be enabled. This is required to enable billing as well as to run the project successfully. API usage can be tracked using a separate link (Figure 7).
Running the project
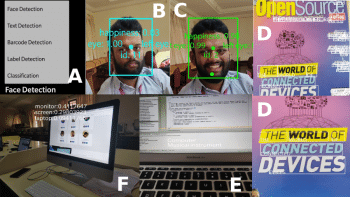
The project can be run now, and the result will include the option to select live detection or still image analysis. There will also be an option to change features, such as text detection, face detection, etc. Figure 8 shows a demo of each of these features.
In Figure 8, (A) shows the available features. Figures (B) and (C) show face detection, along with the happiness level indication. (D) shows text detection, (E) shows label detection and (F) classifies items on the screen.
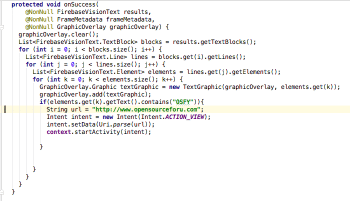
As an example, let’s focus on text detection. Here, a block of text is scanned, and if the text ‘OSFY’ is found, then the website www.opensourceforu.com is opened. The application uses the following code inside the ‘onSuccess’ function:
List<FirebaseVisionText.TextBlock> blocks = results.getTextBlocks();for (int i = 0; i < blocks.size(); i++) {List<FirebaseVisionText.Line> lines = blocks.get(i).getLines();for (int j = 0; j < lines.size(); j++) {List<FirebaseVisionText.Element> elements = lines.get(j).getElements();for (int k = 0; k < elements.size(); k++) {GraphicOverlay.Graphic textGraphic = new TextGraphic(graphicOverlay, elements.get(k));graphicOverlay.add(textGraphic);if(elements.get(k).getText().contains(“OSFY”)){String url = “https://www.opensourceforu.com”;Intent intent = new Intent(Intent.ACTION_VIEW);intent.setData(Uri.parse(url));context.startActivity(intent);}}}} |
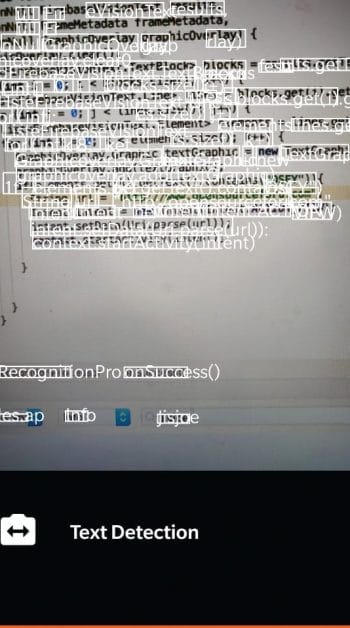
Here, the blocks detected are processed to check for the required string pattern, and the website is opened on being found. Figure 9 shows the scanned code block, and Figure 10 shows the scanning process.


