Bugzilla is Free/Libre and Open Source (FLOSS) bug tracker software developed by the Mozilla project. In this 20th article in the DevOps series, we will learn how to set up and configure Bugzilla.
Bugzilla is Web based and written using the Perl programming language. Released on August 26, 1998, it is used by a number of other FLOSS projects such as the Linux kernel, GNOME, Red Hat, Apache and KDE. It requires a database, Web server and at least Perl 5 to run. You can also configure it to use an SMTP mail server to send emails. It has been released under the Mozilla Public License.
Setup
A CentOS 7 (x86_64) guest virtual machine (VM) using KVM/QEMU will be used to install and configure Bugzilla. The host system is a Parabola GNU/Linux-libre x86_64 system, and Ansible is installed using the distribution package manager. The version of Ansible used is 2.6.0 as indicated below:
$ ansible --version

ansible 2.6.0

config file = /etc/ansible/ansible.cfg

configured module search path = [‘/home/guest/.ansible/plugins/modules’, ‘/usr/share/ansible/plugins/modules’]

ansible python module location = /usr/lib/python3.6/site-packages/ansible

executable location = /usr/bin/ansible

python version = 3.6.5 (default, May 11 2018, 04:00:52) [GCC 8.1.0]
The Ansible inventory, playbook and configuration files are created on the host system as follows:
ansible/inventory/kvm/

/playbooks/configuration/

/files/
The inventory/kvm/inventory file contains the following:
bugzilla ansible_host=192.168.122.87 ansible_connection=ssh ansible_user=centos ansible_password=password
A ‘centos’ user is created in the guest VM, and sudo access is provided for this user using the visudo command. SELinux needs to allow access for port 80. You should also add an entry in the /etc/hosts file for the CentOS VM, as shown below:
192.168.122.87 bugzilla
You can now test connectivity from Ansible to the CentOS 7 VM using the following command:
$ ansible -i inventory/kvm/inventory bugzilla -m ping

sensu | SUCCESS => {

“changed”: false,

“ping”: “pong”

}
Repository
The installation of Bugzilla requires additional repositories — deltarpm and epel-release. These need to be installed first, and then ‘yum update’ is required to update the cache. The Ansible playbook for installing the repositories is given below:
---

- name: Repository setup

hosts: bugzilla

become: yes

become_method: sudo

gather_facts: yes

tags: [repo]

tasks:

- name: Install additional repositories

yum:

name: “{{ item }}”

state: present

with_items:

- “deltarpm”

- “epel-release”

- name: Yum update

yum: name=* update_cache=yes state=present
The above playbook can be invoked using the following command:
$ ansible-playbook -i inventory/kvm/inventory playbooks/configuration/bugzilla.yml --tags repo -vv -K
The ‘-vv’ represents the verbosity in the Ansible output. You can use up to four v’s for a more detailed output. The ‘-K’ option prompts for the sudo password for the ‘centos’ user account.

HTTPD
Bugzilla does require a Web server and the Apache HTTP (httpd) server package, and its dependencies need to be installed. The firewall needs to allow port 80. After installing the packages, the httpd service is started, and we wait for the server to listen on port 80. The Ansible playbook for the above tasks is as follows:
- name: Install httpd

hosts: bugzilla

become: yes

become_method: sudo

gather_facts: true

tags: [httpd]

tasks:

- name: Install httpd and dependency packages

yum:

name: “{{ item }}”

state: present

with_items:

- “httpd”

- “httpd-devel”

- “mod_ssl”

- “mod_perl”

- “mod_perl-devel”

- firewalld:

port: 80/tcp

state: enabled

- name: Start httpd

service:

name: httpd

state: started

- wait_for:

port: 80
The above playbook can be invoked using the following command:
$ ansible-playbook -i inventory/kvm/inventory playbooks/configuration/bugzilla.yml --tags httpd -vv -K
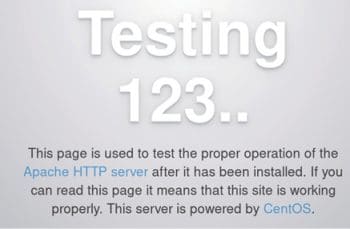
You can now open the following URL http://192.168.122.87 on your host system, and you should see the default httpd home page, as shown in Figure 1.
MariaDB
Bugzilla requires a database and we shall use MariaDB, the community-developed fork of the MySQL database. MariaDB and a few dependency packages need to be installed. The /etc/my.cnf configuration file needs to be updated with ‘max_allowed_packet=4M’ as required by Bugzilla. The database server is then started, and we wait for the server to listen on port 3306. A ‘bugs’ user account is created in MariaDB for use with Bugzilla along with a password. A ‘bugs’ database is also created. The Ansible playbook for setting up MariaDB is as follows:
- name: Install and configure MariaDB

hosts: bugzilla

become: yes

become_method: sudo

gather_facts: true

tags: [mariadb]

tasks:

- name: Install MariaDB and dependency packages

yum:

name: “{{ item }}”

state: present

with_items:

- “mariadb-server”

- “mariadb”

- “mariadb-devel”

- “MySQL-python”

- name: Allow maximum allowed packet

lineinfile:

path: /etc/my.cnf

line: ‘max_allowed_packet=4M’

- name: Start mariadb

service:

name: mariadb

state: started

- wait_for:

port: 3306

- name: Create bugs database user

mysql_user:

name: bugs

password: bugs123

priv: ‘*.*:ALL,GRANT’

state: present

- name: Create a database

mysql_db:

name: bugs

state: present
The above playbook can be invoked using the following command:
$ ansible-playbook -i inventory/kvm/inventory playbooks/configuration/bugzilla.yml --tags mariadb -vv -K
Bugzilla
Perl is required for Bugzilla, and we need to install the same and a few other Comprehensive Perl Archive Network (CPAN) dependencies. The Bugzilla-5.0 tarball is downloaded and copied to /var/www/html/bugzilla. The sources come with a checksetup.pl script that you can invoke to see if the minimum installation requirements are met. The first time you invoke the script, it will exit with errors stating that the Perl modules are missing. You can then use the install-module.pl script to install the Perl dependencies. You should then rerun the checksetup.pl script to check against the installed Perl modules. The /var/www/html/bugzilla/localconfig file needs to be updated with the database password. A bugzilla.conf for the Web server is created at /etc/httpd/conf.d/bugzilla, for which the file contents are shown below:
<VirtualHost *:80>

DocumentRoot /var/www/html/bugzilla/

</VirtualHost>

<Directory /var/www/html/bugzilla>

AddHandler cgi-script .cgi

Options +Indexes +ExecCGI

DirectoryIndex index.cgi

AllowOverride Limit FileInfo Indexes

</Directory>
The Ansible playbook to set up Bugzilla is as follows:
- name: Install and configure Bugzilla

hosts: bugzilla

become: yes

become_method: sudo

gather_facts: true

tags: [bugzilla]

tasks:

- name: Install Bugzilla dependency packages

yum:

name: “{{ item }}”

state: present

exclude: “perl-homedir”

with_items:

- “gcc”

- “gcc-c++”

- “graphviz”

- “graphviz-devel”

- “patchutils”

- “gd”

- “gd-devel”

- “wget”

- “perl*”

- “perl-CPAN”

- name: Download Bugzilla

unarchive:

src: https://ftp.mozilla.org/pub/mozilla.org/webtools/bugzilla-5.0.tar.gz

dest: /var/www/html

remote_src: yes

- name: Rename bugzilla-5.0 to bugzilla

command: mv /var/www/html/bugzilla-5.0 /var/www/html/bugzilla

- name: Install Perl modules

command: ./checksetup.pl

args:

chdir: /var/www/html/bugzilla

ignore_errors: true

- name: Install Perl modules

command: /usr/bin/perl install-module.pl --all

args:

chdir: /var/www/html/bugzilla

- name: Install Perl modules

command: ./checksetup.pl

args:

chdir: /var/www/html/bugzilla

ignore_errors: true

- name: Update localconfig

lineinfile:

path: /var/www/html/bugzilla/localconfig

regexp: ‘^$db_pass’

line: “$db_pass=’bugs123’;”

- name: Update htaccess

lineinfile:

path: /var/www/html/bugzilla/.htaccess

regexp: ‘^Options -’

line: “# Options - Indexes”

- name: Create /etc/httpd/conf.d/bugzilla.conf

copy:

src: ../../files/bugzilla.conf

dest: /etc/httpd/conf.d/bugzilla.conf

mode: 0644
The above playbook can be invoked using the following command:
$ ansible-playbook -i inventory/kvm/inventory playbooks/configuration/bugzilla.yml --tags bugzilla -vv -K

Final configuration
A final configuration step is to run checksetup.pl manually, as it prompts for user credentials. You can change to the /var/www/html/bugzilla directory, and execute the sudo ./checksetup.pl script, which will again check the installed Perl modules, create tables in the database, and prompt for the Administrator user account name and password. This has to be entered manually. A sample execution output is shown below for reference:
[centos@localhost bugzilla]$ sudo ./checksetup.pl

* This is Bugzilla 5.0 on perl 5.16.3

* Running on Linux 3.10.0-862.el7.x86_64 #1 SMP Fri Apr 20 16:44:24 UTC 2018

Checking perl modules...

Checking for CGI.pm (v3.51) ok: found v4.40

Checking for Digest-SHA (any) ok: found v5.85

Checking for TimeDate (v2.23) ok: found v2.24

Checking for DateTime (v0.75) ok: found v1.50

Checking for DateTime-TimeZone (v1.64) ok: found v2.19

Checking for DBI (v1.614) ok: found v1.627

Checking for Template-Toolkit (v2.24) ok: found v2.27

Checking for Email-Sender (v1.300011) ok: found v1.300031

Checking for Email-MIME (v1.904) ok: found v1.946

Checking for URI (v1.55) ok: found v1.74

Checking for List-MoreUtils (v0.32) ok: found v0.428

Checking for Math-Random-ISAAC (v1.0.1) ok: found v1.004

Checking for File-Slurp (v9999.13) ok: found v9999.19

Checking for JSON-XS (v2.01) ok: found v3.04

Checking available perl DBD modules...

Checking for DBD-Pg (v2.7.0) not found

Checking for DBD-mysql (v4.001) ok: found v4.023

Checking for DBD-SQLite (v1.29) ok: found v1.58

Checking for DBD-Oracle (v1.19) not found

The following Perl modules are optional:

Checking for GD (v1.20) ok: found v2.69

Checking for Chart (v2.4.1) ok: found v2.4.10

Checking for Template-GD (any) ok: found v1.56

Checking for GDTextUtil (any) ok: found v0.86

Checking for GDGraph (any) ok: found v1.54

Checking for MIME-tools (v5.406) ok: found v5.509

Checking for libwww-perl (any) ok: found v6.35

Checking for XML-Twig (any) ok: found v3.52

Checking for PatchReader (v0.9.6) ok: found v0.9.6

Checking for perl-ldap (any) ok: found v0.65

Checking for Authen-SASL (any) ok: found v2.16

Checking for Net-SMTP-SSL (v1.01) ok: found v1.04

Checking for RadiusPerl (any) ok: found v0.27

Checking for SOAP-Lite (v0.712) ok: found v1.27

Checking for XMLRPC-Lite (v0.712) ok: found v0.717

Checking for JSON-RPC (any) ok: found v1.06

Checking for Test-Taint (v1.06) ok: found v1.06

Checking for HTML-Parser (v3.67) ok: found v3.72

Checking for HTML-Scrubber (any) ok: found v0.17

Checking for Encode (v2.21) ok: found v2.98

Checking for Encode-Detect (any) ok: found v1.01

Checking for Email-Reply (any) ok: found v1.204

Checking for HTML-FormatText-WithLinks(v0.13) ok: found v0.15

Checking for TheSchwartz (v1.07) ok: found v1.12

Checking for Daemon-Generic (any) ok: found v0.85

Checking for mod_perl (v1.999022) ok: found v2.000010

Checking for Apache-SizeLimit (v0.96) ok: found v0.97

Checking for File-MimeInfo (any) ok: found v0.29

Checking for IO-stringy (any) ok: found v2.111

Checking for Cache-Memcached (any) ok: found v1.30

Checking for File-Copy-Recursive (any) ok: found v0.44

Checking for mod_env (any) ok

Checking for mod_expires (any) ok

Checking for mod_headers (any) ok

Checking for mod_rewrite (any) ok

Checking for mod_version (any) ok

Reading ./localconfig...

Checking for DBD-mysql (v4.001) ok: found v4.023

Checking for MySQL (v5.0.15) ok: found v5.5.60-MariaDB

WARNING: You need to set the max_allowed_packet parameter in your MySQL

configuration to at least 3276750. Currently it is set to 1048576.

You can set this parameter in the [mysqld] section of your MySQL

configuration file.

Adding new table bz_schema...

Initializing bz_schema...

Creating tables...

Converting attach_data maximum size to 100G...

Setting up choices for standard drop-down fields:

priority bug_status rep_platform resolution bug_severity op_sys

Creating ./data directory...

Creating ./data/assets directory...

Creating ./data/attachments directory...

Creating ./data/db directory...

Creating ./data/extensions directory...

Creating ./data/mining directory...

Creating ./data/webdot directory...

Creating ./graphs directory...

Creating ./skins/custom directory...

Creating ./data/extensions/additional...

Creating ./data/mailer.testfile...

Creating ./Bugzilla/.htaccess...

Creating ./data/.htaccess...

Creating ./data/assets/.htaccess...

Creating ./data/attachments/.htaccess...

Creating ./data/webdot/.htaccess...

Creating ./graphs/.htaccess...

Creating ./lib/.htaccess...

Creating ./template/.htaccess...

Creating contrib/.htaccess...

Creating t/.htaccess...

Creating xt/.htaccess...

Precompiling templates...done.

Fixing file permissions...

Initializing “Dependency Tree Changes” email_setting ...

Initializing “Product/Component Changes” email_setting ...

Marking closed bug statuses as such...

Creating default classification ‘Unclassified’...

Setting up foreign keys...

Setting up the default status workflow...

Creating default groups...

Setting up user preferences...

Looks like we don’t have an administrator set up yet. Either this is

your first time using Bugzilla, or your administrator’s privileges

might have accidentally been deleted.

Enter the e-mail address of the administrator: mail@shakthimaan.com

Enter the real name of the administrator: Shakthi Kannan

Enter a password for the administrator account:

Please retype the password to verify:

mail@shakthimaan.com is now set up as an administrator.

Creating initial dummy product ‘TestProduct’...

Now that you have installed Bugzilla, you should visit the ‘Parameters’

page (linked in the footer of the Administrator account) to ensure it

is set up as you wish - this includes setting the ‘urlbase’ option to

the correct URL.

checksetup.pl complete.
You can now restart the httpd server using the following command:
$ sudo systemctl restart httpd
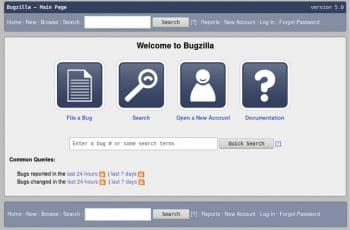
You can open the URL http://192.168.122.87 on your host system to see the Bugzilla home page, as shown in Figure 2.

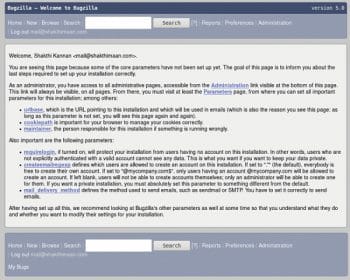
After logging in with the created user credentials, you should see the default page, as shown in Figure 3.
The Bugzilla documentation is available in different formats for your reference at https://www.bugzilla.org/docs/.


