


Computer security is best achieved by allowing access to authorised users only. Red Hat Identity Management is a means of centrally setting up the authorisation and management of identities. The RedHat IdM solution is native to RHEL from Linux version 6.3 onwards. This article lists the various steps needed to install the Red Hat Identity Management server.
Red Hat Identity Management (IdM) is a solution for centrally managing the authentication of identities and authorisation policies from a Linux server, for enrolled Linux clients, using native Linux tools. Red Hat IdM v2.2 was first introduced in Red Hat Enterprise Linux (RHEL) 6.3. An upgrade to Red Hat IdM v3.0 occurred with RHEL 6.4.
Based on the Free IPA project (Identity, Policy, Audit), a Red Hat Identity Management domain consists of a number of services. The 389 Directory Server is the main data store using LDAPv3 (Lightweight Directory Access Protocol) single sign-on authentication and it is provided by an MIT Kerberos KDC (Key Distribution Center). An integrated certificate system is based on the Dogtag project. Synchronised time can be provided by an integrated NTP service. Optionally, DNS services and registration can be managed with an integrated ISC BIND service.

The ipa-server and ipa-client packages install the various packages for the above services and dependencies. The project features simple installation scripts (ipa-server-install and ipa-client-install) for both the server and client that can be run interactively or with options unattended to configure all the services. Administration can be done from either a Web-based user interface (from ipa-server) or a command line utility (from ipa-admin tools installed on a client).Other features include configuring multiple Red Hat IdM servers in a single domain to provide replication, redundancy and stability. It also supports synchronisation of data (or trust) with an Active Directory forest to preserve a centralised user store, but should not be seen as an AD (Active Directory) replacement.
An IdM client is any machine that can retrieve credentials from an IdM server. SSSD (System Security Services Daemon) provides for keytab retrieval, offering user authentication and enforcing host based access control rules (the identity and policy parts). Certmonger monitors and renews the certificates on the client.
When a host is enrolled as an IdM client, SSSD and Certmonger are reconfigured to point to the IdM server for the keytab, and host certificates are created. Technically, IdM does not use the host certificate directly, but it may be used by other services.
Steps for installing the IdM server
1. Perform the required steps by reviewing the hardware and software prerequisites, opening the necessary ports in the firewall, and confirming the network and system’s configuration.
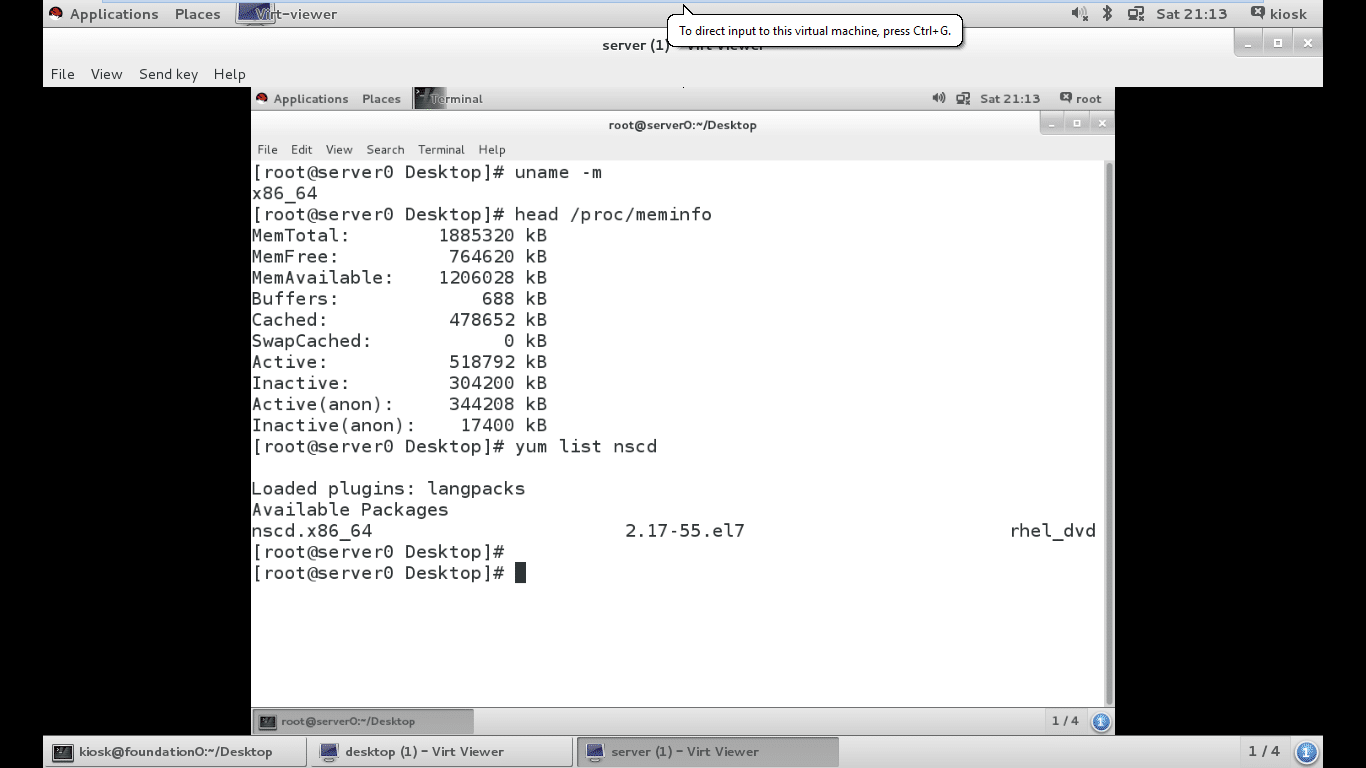
The IdM server is supported on both i386 and x86_64 platforms of Red Hat Enterprise Linux 6. Properly sizing the RAM is imperative given the caching philosophy of IdM, i.e., at least 2GB RAM for 10,000 users and at least 16GB of RAM for 100,000 users and 50,000 groups. The installation script makes certain assumptions about the systems, i.e., DNS and /etc/hosts properly resolve the fully-qualified domain name, there is no pre-existing 389 Directory Server or Kerberos configuration, and the NSCD (Name Service Cache Daemon) service is disabled.
System ports for IdM services include HTTP/ HTTPS (80/tcp and 443/tcp), LDAP/ LDAP5 (389/tcp and 636/tcp), Kerberos (88 and 464, both tcp and udp), DNS (53, both tcp and udp), NTP (123/udp), and Certificate System (7389/tcp).
Network configuration should disable NetworkManager (and NetworkManagerDispatcher if installed), and use static network services.
2. Next, install the IdM server packages. Installing ipa-server will typically install a large number of dependencies. If the IdM server also manages a DNS server, then you must specifically install two additional packages — bind and bind-dyndb-ldap.
# yum –y install ipa-server.
3. Now, create an IdM server instance interactively. The ipa-server-install script will configure all of the required services for the IdM domain — network time domain (ntpd), 389 directory server (dirsrv), Kerberos key distribution center (KDC), Apache (httpd), certificate authority, and an updated SELinux targeted policy. Optionally, it can integrate a DNS service.
You can monitor the installation from the /var/log/ipaserver-install.log log file. Each component service (Apache, 389 Directory Server, Kerberos, and Certificate System) has its own log files, generally found under /var/log/ (httpd/, dirsrv/, k*.log, and pki-ca/).
#ipa-server-install.
The same result could be achieved by passing the following required arguments to the ipa-server-install command.
# ipa-server-install –hostname=demo.example.com –n example.com –r EXAMPLE.COM –p linux123 –a redhat123 -U
Warning: The hostname must be a valid DNS name— only numbers, lower-case letters of the alphabet and hyphens. It cannot use underscores or capital letters.
Unlike Active Directory, where AD DNS must equal the AD domain, with IdM, a single deployment (Kerveros RELAM) can manage several domains without duplication of the servers. This is why we specify the –n DNS domain and –r Kerberos RELAM separately.
The –p option sets the underlying directory manager password, which is used for troubleshooting functions. Think of it as the root of the IdM LDAP instance, and it should be protected as such. The –a option sets the admin user password, which represents the first administrative account and is used for general IPA administrative tasks.
Other options include –setup-dns to integrate the DNS service and –idmax=number and –idstart=number, which can be used to bind the IDs assigned by the IdM server.
If the server is being installed on a virtual machine, it is normally recommended not to run an NTP server. To disable NTP for IdM, use the –no-ntp option.
4. Restart the ssh service to obtain Kerberos’ credentials.
# systemctl start sshd.
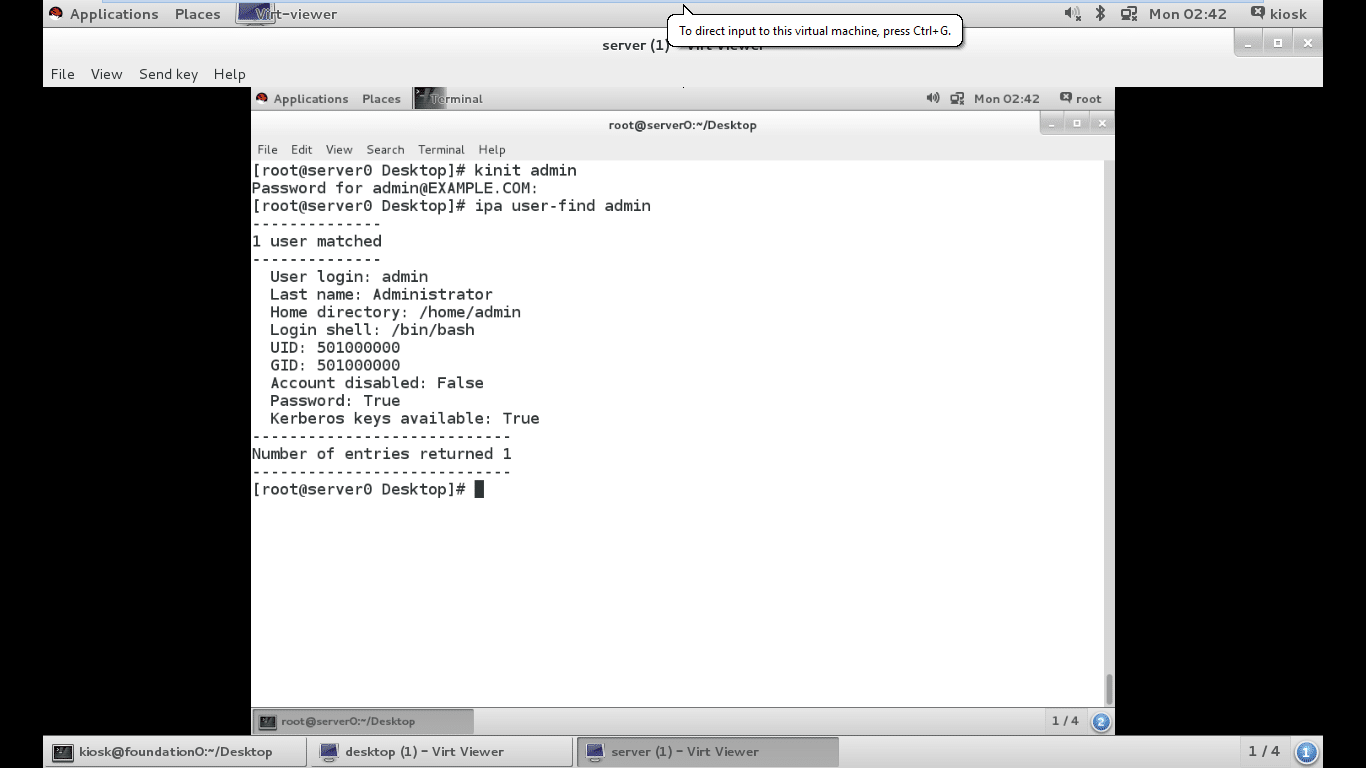
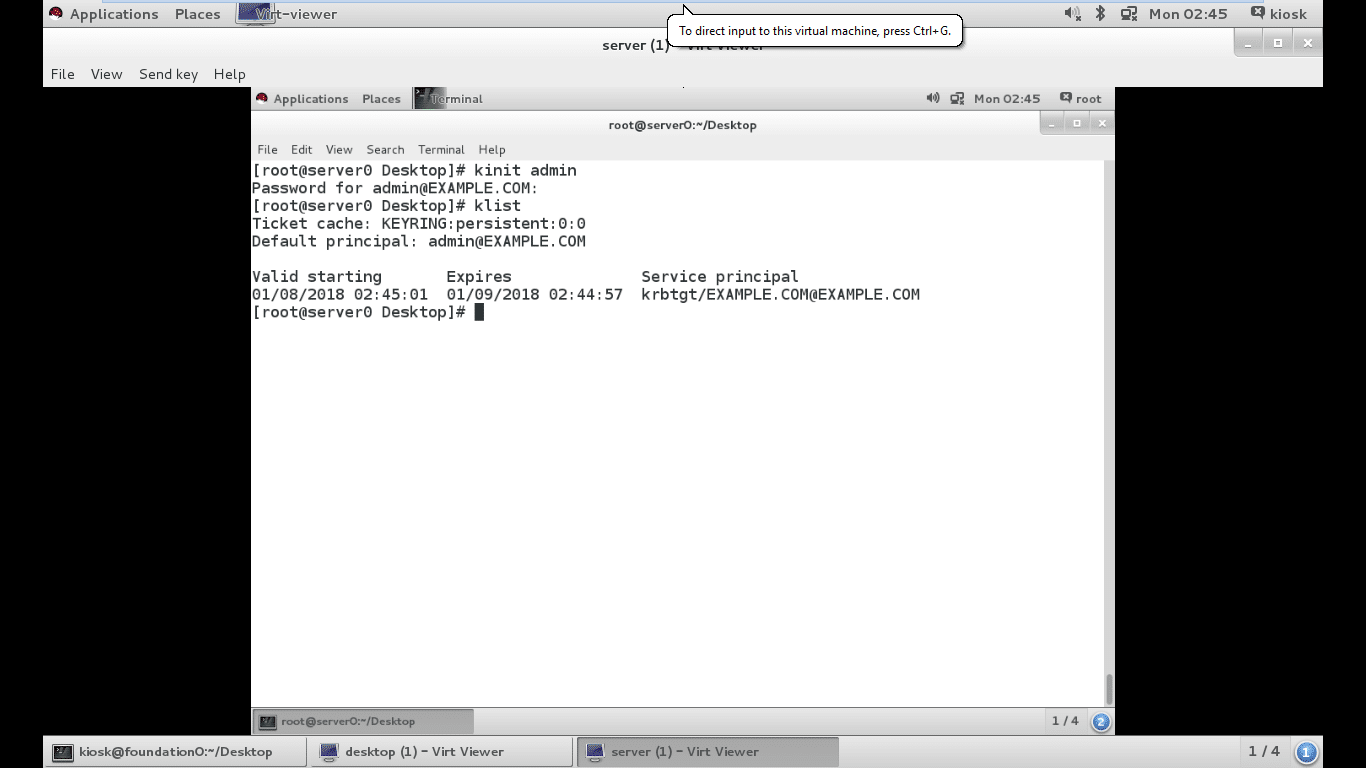
5. Verify the IdM instance by verifying Kerberos’ authentication and ipa command line access. Verify Kerberos authentication.
Adding user and group entries to IdM
-
Before we use the command line tool for the Web based interface, first log in to the IdM domain to obtain a Kerberos ticket with administrative authority.
2. The command line utility, ipa, offers a number of global options.
The ipa command supports a number of sub-commands, which are made of two parts — the object type (user, group, etc) and the operation that performs on that object (add, del, find, etc). Get a list of those sub-commands with ipa help commands.
# ipa help commands
3. For example, to create a user, we would look to use the sub-command of user-add. But to find the additional operation, use the following command:
# ipa help user-add
…to create a user interactively.
We never set the password, to use the sub-command user-mod:
# ipa user-mod user1 –password
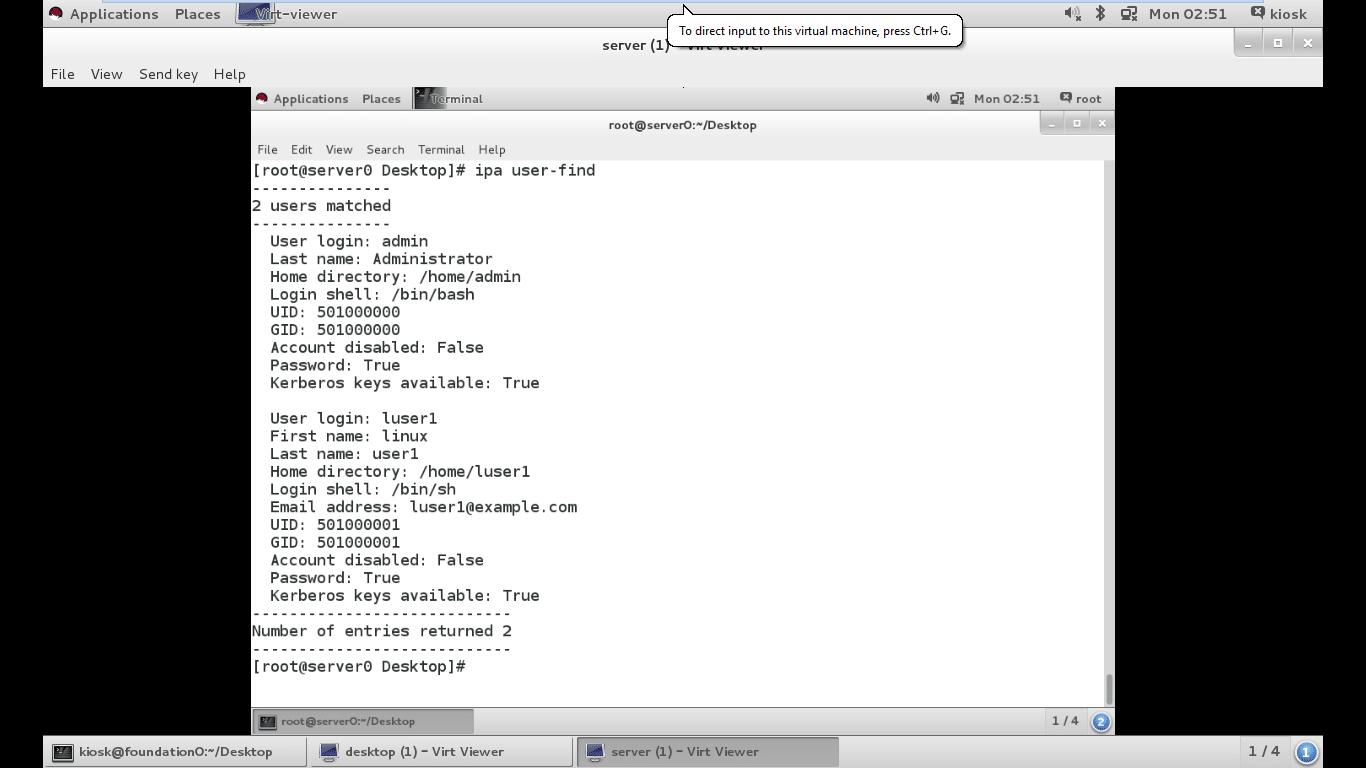
Confirm the user exists with the command ipa user-find.
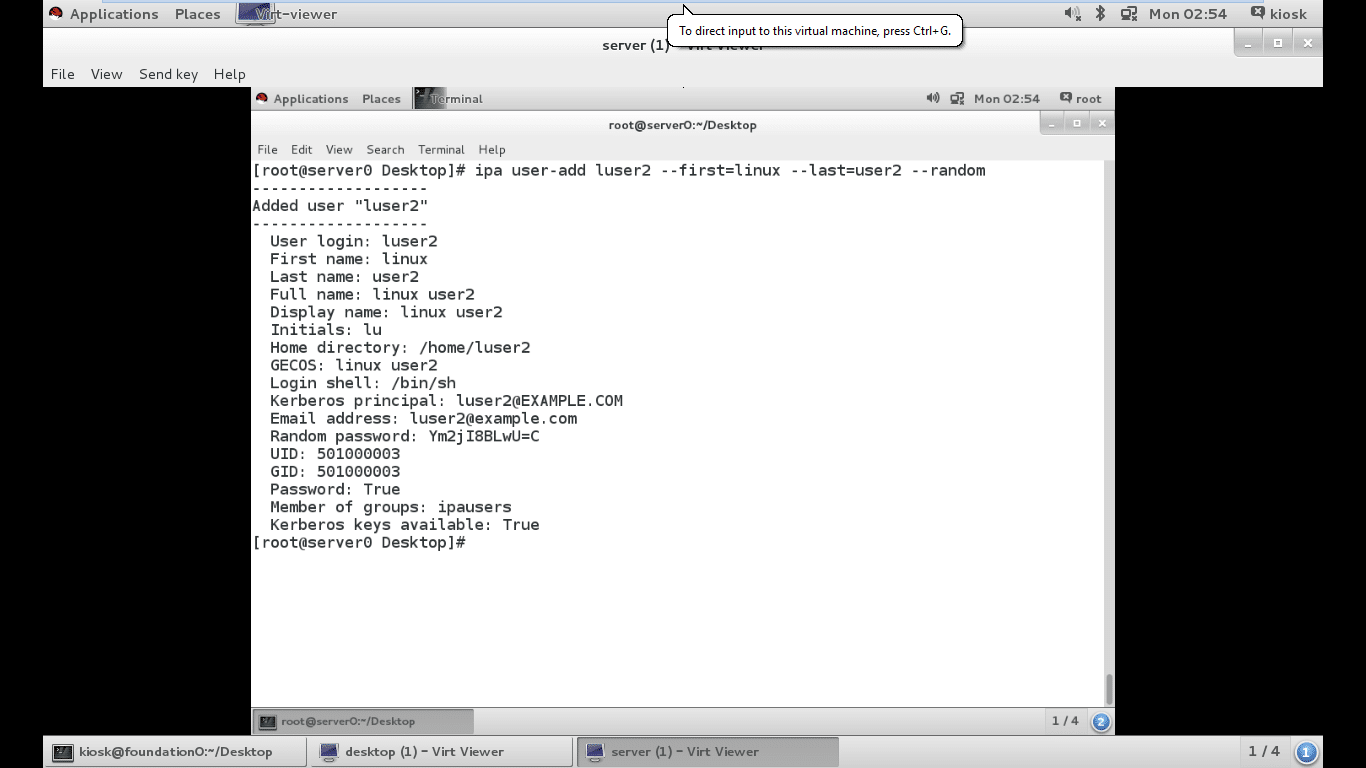
Add a second user linux user2 with no prompting and a random password:
# ipa user-add luser2 --first=linux --last=user2 --random
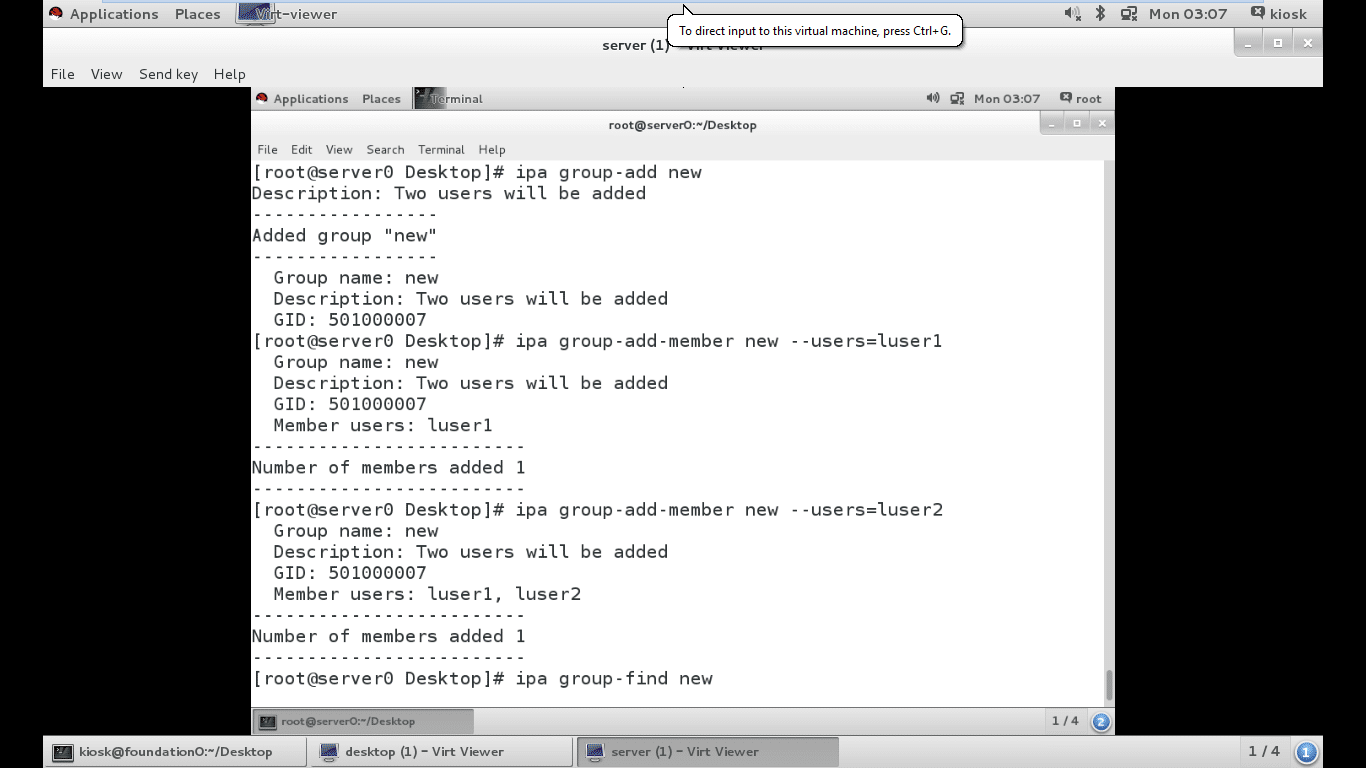
4. Create a group, putting the previous two users in the group. To create a group, use the command group-add:
# ipa group-add group1
To add both members in the group, use the
following command:
# ipa group-add-member group1 –users user1,user2
To verify the group, use the following command:
# ipa group-find group1
Note: Recall that the first time you log in or authenticate with kinit, you will be prompted to change your password. While this is not shown above, just follow the prompts and be sure to note the new password.
5. Now begin to explore the Web based administrative interface. Navigate to https://demo.example.com, which will display the message ‘This connection is untrusted’. Choose ‘I Understand the Risks’, then ‘Add an Exception’ and ‘Confirm Security Exceptions’.
After accepting the certificate from the Identity Management server, we need to configure Firefox to use Kerberos for its credentials. If this is the first time you are connecting, you will be prompted to do this. Of course, this assumes that you have already run kinit and have your ticket.
Choose ‘Firefox Configuration Page’. Then select the ‘Import Certificate Authority’ certificate. Select all three check boxes, before clicking on ‘OK’. Choose ‘Proceed to configuration page for older versions of Firefox’. Under ‘Automatic configuration of older versions’, click on ‘Configure Firefox’, and then on ‘Allow’. Finally, choose ‘Click here to return to Web UI’.
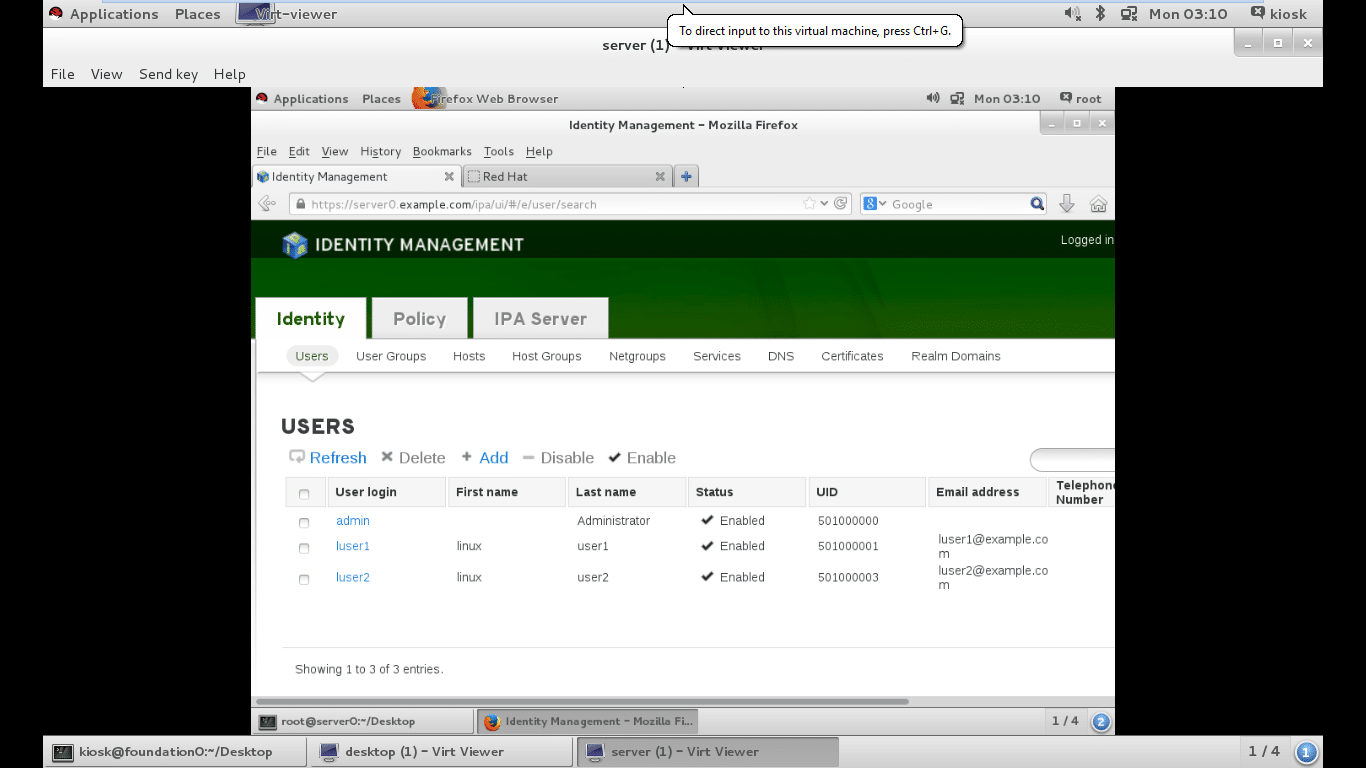
6. Notice the three basic tabs — Identity, Policy and IPA Server. The first tab, Identity, has configuration areas to define each of the entities in the database — users, user groups, hosts, host groups, net groups, services, and DNS records, if enabled. The second tab, Policy, has configuration areas for host based access control (HBAC), sudo rules, automount, user password policy, Kerberos ticket policies, SELinux user maps, and automember. The final tab, IPA server, has configuration areas for role based access control (RBAC), self-service permissions, delegations, ID ranges, trusts and configuration.
7. To create another user, click on ‘Add’. Next, enter the details of the user, and click on ‘Add User’. Then click on ‘Add’ again (Figure 8).

Registering a client system with IdM
1. Perform the prerequisite steps by opening the necessary ports in the firewall.
System ports for IdM services include HTTP/ HTTPS (80/tcp and 443/tcp), LDAP/ LDAPS (389/tcp and 636/tcp), Kerberos (88 and 464, both tcp and udp), DNS (53, both tcp and udp), NTP(123/udp), and Certificate System (7389/tcp). The above ports must be opened.
If the IdM server was configured as the DNS server, ensure that the client machine points to the IdM server first for DNS by making it the first entry in /etc/resolve.conf.
2. Install IdM client packages. Installing ipa-client will typically install a number of dependencies. If the IdM client also functions as an administrator machine, then you must install one additional package —ipa-admintools, as follows:
# yum –y install ipa-client ipa-admintools.
3. Enrol your client system as a client of the earlier created IdM server, server.example.com, in the domain using the credentials of the admin and passphrase, enabling the PAM home directory modules.
Like some of the options with ipa-server-install, the —mkhomedir option must be specified on the command line since it is not a question asked interactively.
The same result could be achieved by passing the following arguments to the ipa-client-install command.
#ipa-client-install --domain=xyz.com --server=demo.example.com --realm=EXAMPLE.COM –p admin –w linux123 –mkhomedir –U.
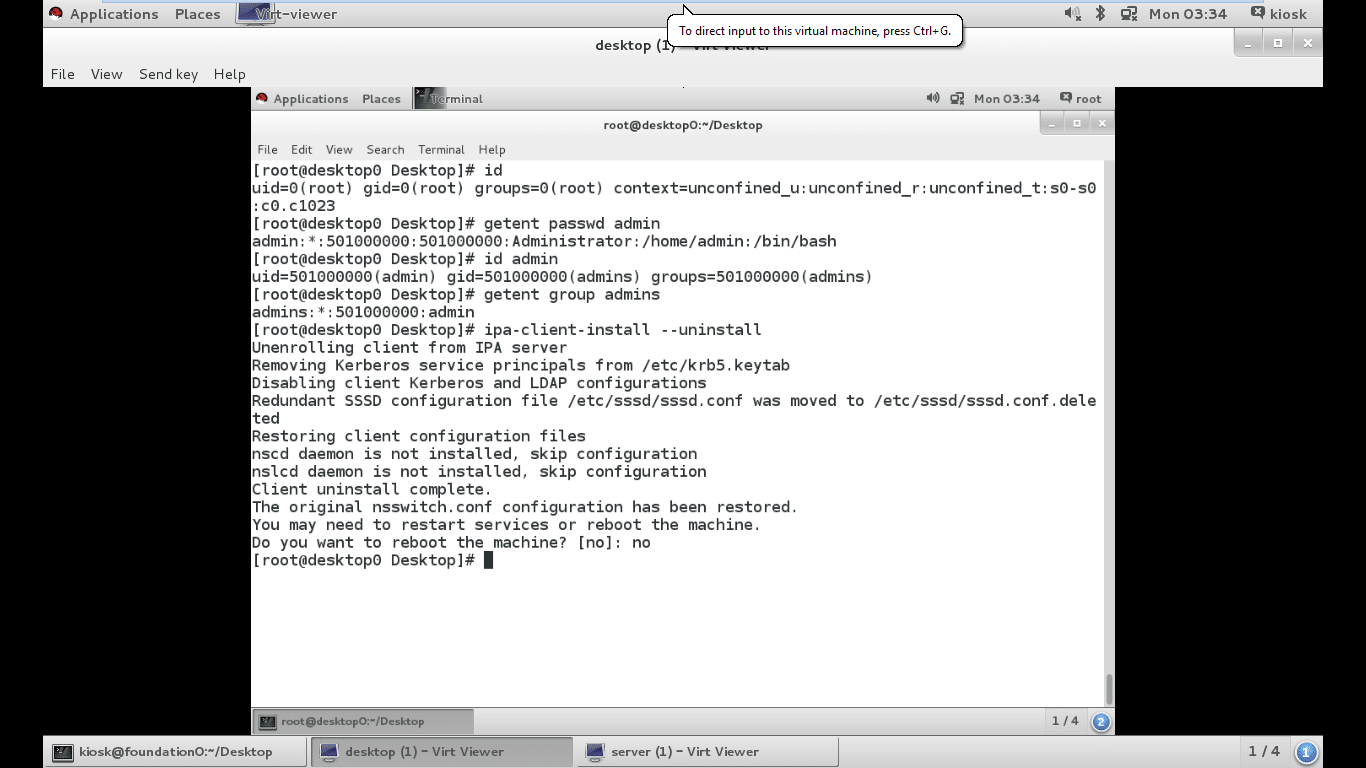
4. Confirm successful configuration by testing the lookup information of the standard user admin and group admins.
5. In preparation for the end of our practical session, and to prevent conflicting database information, we need to cleanly remove this client system’s enrolment in the domain.
#ipa-client-install –uninstall
After the machine completes the reboot, remove the CA certificate from the client machine.
#rm –rf /etc/ipa/ca.crt.


How To Login To Windows machine With A FreeIPA user Account