


This 11th article in the DevOps series is a tutorial on installing Graylog software using Ansible.
Graylog is a free and open source log management software that allows you to store and analyse all your logs from a central location. It requires MongoDB (a document-oriented, NoSQL database) to store meta information and configuration information. The actual log messages are stored in Elasticsearch. It is written using the Java programming language and released under the GNU General Public License (GPL) v3.0.
Access control management is built into the software, and you can create roles and user accounts with different permissions. If you already have an LDAP server, its user accounts can be used with the Graylog software. It also provides a REST API, which allows you to fetch data to build your own dashboards. You can create alerts to take actions based on the log messages, and also forward the log data to other output streams. In this article, we will install the Graylog software and its dependencies using Ansible.
GNU/Linux
An Ubuntu 16.04.3 LTS guest virtual machine (VM) instance will be used to set up Graylog using KVM/QEMU. The host system is a Parabola GNU/Linux-libre x86_64 system. Ansible is installed on the host system using the distribution package manager. The version of Ansible used is:
$ ansible --versionansible 2.4.1.0config file = /etc/ansible/ansible.cfgconfigured module search path = [u’/home/shakthi/.ansible/plugins/modules’, u’/usr/share/ansible/plugins/modules’]ansible python module location = /usr/lib/python2.7/site-packages/ansibleexecutable location = /usr/bin/ansiblepython version = 2.7.14 (default, Sep 20 2017, 01:25:59) [GCC 7.2.0] |
Add an entry to the /etc/hosts file for the guest ‘ubuntu’ VM as indicated below:
192.168.122.25 ubuntu |
On the host system, let’s create a project directory structure to store the Ansible playbooks:
ansible/inventory/kvm//playbooks/configuration//playbooks/admin/ |
An ‘inventory’ file is created inside the inventory/kvm folder that contains the following code:
ubuntu ansible_host=192.168.122.25 ansible_connection=ssh ansible_user=ubuntu ansible_password=password |

You should be able to issue commands using Ansible to the guest OS. For example:
$ ansible -i inventory/kvm/inventory ubuntu -m pingubuntu | SUCCESS => {“changed”: false,“failed”: false,“ping”: “pong”} |
Pre-requisites
The Graylog software has a few dependency packages that need to be installed as pre-requisites. The APT package repository is updated and upgraded before installing the pre-requisite software packages.
---- name: Pre-requisiteshosts: ubuntubecome: yesbecome_method: sudogather_facts: truetags: [prerequisite]tasks:- name: Update the software package repositoryapt:update_cache: yes- name: Update all the packagesapt:upgrade: dist- name: Install pre-requisite packagespackage:name: “{{ item }}”state: latestwith_items:- apt-transport-https- openjdk-8-jre-headless- uuid-runtime- pwgen |
The above playbook can be invoked as follows:
$ ansible-playbook -i inventory/kvm/inventory playbooks/configuration/graylog.yml --tags prerequisite -K |
The ‘-K’ option prompts for the sudo password for the ‘ubuntu’ user. You can append multiple ‘-v’ to the end of the playbook invocation to get a more verbose output.
MongoDB
Graylog uses MongoDB to store meta information and configuration changes. The MongoDB software package that ships with Ubuntu 16.04 is supported by the latest Graylog software. The Ansible playbook to install the same is as follows:
The Ubuntu software package for MongoDB is called the ‘mongodb-server’. It is installed, and the database server is started. The Ansible playbook waits for the MongoDB server to start and listen on the default port 27017. The above playbook can be invoked using the following command:
$ ansible-playbook -i inventory/kvm/inventory playbooks/configuration/graylog.yml --tags mongodb -K |
Elasticsearch
Elasticsearch is a search engine that is written in Java and released under the Apache licence. It is based on Lucene (an information retrieval software library) and provides a full-text search feature. The elastic.co website provides .deb packages that can be used to install the same on Ubuntu. The Ansible playbook for this is provided below:
- name: Install Elasticsearchhosts: ubuntubecome: yesbecome_method: sudogather_facts: truetags: [elastic]tasks:- name: Add keyapt_key:url: https://artifacts.elastic.co/GPG-KEY-elasticsearchstate: present- name: Add elastic deb sourceslineinfile:path: /etc/apt/sources.list.d/elastic-5.x.listcreate: yesline: ‘deb https://artifacts.elastic.co/packages/5.x/apt stable main’- name: Update the software package repositoryapt:update_cache: yes- name: Install Elasticsearchpackage:name: elasticsearchstate: latest- name: Update cluster namelineinfile:path: /etc/elasticsearch/elastisearch.ymlcreate: yesregexp: ‘^#cluster.name: my-application’line: ‘cluster.name: graylog’- name: Daemon reloadsystemd: daemon_reload=yes- name: Start elasticsearch serviceservice:name: elasticsearch.servicestate: started- wait_for:port: 9200- name: Test Curl queryshell: curl -XGET ‘localhost:9200/?pretty’ |
The stable elastic.co repository package is installed before installing Elasticsearch. The cluster name is then updated in the /etc/elasticsearch/elasticsearch.yml configuration file. The system daemon services are reloaded, and the Elasticsearch service is started. The Ansible playbook waits for the service to run and listen on port 9200.
The above playbook can be invoked as follows:
$ ansible-playbook -i inventory/kvm/inventory playbooks/configuration/graylog.yml --tags elastic -K |
You can perform a manual query to verify that Elasticsearch is running using the following Curl command:
$ curl -XGET ‘localhost:9200/?pretty’{“name” : “cFn-3YD”,“cluster_name” : “elasticsearch”,“cluster_uuid” : “nuBTSlFBTk6PDGyrfDCr3A”,“version” : {“number” : “5.6.5”,“build_hash” : “6a37571”,“build_date” : “2017-12-04T07:50:10.466Z”,“build_snapshot” : false,“lucene_version” : “6.6.1”},“tagline” : “You Know, for Search”} |

Graylog
The final step is to install Graylog itself. The .deb package available from the graylog2.org website is installed and then the actual ‘graylog-server’ package is installed. The configuration file is updated with credentials for the ‘admin’ user with a hashed string for the password ‘osfy’. The Web interface is also enabled with the default IP address of the guest VM. The Graylog service is finally started. The Ansible playbook to install Graylog is as follows:
- name: Install Grayloghosts: ubuntubecome: yesbecome_method: sudogather_facts: truetags: [graylog]tasks:- name: Install Graylog repo debapt:deb: https://packages.graylog2.org/repo/packages/graylog-2.3-repository_latest.deb- name: Update the software package repositoryapt:update_cache: yes- name: Install Graylogpackage:name: graylog-serverstate: latest- name: Update database credentials in the filereplace:dest: “/etc/graylog/server/server.conf”regexp: “{{ item.regexp }}”replace: “{{ item.replace }}”with_items:- { regexp: ‘password_secret =’, replace: ‘password_secret = QXHg3Eqvsu PmFxUY2aKlgimUF05plMPXQ Hy1stUiQ1uaxgIG27 K3t2MviRiFLNot09U1ako T30njK3G69KIzqIoYqdY3oLUP’ }- { regexp: ‘#root_username = admin’, replace: ‘root_username = admin’ }- { regexp: ‘root_password_sha2 =’, replace: ‘root_password_sha2 = eabb9bb2efa089223 d4f54d55bf2333ebf04a29094bff00753536d7488629399’}- { regexp: ‘#web_enable = false’, replace: ‘web_enable = true’ }- { regexp: ‘#web_listen_uri = http://127.0.0.1:9000/’, replace: “web_listen_uri = http://{{ ansible_default_ipv4.address }}:9000/” }- { regexp: ‘rest_listen_uri = http://127.0.0.1:9000/api/’, replace: “rest_listen_uri = http://{{ ansible_default_ipv4.address }}:9000/api/” }- name: Start graylog serviceservice:name: graylog-server.servicestate: started |
The above playbook can be run using the following command:
$ ansible-playbook -i inventory/kvm/inventory playbooks/configuration/graylog.yml --tags graylog -K |
Web interface
You can now open the URL http://192.168.122.25:9000 in a browser on the host system to see the default Graylog login page as shown in Figure 1.
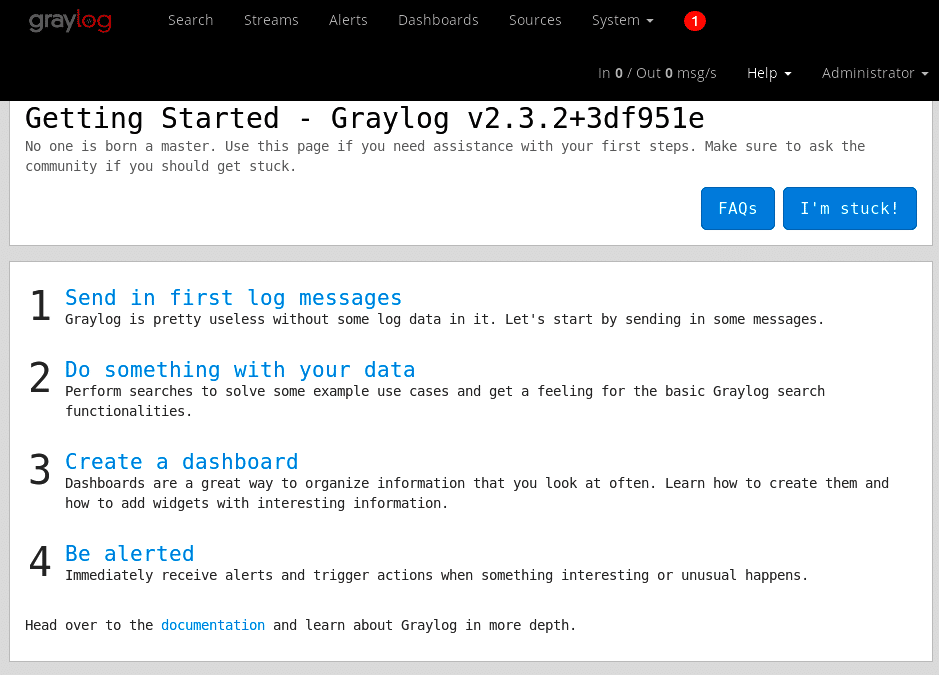
The user name is ‘admin’ and the password is ‘osfy’. You will then be taken to the Graylog home page as shown in Figure 2.
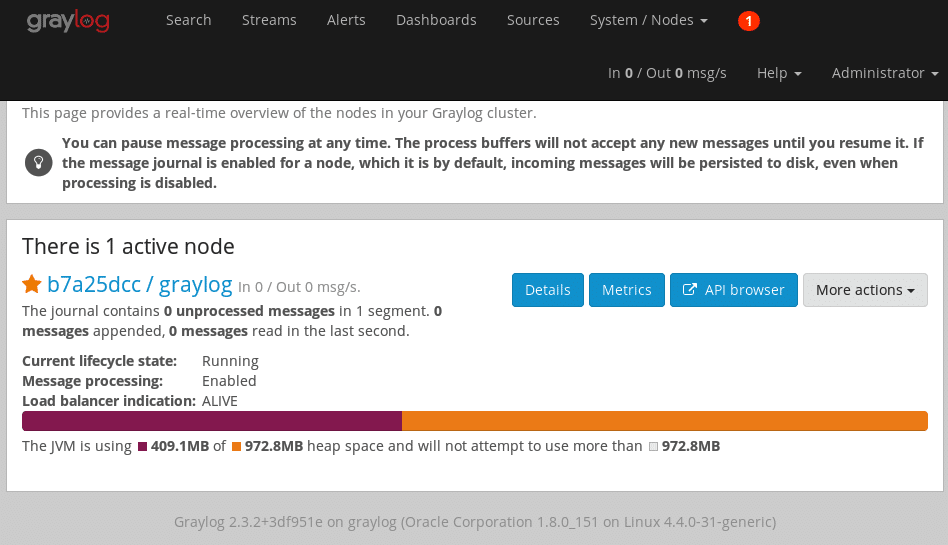
The guest VM is a single node, and hence if you traverse to System -> Nodes, you will see this node information as illustrated in Figure 3.
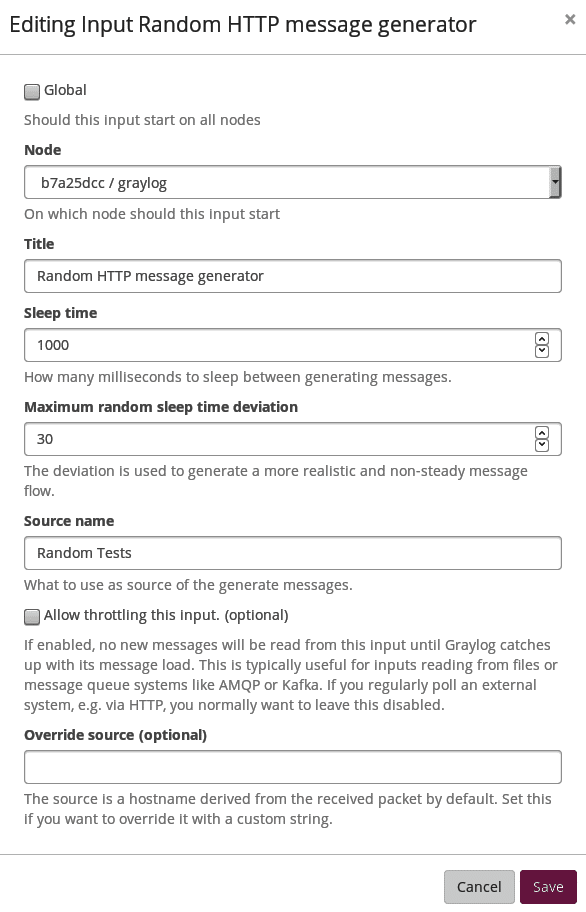
You can now test the Graylog installation by adding a data source as input by traversing System -> Input in the Web interface. The ‘random HTTP message generator’ is used as a local input, as shown in Figure 4.
The newly created input source is now running and visible as a local input in the Web page as shown in Figure 5.
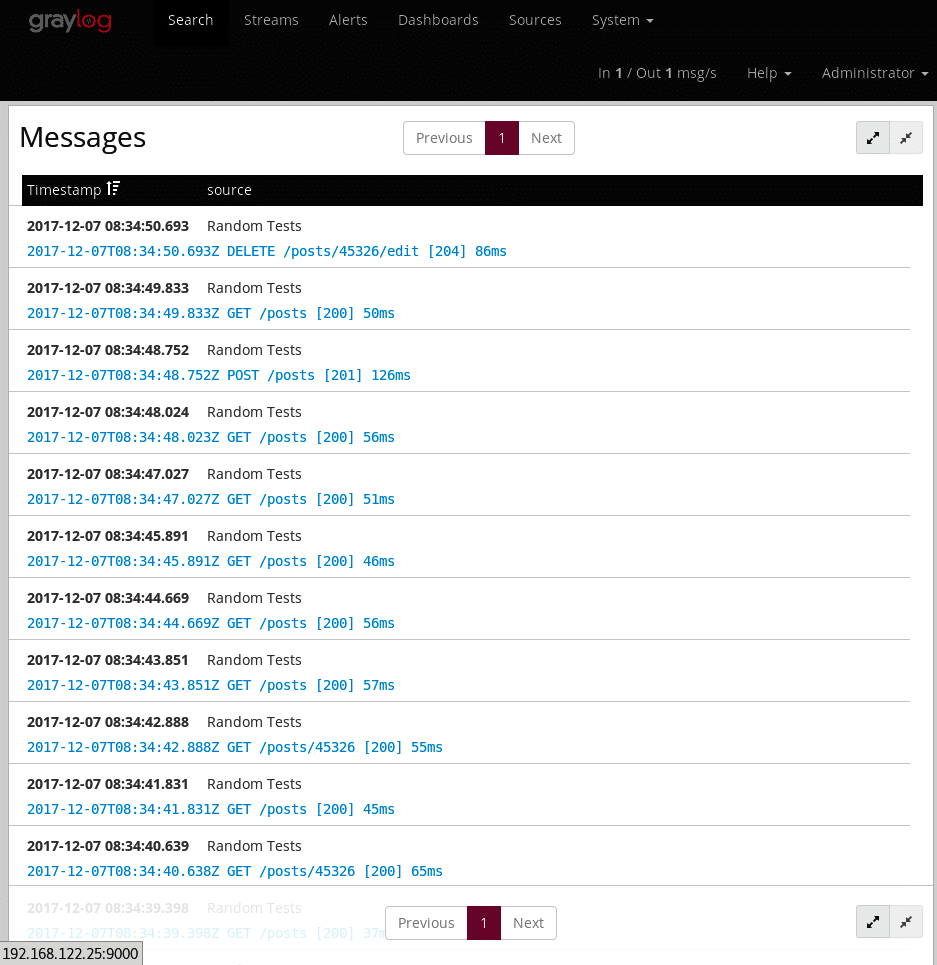
After a few minutes, you can observe the created messages in the Search link as shown in Figure 6.
Uninstalling Graylog
An Ansible playbook to stop the different services, and to uninstall Graylog and its dependency software packages, is given below for reference:
---- name: Uninstall Grayloghosts: ubuntubecome: yesbecome_method: sudogather_facts: truetags: [uninstall]tasks:- name: Stop the graylog serviceservice:name: graylog-server.servicestate: stopped- name: Uninstall graylog serverpackage:name: graylog-serverstate: absent- name: Stop the Elasticsearch serverservice:name: elasticsearch.servicestate: stopped- name: Uninstall Elasticsearchpackage:name: elasticsearchstate: absent- name: Stop the MongoDB serverservice:name: mongodbstate: stopped- name: Uninstall MongoDBpackage:name: mongodb-serverstate: absent- name: Uninstall pre-requisitespackage:name: “{{ item }}”state: absentwith_items:- pwgen- uuid-runtime- openjdk-8-jre-headless- apt-transport-https |
The above playbook can be invoked using:
$ ansible-playbook -i inventory/kvm/inventory playbooks/admin/uninstall-graylog.yml -K |


