

Ansible is the simplest way to automate apps and IT infrastructure. It meshes well with DevOps to deploy apps. In this ninth article in the series on DevOps, we explore the use of Ansible for launching Docker containers and provisioning virtual machines.
Provisioning is the first step in an application’s deployment process. In a cloud environment, software can be run from a Docker container, virtual machine or bare metal, and Ansible can be used for provisioning such systems. In this article, we explore how to use Ansible to launch Docker containers and provision virtual machines.
Setting it up
Let’s create an Ansible playbook for the ‘Get started with Docker Compose’ composetest example available at https://docs.docker.com/compose/gettingstarted/. The Ansible version used on the host system (Ubuntu x86_64) is 2.2.0.0. You will need to install Docker CE and docker-compose on Ubuntu. Follow the installation guide provided at https://docs.docker.com/engine/ installation/linux/docker-ce/ubuntu/#install-using-the-repository to install Docker CE. You can then install docker-compose using the APT package manager:
$ sudo apt-get install docker-compose |
The composetest/ folder consists of the following files:
composetest/app.pycomposetest/docker-compose.ymlcomposetest/Dockerfilecomposetest/provision.ymlcomposetest/requirements.txt |
The app.py file contains a basic Flask application that communicates with a backend Redis database server. Its file contents are as follows:
from flask import Flaskfrom redis import Redisapp = Flask(__name__)redis = Redis(host=’redis’, port=6379)@app.route(‘/’)def hello():count = redis.incr(‘hits’)return ‘Hello World! I have been seen {} times.\n’.format(count)if __name__ == “__main__”:app.run(host=”0.0.0.0”, debug=True) |
An HTTP request to the Flask application returns the text string ‘Hello World! I have been seen N times.’ This will be run inside a Docker container. The requirements.txt file is provided to list the dependencies required for the project:
flaskredis |
Now let’s provision a minimalistic Docker container that has support for Python and is based on Alpine (a security-oriented, lightweight GNU/Linux distribution). The Dockerfile for the application is provided below for reference:
FROM python:3.4-alpineADD . /codeWORKDIR /codeRUN pip install -r requirements.txtCMD [“python”, “app.py”] |
The Docker-compose.yml file is used to create the images and will also be used by Ansible. It defines the services that will be deployed in the containers:
version: ‘2’services:web:build: .ports:- “5000:5000”redis:image: “redis:alpine”ports:- “6379:6379” |
Provisioning
The Python Web application will be running on port 5000, whereas the Redis database server will be listening on port 6379. We will first build the application using the following code:
$ docker-compose upCreating composetest_web_1Creating composetest_redis_1Attaching to composetest_web_1, composetest_redis_1redis_1 | 1:C 05 Oct 11:40:49.067 # oO0OoO0OoO0Oo Redis is starting oO0OoO0OoO0Ooredis_1 | 1:C 05 Oct 11:40:49.067 # Redis version=4.0.2, bits=64, commit=00000000, modified=0, pid=1, just startedredis_1 | 1:C 05 Oct 11:40:49.067 # Warning: no config file specified, using the default config. In order to specify a config file use redis-server /path/to/redis.confredis_1 | 1:M 05 Oct 11:40:49.070 * Running mode=standalone, port=6379.redis_1 | 1:M 05 Oct 11:40:49.070 # WARNING: The TCP backlog setting of 511 cannot be enforced because /proc/sys/net/core/somaxconn is set to the lower value of 128.redis_1 | 1:M 05 Oct 11:40:49.070 # Server initializedredis_1 | 1:M 05 Oct 11:40:49.070 # WARNING overcommit_memory is set to 0! Background save may fail under low memory condition. To fix this issue add ‘vm.overcommit_memory = 1’ to /etc/sysctl.conf and then reboot or run the command ‘sysctl vm.overcommit_memory=1’ for this to take effect.redis_1 | 1:M 05 Oct 11:40:49.070 # WARNING you have Transparent Huge Pages (THP) support enabled in your kernel. This will create latency and memory usage issues with Redis. To fix this issue run the command ‘echo never > /sys/kernel/mm/transparent_hugepage/enabled’ as root, and add it to your /etc/rc.local in order to retain the setting after a reboot. Redis must be restarted after THP is disabled.redis_1 | 1:M 05 Oct 11:40:49.070 * Ready to accept connectionsweb_1 | * Running on http://0.0.0.0:5000/ (Press CTRL+C to quit)web_1 | * Restarting with statweb_1 | * Debugger is active!web_1 | * Debugger PIN: 100-456-831 |
If you start a browser on the host system and open the URL http://0.0.0.0:5000, you will see the text from the Flask application. You can continue to refresh the page making requests to the application, and you will see the count increasing in the text: ‘Hello World! I have been seen N times.’ Pressing Ctrl+c in the above terminal will stop the application. Let’s now create an Ansible playbook to launch these containers:
- name: Provision Flask applicationhosts: localhostconnection: localbecome: truegather_facts: truetags: [setup]tasks:- docker_service:project_name: composetestdefinition:version: ‘2’services:web:build: “{{ playbook_dir }}/.”ports:- “5000:5000”redis:image: “redis:alpine”register: output- debug:var: output- assert:that:- “web.composetest_web_1.state.running”- “redis.composetest_redis_1.state.running” |
The above playbook can be invoked as follows:
$ sudo ansible-playbook provision.yml --tags setup |
The docker_service module is used to compose the services—a Web application and a Redis database server. The output of launching the containers is stored in a variable and is used to ensure that both the backend services are up and running. You can verify that the containers are running using the docker ps command output as shown below:
$ docker psCONTAINER ID IMAGE COMMAND CREATED STATUS PORTS NAMES03f6f6a3d48f composetest_web “python app.py” 18 seconds ago Up 17 seconds 0.0.0.0:5000->5000/tcp composetest_web_1fa00c70da13a redis:alpine “docker-entrypoint...” 18 seconds ago Up 17 seconds 6379/tcp composetest_redis_1 |
Scaling
You can use the docker_service Ansible module to increase the number of Web services to two, as shown in the following Ansible playbook:
- name: Scale the web services to 2hosts: localhostconnection: localbecome: truegather_facts: truetags: [scale]tasks:- docker_service:project_src: “/home/guest/composetest”scale:web: 2register: output- debug:var: output- name: Start container twodocker_container:name: composetest_web_2image: composetest_webstate: startedports:- “5001:5000”network_mode: bridgenetworks:- name: composetest_defaultipv4_address: “172.19.0.12” |
The above playbook can be invoked as follows:
$ sudo ansible-playbook provision.yml --tags scale |
The execution of the playbook will create one more Web application server, and this will listen on Port 5001. You can verify the running containers as follows:
$ docker psCONTAINER ID IMAGE COMMAND CREATED STATUS PORTS NAMES66b59eb163c3 composetest_web “python app.py” 9 seconds ago Up 8 seconds 0.0.0.0:5001->5000/tcp composetest_web_24e8a37344598 redis:alpine “docker-entrypoint...” 11 seconds ago Up 10 seconds 0.0.0.0:6379->6379/tcp composetest_redis_103f6f6a3d48f composetest_web “python app.py” 55 seconds ago Up 54 seconds 0.0.0.0:5000->5000/tcp composetest_web_1 |
You can open another tab in the browser with the URL http://localhost:5001 on the host system, and the text count will continue to increase if you keep refreshing the page repeatedly.
Cleaning up
You can stop and remove all the running instances. First, stop the newly created Web application, as follows:
$ docker stop 66b |
You can use the following Ansible playbook to stop the containers that were started using Docker compose:
- name: Stop all!hosts: localhostconnection: localbecome: truegather_facts: truetags: [stop]tasks:- docker_service:project_name: composetestproject_src: “{{ playbook_dir }}/.”state: absent |
The above playbook can be invoked using the following command:
$ sudo ansible-playbook provision.yml --tags stop |
You can also verify that there are no containers running in the system, as follows:
$ docker psCONTAINER ID IMAGE COMMAND CREATED STATUS PORTS NAMES |
Refer to the Ansible docker_service module’s documentation at http://docs.ansible.com/ansible/ latest/docker_service_module.html for more examples and options.
Vagrant and Ansible
Vagrant is free and open source software (FOSS) that helps to build and manage virtual machines. It allows you to create machines using different backend providers such as VirtualBox, Docker, libvirt, etc. It is developed by HashiCorp and is written in the Ruby programming language. It was first released in 2010 under an MIT licence. The Vagrantfile describes the virtual machine using a Ruby DSL, and an Ansible playbook can be executed as part of the provisioning process.
The following dependencies need to be installed on the host Ubuntu system:
$ sudo apt-get build-dep vagrant ruby-libvirt$ sudo apt-get install qemu libvirt-bin ebtables dnsmasq virt-manager$ sudo apt-get libxslt-dev libxml2-dev libvirt-dev zlib1g-dev ruby-dev |
Vagrant 1.8.7 is then installed on Ubuntu using a .deb package obtained from the https://www.vagrantup.com/ website. Issue the following command to install the vagrant-libvirt provider:
$ vagrant plugin install vagrant-libvirt |
The firewalld daemon is then started on the host system, as follows:
$ sudo systemctl start firewalld |
A simple Vagrantfile is created inside a test directory to launch an Ubuntu guest system. Its file contents are given below for reference:
# -*- mode: ruby -*-# vi: set ft=ruby :Vagrant.configure(“2”) do |config|config.vm.define :test_vm do |test_vm|test_vm.vm.box = “sergk/xenial64-minimal-libvirt”endconfig.vm.provision “ansible” do |ansible|ansible.playbook = “playbook.yml”endend |
When provisioning the above Vagrantfile, a minimalistic Xenial 64-bit Ubuntu image is downloaded, started and the Ansible playbook is executed after the instance is launched. The contents of the playbook.yml file are as follows:
---- hosts: allbecome: truegather_facts: nopre_tasks:- name: Install python2raw: sudo apt-get -y install python-simplejsontasks:- name: Update apt cacheapt: update_cache=yes- name: Install Apacheapt: name=apache2 state=present |
The minimal Ubuntu machine has Python 3 by default, and the Ansible that we use requires Python 2. Hence, we install Python 2, update the APT repository and install the Apache Web server. A sample debug execution of the above playbook from the test directory is given below:
$ VAGRANT_LOG=debug sudo vagrant up --provider=libvirtBringing machine ‘test_vm’ up with ‘libvirt’ provider...==> test_vm: Creating image (snapshot of base box volume).==> test_vm: Creating domain with the following settings...==> test_vm: -- Name: vagrant-libvirt-test_test_vm==> test_vm: -- Domain type: kvm==> test_vm: -- Cpus: 1==> test_vm: -- Feature: acpi==> test_vm: -- Feature: apic==> test_vm: -- Feature: pae==> test_vm: -- Memory: 512M==> test_vm: -- Management MAC:==> test_vm: -- Loader:==> test_vm: -- Base box: sergk/xenial64-minimal-libvirt==> test_vm: -- Storage pool: default==> test_vm: -- Image: /var/lib/libvirt/images/vagrant-libvirt-test_test_vm.img (100G)==> test_vm: -- Volume Cache: default==> test_vm: -- Kernel:==> test_vm: -- Initrd:==> test_vm: -- Graphics Type: vnc==> test_vm: -- Graphics Port: 5900==> test_vm: -- Graphics IP: 127.0.0.1==> test_vm: -- Graphics Password: Not defined==> test_vm: -- Video Type: cirrus==> test_vm: -- Video VRAM: 9216==> test_vm: -- Sound Type:==> test_vm: -- Keymap: en-us==> test_vm: -- TPM Path:==> test_vm: -- INPUT: type=mouse, bus=ps2==> test_vm: Creating shared folders metadata...==> test_vm: Starting domain.==> test_vm: Waiting for domain to get an IP address...==> test_vm: Waiting for SSH to become available...test_vm:test_vm: Vagrant insecure key detected. Vagrant will automatically replacetest_vm: this with a newly generated keypair for better security.test_vm:test_vm: Inserting generated public key within guest...test_vm: Removing insecure key from the guest if it’s present...test_vm: Key inserted! Disconnecting and reconnecting using new SSH key...==> test_vm: Configuring and enabling network interfaces...==> test_vm: Running provisioner: ansible...test_vm: Running ansible-playbook...PLAY ********************************************************TASK [Install python2] **************************************ok: [test_vm]TASK [Update apt cache] *************************************ok: [test_vm]TASK [Install Apache] ***************************************changed: [test_vm]PLAY RECAP **************************************************test_vm : ok=3 changed=1 unreachable=0 failed=0 |
Since you have installed virt-manager, you can now open up the Virtual Machine Manager to see the instance running. You can also log in to the instance using the following command from the test directory:
$ vagrant ssh |
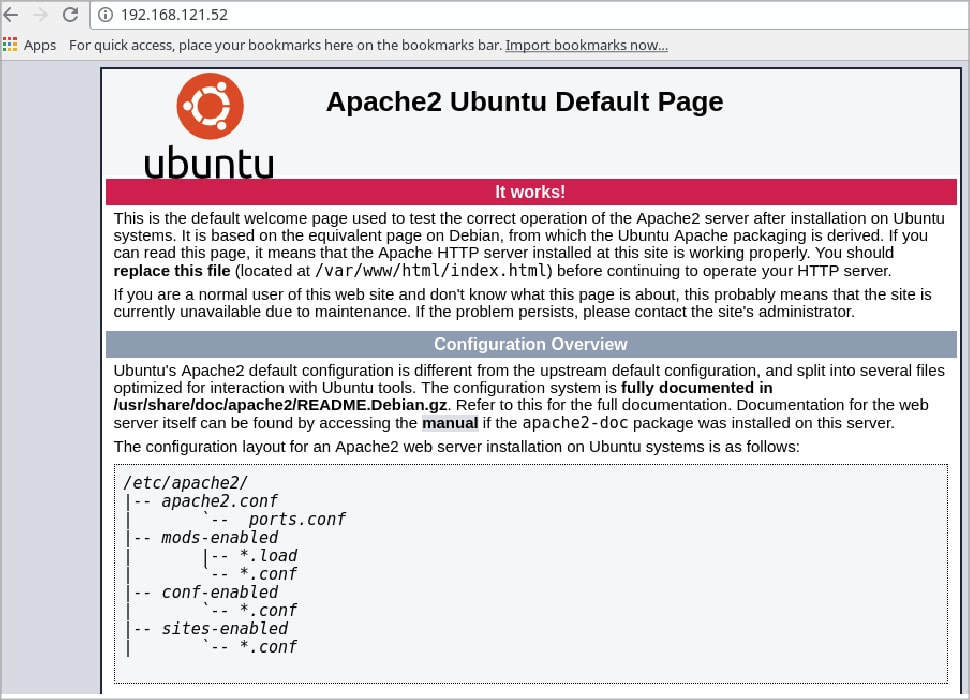
After logging into the guest machine, you will find its IP address using the ifconfig command. You can then open a browser on the host system with this IP address to see the default Apache Web server home page, as shown in Figure 1.


