This is the second article in the DevOps series, and covers the installation of a LAMP stack and WordPress, using Ansible.
In this article, we are going to learn how to automate the deployment of a LAMP stack and install WordPress. LAMP stands for Linux, Apache (a Web server), MySQL (a database) and PHP (server-side scripting). It is a technology stack on which you can deploy different Web applications. We are also going to explore the installation of WordPress, which is free and open source software for creating websites and blogs.
Installing Linux
A Parabola GNU/Linux-libre x86_64 system is used as the host system. An Ubuntu 15.04 image runs as a guest OS using KVM/QEMU. Ansible is installed on the host system using the distribution package manager. You should be able to issue commands from Ansible to the guest OS. For example:
$ ansible ubuntu -m pingubuntu | SUCCESS => {"changed": false, "ping": "pong"} |
The /etc/hosts file already has an entry for the guest Ubuntu VM.
192.168.122.250 ubuntu |
On the host system, we will create a project for our playbooks. It has the following directory structure:
ansible/inventory/kvm//playbooks/configuration//playbooks/admin/ |
An ‘inventory’ file is created inside the inventory/kvm folder that contains the following:
ubuntu ansible_host=192.168.122.250 ansible_connection=ssh ansible_user=xetex |
Installing Apache
We will first install and test the Apache Web server on the guest Ubuntu system. Let’s then create a playbooks/configuration/apache.yml file with the following content:
---- name: Install Apache web serverhosts: ubuntubecome: yesbecome_method: sudogather_facts: truetags: [web]tasks:- name: Update the software package repositoryapt:update_cache: yes- name: Install Apachepackage:name: "{{ item }}"state: latestwith_items:- apache2- wait_for:port: 80 |
On the Ubuntu guest system, the playbook runs apt-get update and then installs the apache2 package. The playbook finishes after the server has started, and is listening on port 80. Open a terminal, enter the ansible/ folder, and execute the playbook as shown below:
$ ansible-playbook -i inventory/kvm/inventory playbooks/configuration/apache.yml -K SUDO password:PLAY [Install Apache web server] ****************************TASK [setup] ************************************************ok: [ubuntu]TASK [Update the software package repository] ***************changed: [ubuntu]TASK [Install Apache] ***************************************changed: [ubuntu] => (item=[u'apache2'])TASK [wait_for] *********************************************ok: [ubuntu]PLAY RECAP **************************************************ubuntu : ok=4 changed=2 unreachable=0 failed=0 |
The ‘-K’ option is to prompt for the sudo password for the ‘xetex’ user. You can increase the level of verbosity in the Ansible output by passing ‘-vvvv’ at the end of the ansible-playbook command. The more number of times ‘v’ occurs, the greater is the verbosity level.
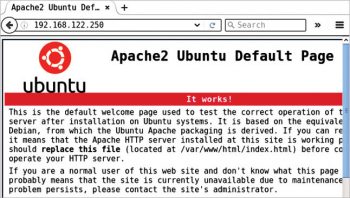
If you now open http://192.168.122.250, you should be able to see the default Apache2 index.html page as shown in Figure 1.

Installing MySQL
The next step is to install the MySQL database server. The corresponding playbook is provided below:
---- name: Install MySQL database serverhosts: ubuntubecome: yesbecome_method: sudogather_facts: truetags: [database]tasks:- name: Update the software package repositoryapt:update_cache: yes- name: Install MySQLpackage:name: "{{ item }}"state: latestwith_items:- mysql-server- mysql-client- python-mysqldb- name: Start the serverservice:name: mysqlstate: started- wait_for:port: 3306- mysql_user:name: guestpassword: '*F7B659FE10CA9FAC576D358A16CC1BC646762FB2'encrypted: yespriv: '*.*:ALL,GRANT'state: present |
The package repository is updated and the necessary MySQL packages are installed. The database server is then started, and we wait for the server to be up and running. A ‘guest’ user account with ‘osfy’ as the password is created for use in our Web application. The chosen password is just for demonstration purposes. When used in production, please select a strong password with special characters and numerals.
You can compute the hash for a password from the MySQL client, as shown below:
mysql> SELECT PASSWORD('osfy');+-------------------------------------------+| PASSWORD('osfy') |+-------------------------------------------+| *F7B659FE10CA9FAC576D358A16CC1BC646762FB2 |+-------------------------------------------+1 row in set (0.00 sec) |
An execution run to install MySQL is as follows:
$ ansible-playbook -i inventory/kvm/inventory playbooks/configuration/mysql.yml -K SUDO password: PLAY [Install MySQL database server] ************************TASK [setup] ************************************************ok: [ubuntu]TASK [Update the software package repository] ***************changed: [ubuntu]TASK [Install MySQL] ****************************************changed: [ubuntu] => (item=[u'mysql-server', u'mysql-client', u'python-mysqldb'])TASK [Start the server] *************************************ok: [ubuntu]TASK [wait_for] *********************************************ok: [ubuntu]TASK [mysql_user] *******************************************ok: [ubuntu]PLAY RECAP **************************************************ubuntu : ok=6 changed=2 unreachable=0 failed=0 |
Installing PHP
PHP is a server-side programming language and stands for PHP: Hypertext Preprocessor (a recursive acronym). Although we have used PHP5 in this example, it is recommended that you use the latest PHP for security reasons. The Ansible playbook for installing PHP is given below:
---- name: Install PHPhosts: ubuntubecome: yesbecome_method: sudogather_facts: truetags: [web]tasks:- name: Update the software package repositoryapt:update_cache: yes- name: Install PHPpackage:name: "{{ item }}"state: latestwith_items:- php5- php5-mysql |
We update the software repository and install PHP5. An execution output of the Ansible playbook is shown below:
$ ansible-playbook -i inventory/kvm/inventory playbooks/configuration/php.yml -K SUDO password: PLAY [Install PHP] ******************************************TASK [setup] ************************************************ok: [ubuntu]TASK [Update the software package repository] ***************changed: [ubuntu]TASK [Install PHP] ******************************************changed: [ubuntu] => (item=[u'php5', u'php5-mysql'])PLAY RECAP **************************************************ubuntu : ok=3 changed=2 unreachable=0 failed=0 |
Installing WordPress
As a final step, we will download, install and set up WordPress. The complete playbook is as follows:
---- name: Setup WordPresshosts: ubuntubecome: yesbecome_method: sudogather_facts: truetags: [database]vars:wordpress_file: "/home/{{ ansible_user }}/Downloads/wordpress-latest.zip"wordpress_dest: "/var/www/html"tasks:- name: Update the software package repositoryapt:update_cache: yes- name: Create a database for wordpressmysql_db:name: wordpressstate: present- name: Create downloads directoryfile:path: "/home/{{ ansible_user }}/Downloads"state: directory- name: Create target directoryfile:path: "{{ wordpress_dest }}/wordpress"state: directory- name: Download latest wordpressget_url:url: https://wordpress.org/latest.zipdest: "{{ wordpress_file }}"- name: Extract to /var/www/htmlunarchive:src: "{{ wordpress_file }}"dest: "{{ wordpress_dest}}"remote_src: True- name: Copy wp-config-sample.php to wp-config.phpcommand: cp "{{ wordpress_dest }}/wordpress/wp-config-sample.php" "{{ wordpress_dest }}/wordpress/wp-config.php"- name: Update database credentials in the filereplace:dest: "{{ wordpress_dest }}/wordpress/wp-config.php"regexp: "{{ item.regexp }}"replace: "{{ item.replace }}"with_items:- { regexp: 'database_name_here', replace: 'wordpress' }- { regexp: 'username_here', replace: 'guest' }- { regexp: 'password_here', replace: 'osfy'}- name: Restart apache2 serverservice:name: apache2state: restarted |
We create variables to store the downloaded file for WordPress, and the target installation path. After updating the software repository, a database is created for the WordPress application. The download and target directories are created on the guest system, before actually downloading the latest WordPress sources. A configuration file is then created, and the database settings are updated. Although we explicitly specify the password here, the recommended practice is to store the encrypted passwords in an Ansible Vault file, and reference the same in the playbook. In future articles, I will demonstrate this use case. After completing the configuration, the Web server is restarted. An execution run of the playbook is shown below:
$ ansible-playbook -i inventory/kvm/inventory playbooks/configuration/wordpress.yml -K SUDO password: PLAY [Setup WordPress] *********************************************************TASK [setup] *******************************************************************ok: [ubuntu]TASK [Update the software package repository] **********************************changed: [ubuntu]TASK [Create a database for wordpress] *****************************************changed: [ubuntu]TASK [Create downloads directory] ***************************ok: [ubuntu]TASK [Create target directory] ******************************changed: [ubuntu]TASK [Download latest wordpress] ****************************ok: [ubuntu]TASK [Extract to /var/www/html] *****************************changed: [ubuntu]TASK [Copy wp-config-sample.php to wp-config.php] ******************************changed: [ubuntu]TASK [Update database credentials in the file] ***************changed: [ubuntu] => (item={u'regexp': u'database_name_here', u'replace': u'wordpress'})changed: [ubuntu] => (item={u'regexp': u'username_here', u'replace': u'guest'})changed: [ubuntu] => (item={u'regexp': u'password_here', u'replace': u'osfy'})TASK [Restart apache2 server] *******************************changed: [ubuntu]PLAY RECAP **************************************************ubuntu : ok=10 changed=7 unreachable=0 failed=0 |
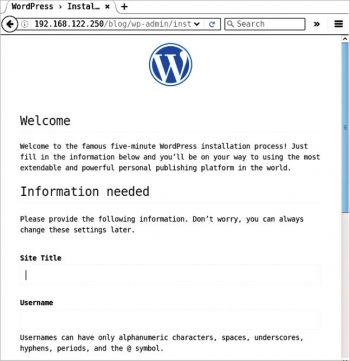
If you open the URL http://192.168.122.250/wordpress in a browser on the host system, you will see a screenshot as shown in Figure 2.

You can now proceed to complete the installation process from the browser. It is recommended that you follow the security best practices as recommended by the WordPress and PHP projects to harden this deployment.
Writing clean-up playbooks
It is essential to write clean-up playbooks to revert whatever changes you have made, so that you can roll back the system if things fail. Uninstalling should be done in the reverse order. For example, remove WordPress first, followed by PHP, MySQL and Apache.
The removal of WordPress could depend on your data retention policy. You might want to back up your PHP files, or you may decide to discard them. You might also want to retain the database. A complete removal of WordPress and the LAMP stack in the playbooks/admin folder is provided below for reference:
---- name: Uninstall WordPresshosts: ubuntubecome: yesbecome_method: sudogather_facts: truetags: [web]vars:wordpress_dest: "/var/www/html"tasks:- name: Delete wordpress folderfile:path: "{{ wordpress_dest }}/wordpress"state: absent- name: Drop databasemysql_db:name: wordpressstate: absent---- name: Uninstall PHPhosts: ubuntubecome: yesbecome_method: sudogather_facts: truetags: [web]tasks:- name: Uninstall PHP packagespackage:name: "{{ item }}"state: absentwith_items:- php5-mysql- php5---- name: Uninstall MySQLhosts: ubuntubecome: yesbecome_method: sudogather_facts: truetags: [database]tasks:- name: Stop the database serverservice:name: mysqlstate: stopped- name: Uninstall MySQL packagespackage:name: "{{ item }}"state: absentwith_items:- python-mysqldb- mysql-client- mysql-server---- name: Uninstall Apache web serverhosts: ubuntubecome: yesbecome_method: sudogather_facts: truetags: [server]s tasks:- name: Stop the web serverservice:name: apache2state: stopped- name: Uninstall apache2package:name: "{{ item }}"state: absentwith_items:- apache2 |
The entire suite of playbooks is also available in my GitHub project (https://github.com/shakthimaan/introduction-to-ansible) for your reference.


