Network Security Toolkit (NST) is an analysis and validation tool which can be used on enterprise virtual servers that host virtual machines. Get acquainted with NST in this article.
NST provides a security toolkit for network administrators. It comes with a complete set of open source network security tools and an advanced Web user interface (WUI).
System requirements
The Network Security Toolkit is designed to provide many tools that run entirely in the RAM. Hence, it requires a large amount of RAM. Table 1 lists the minimum system requirements.
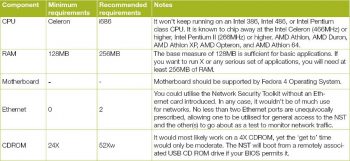
Downloading and burning the ISO image
We can read how to download NST Linux and burn the ISO image from the NST instructional exercise. When it is done, restart the PC and begin the installation. NST installs easily on Linux systems.
Logging in
When the installation is done, NST Linux creates a client named ‘NST user’. You can log in with this user name and no password.
NST is integrated with different types of tools. You can see them when you access applications from the Activities menu on the top left.


NST Web user interface (WUI)
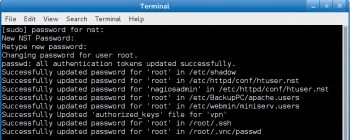
The tools that appear on the desktop are just a small part of the NST armoury. The originality of NST Linux is the NST WUI, which is the control panel or system management tool for all that you have to do with NST. This feature can’t be accessed unless you fix a password for the current client. To fix or change the secret password, double-click on the ‘Set the NST system passwords’ symbol. You will be prompted for a new password, or to change the last secret password that you had.
Once logged in, you can get to NST WUI. Open the Mozilla Firefox browser, and type http://192.0.0.1/untwist in the address bar. You will be asked for a login password.
Since it is a Web tool, you can also get it through another machine. The difference is that you need to use the HTTPS protocol to get to NST WUI via the Web.
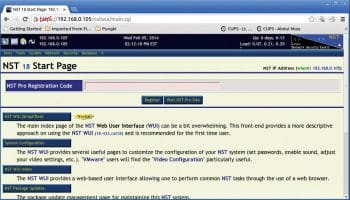
The NST Start page
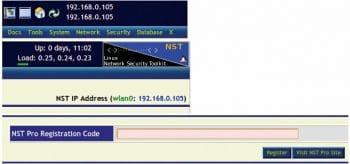
On the NST WUI page you will see the following:



NST Linux: Setting up BandwidthD
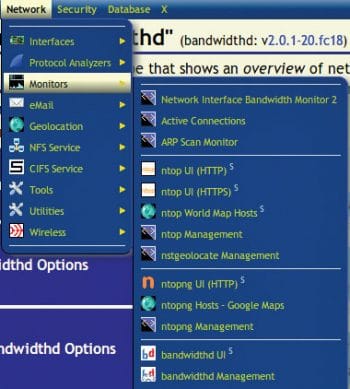
BandwidthD is a network traffic test that shows an outline of system use. To enable this feature, go to the menu and follow Network > Monitors > BandwidthD UI.
Next, pick the network interface that we need to monitor, arrange the parameter and its subnet. Click the Start BandwidthD button.
NST provides two different interfaces for verifying BandwidthD. The first is the important BandwidthD interface (see Figure 8).
The second is the NST WUI BandwidthD interface, for real-time monitoring with a graph (Figure 9).
Monitor CPU utilisation
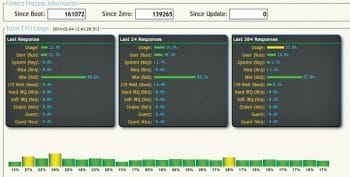
When one or more activities are running simultaneously, we may want to know about the CPU utilisation. NST provides us a tool to do that. To use this tool, go to System > Processes > CPU Usage Monitor. You need to wait for a few seconds to get the graph.
SSH to the server
When you need to carry out a remote activity through the shell, you can do it via the Web. NST Linux provides this function. Simply go to System > Control Management > Run command
At that point, you will have a SSH client on the Web.


Launch the X Window application
With this feature, you can dispatch the X Window application without a remote to the server. The application’s graphical acquaintance will be redirected by the X Server on your client PC. In any case, before doing this, you have to ensure that the X Server on your PC acknowledges the TCP connection.
Here is an example. I am using Zorin Linux 7, which is based on Ubuntu, as a client. Here are the steps to be followed.
1. Enable XDMCP as shown below:
$ sudo vi /etc/lightdm/lightdm.conf |
Add the following lines:
xserver-allow-tcp=true[XDMCPServer]enabled=true |
2. Restart lightdm, as follows:
$ sudo restart lightdm |
Note: This command will restart your X Window. Every single open application will be shut.
3. Ensure that port 6000 is tuning in. Run netstat to check it, as shown below:
$ netstat -an | grep -F 6000 |
4. Allow your computer to accept the X Server connection.
For example, if the NST Linux IP address is 192.168.0.105 and the client is 192.168.0.104, run the xhost command from the customer side to include the NST Linux server in the rundown of permitted hosts to make the connections.
$ xhost +192.168.0.105 |
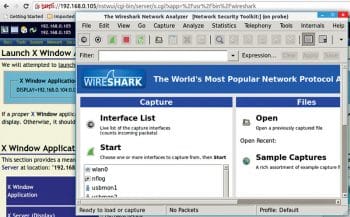
Once you have done this, you can attempt to dispatch the X Window application from the NST WUI. For instance, we can attempt dispatching the Wireshark application from the NST WUI. Go to the menu and then perform the following steps: X > Network Applications > Wireshark (Packet Capture).
At this point, Wireshark will show up.
The status (on probe) at the header reveals to us that it really begins from the server, yet is rendered on the client side. On the off chance that you are running the Microsoft Windows client, you can do the same on it, if you also run Cygwin/X on your Windows client. Reboot or shut down the server.
NST WUI also allows the server administrator to restart or shut down the server from the Web. If a server reboot is required, go to System > Control Management > Reboot.
Using NST in the wild
Let’s now look at the different uses of NST in a wide variety of network environments.
Basic use case 1: This is a simple configuration for NST. A small computer like a notebook is attached directly to a broadband cable network. This configuration is helpful for checking and exploring the Intrusion Detection System (IDS).
Basic use case 2: There is another basic simple configuration, which involves a notebook computer running NST behind a router, switch, firewall or wireless device that is attached to a broadband cable network. This set-up is valuable for investigating the NST Linux operating system and its abilities.
Mobile wireless monitoring: This involves a notebook computer running NST to monitor 802.11 wireless networks. This plan is alluring for running the Kismet 3 remote network sniffers.
Small business configuration: This is a commonplace NST set-up and provides network security observation inside a private business network environment that is joined to the public Internet.
Enterprise configuration: This type of configuration gathers all the information from the network. A corporate enterprise network helps connect computers and related devices across departments and workgroups. For securing data or information, NST can be integrated in the corporate enterprise network environment.
Using VPNs with NST
VPN tunnels have for some time been used to secure and ensure the integrity of information over untrusted systems like the Internet. By using distinctive VPN connection types with NST, what you access on the Web and anything sent from one system to another is encrypted and directed through the VPN. So, data sent to the network can’t be read by anyone except the VPN provider. When a connection is not encrypted, an attacker could perform a man-in-the-middle exploit (MITM), whereby the attacker can see all the information that is not encrypted being sent to other networks—including user names and passwords.
Let’s now look at an instance of using VPN with Point to Point Protocol (PPP) over SSH.
VPN: PPP tunnelled over SSH
Probably the most common VPN solutions are SSH-Tunnel, PPP, PPTP and OpenVPN. I personally think that OpenVPN is the best option since it’s strong and secure. The Secure Shell (SSH) can likewise be used to make an encoded tunnel between two PCs. PPP over SSH is a fast and speedy VPN solution. You can run a PPP connection over an SSH connection to make a simple, encrypted VPN. With PPP and SSH tools, you can create your own VPN within just a few minutes. Before I get into the details, shown below is a sample of PPP over SSH in a network.
Here, I will use a Windows machine to demonstrate the PPP tunnel over SSH in a VPN network. The steps are as follows.
1. Set up the VPN. The commands given below should run on a remote NST probe.
Script:”vpn-pppss” Is Run On Remote NST probe:”192.168.1.51”SSH Configuration File:/root/.ssh/configHOST nstprobeHostName=70.22.33.10Port=20022VPN PPP SSH Script: vpn-pppsshVpn-ppssh -r nstprobe -s 172.18.2.31 -c 172.18.2.32 -rt -sn \172.18.2.0/24 -cn 192.168.1.0/24 -nt -v |
2. Once the VPN is set up, you can connect the two NST probes between the two sites by using the point-to-point layered protocol.
3. As a tunnelling step CIFS share is mapped securely over the Internet. This tunnelling demonstrates the use of extending Corporate CIFS (SMB) file services to a remote satellite office securely over the untrusted public Internet.
Virtual computing
Virtual computing allows PC users remote access to programming applications and procedures when they require it. Users gain access via the Internet through a remote or network server.
Secure virtual computing
Secure virtual computing can be effected by tunnelling services or application protocols within an encrypted secure shell (SSH) session envelope.
Secure virtual computing with Microsoft Remote Desktop Protocol (RDP)
Two NST probes can be arranged for a VPN that tunnels the Remote Desktop Protocol between a terminal services server and a Microsoft terminal service client (mstsc) across the public Internet.
Note: The ISO image of NST 24 can be found with the bundled DVD.


[…] https://www.opensourceforu.com/2017/04/how-to-use-the-network-security-toolkit/ […]