Rails is a Web application framework designed to work with the Ruby programming language.
Web developers or those who like to build websites have probably heard about Ruby on Rails (RoR).
For those who aren’t familiar with it, let’s explore this magical and powerful Web framework. RoR is a full stack, which supports both the front-end and back-end. Some popular clients of this framework are Twitter, Basecamp and Amazon.
What is Ruby on Rails?
In layman terms, Ruby is a language and Ruby on Rails is a framework built on the former. It is also known as just Rails.
Ruby on Rails aims to reduce the complexity of building powerful Web applications. It provides a default structure for Web application code, databases and all the Web pages. So, rather than managing all the configurations, Web developers can quickly start building on their innovative ideas.
David Heinemeier Hanson (a.k.a. as DHH) created the Ruby on Rails framework. In one of his interviews, he said that Ruby’s conciseness, ease-of-use and high level design patterns attracted him to it rather than PHP.
Ruby is a highly object-oriented, user-friendly, general-purpose, dynamic programming language developed in the mid-90s. If you don’t know programming, then it’s the best language to start with. Many startups prefer to use RoR for faster and cost-effective development. The ultimate goal of RoR is to keep developers happy while coding. It is so elegant and clean that anyone can easily come to grips with it. Other languages in the market like Java and .NET are not very suited for rapid development and also involve costs. Here are a few benefits of using Ruby on Rails.
- Open source
Anyone can use it and modify it according to one’s needs, but along with flexibility, it has its own naming convention, which makes this language elegant and clean. - It reduces the time to market drastically
Web development in RoR is one or two times faster than using traditional frameworks. - Highly compatible
Development speed increases if the framework is compatible with other platforms. With the increasing popularity and benefits of cloud deployments, startups are moving into cloud based deployment to reduce initial deployment costs and for faster development. Companies are using PaaS platforms like Heroku to reduce infrastructure investments. Luckily, RoR supports all the major PaaS platforms. It also incorporates RESTful architecture. RoR handles RESTful APIs properly, so developers can focus on the main logic rather than the API build-up. - It follows the MVC design pattern
RoR follows the Model View Controller (MVC) design where the model can be co-related with database-side coding, the view is for Web pages/HTML templates, and the controller acts as a mediator between the front-end and the back-end. - Strong community support
Ruby on Rails has very strong community support. Whenever beginners join the RoR community, they get plenty of help from everyone. Along with that, RoR has a very rich set of free plugins, which are readymade functionalities and are ready to use. Rather than building from scratch, developers can use these plugins to speed up their development process. - Object-oriented
In RoR, everything is an object. It is highly object-oriented and easy to learn. Even numbers and strings are objects.

Installation steps
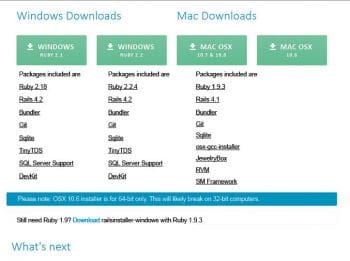
Windows: To install Ruby on Rails, we need to install components like Ruby, Rails, Git, SQLite and some of the other components that Rails needs to be able to run on Windows. It is a cumbersome task, but railsinstaller has made our lives easier. We have to go to http://railsinstaller.org/ and just click on Installer. Currently, the latest version is railsinstaller-3.2.0.exe.
Mac users can also use this URL as a reference to install Ruby on Rails.
Figure 1 demonstrates the page from where we can download railsinstaller, which will automatically install all the components to run Ruby on Rails.
After installing Rails, try to run rails –v to check the version of Rails installed. Sometimes, you may get an error like the one shown below:
“The system cannot find the path specified.”
This is because some .bat files have the wrong path.
To correct this, simply open your favourite text editor—in my case it’s the Sublime text editor—and take the following steps.
Open all the files under C:\RailsInstaller\Ruby2.2.0\bin in the text editor and use the Find and replace option (the shortcut key for the Sublime text editor is: Ctrl+Shift+F). Now, replace @ C:\Users\emachnic\GitRepos\railsinstaller-windows\stage\Ruby2.2.0\bin\ruby.exe with @%~dp0ruby.exe.
Once it is done, you can run the rails –v command and you should not get any error message.
Linux (Ubuntu): Resolving software dependencies, installation and maintaining software versions successfully sometimes becomes difficult in Linux based distributions. But, RVM (Ruby Version Manager) has made our lives easy while installing Ruby on Rails.
Ubuntu is the most popular Linux distribution available in the market, so considering that, we have demonstrated the installation steps in Ubuntu OS.
To install Ruby on Rails with RVM, run the following commands as a normal user:
gpg --keyserver hkp://keys.gnupg.net --recv-keys 409B6B1796C275462A1703113804BB82D39DC0E3 \curl -sSL https://get.rvm.io | bash -s stable --rails
Enter the normal user password to proceed further.
Now, let’s see how this command works.
The gpg command is used to connect with a public key server and to request a key attached with that particular ID. Here, we are fetching the RVM project’s key, which is utilised to sign every RVM release. Having the RVM project’s public key permits us to check the legitimacy of the release, which we will download now and sign with the matching private key.
The remaining portion of the command, starting with\curl, uses the Curl utility to grab a file from the RVM website. It is a script that will automatically install all related components. Here “\” is not an alias for any command.
The -s flag is for silent mode, and the -S flag overrides it to display errors if Curl fails. The -L flag is for redirection.
The script is then channelised to the bash prompt to run. The -s flag indicates that the input is coming from standard in. The rest of the commands are used to install the latest and most stable version of RVM and Rails, along with Ruby.
After this process, we have to source the RVM scripts by using the command below:
source ~/.rvm/scripts/rvm

The Ruby on Rails framework is now installed and we can start building a Web application. To install a specific version of Ruby and Rails, follow the link https://www.digitalocean.com/community/tutorials/how-to-install-ruby-on-rails-on-ubuntu-14-04-using-rvm.
Once the installation is completed, a Windows user can go to the command prompt and an Ubuntu user to the terminal, and run the following commands to check the version of Ruby and Rails:
rails –v
ruby –v
Here, the –v option is to check the version of a particular package.
Building a Web application
Let’s build a sample Web application and later we can look at how we can convert it into a powerful static Web application. To avoid information overload, I will not go too deep into this topic. We will skip the database connectivity part, which we will cover in subsequent articles on RoR.
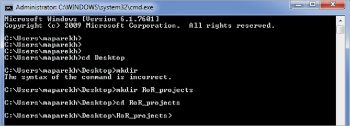
Before creating a project, first create or select a directory in which you want to store all RoR projects. In my case, I have created a directory called RoR_projects.
mkdir RoR_projects
cd RoR_projects
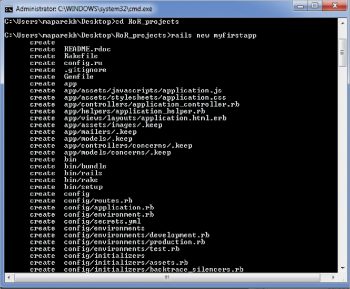
After that, we will create a new project, which will be our first Web application on RoR.
rails –new myfirstapp
Once we run this command, it will create everything that is required to build a Web application for us. The entire structure will be created. When we go into the myfirstapp folder and then go to dir (in Windows) and /ls (in Linux), we can see different folders and files already created inside it.
Here, my path is C:\Users\maparekh\Desktop\RoR_projects\myfirstapp.
If we want to check the app we created, we have to first go to our project directory and then run the local server. RoR has its own server called WEBrick and besides, it comes with SQlite, by default, which is a serverless database.
We have to make sure that the server is up and running in another command prompt/terminal to check if the application runs:
rails server
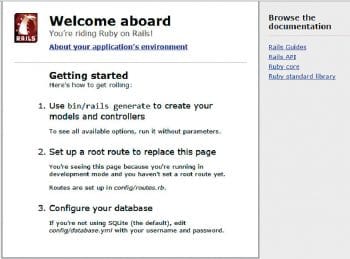
Now, copy the URL http://localhost:3000 and paste it in a browser. We can see the default Web application page, which means that the app is up and running.
Now, instead of the default page, we use our own home page.
To do that, we have to create a controller that is used as a mediator to go to a specific Web page. Basically, it will control the calls and tell us when we have to call or display which Web page.
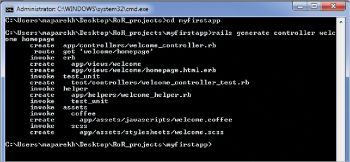
Here is the command to create the controller and Web page:
rails generate controller welcome homepage
‘Generate’ is the keyword used to create the controller, ‘welcome’ is a controller name and ‘homepage’ is the view created under this controller.
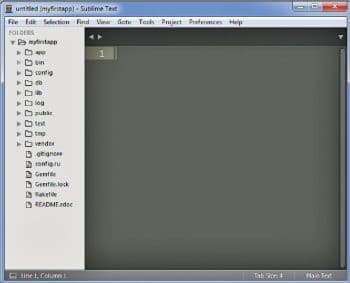
Now open your project folder. You will find myfirstapp in the text editor (I am using Sublime).
Given below is some information about the contents of the folder and the files associated with it.
App: App is the folder in which we will spend most of our time. It contains the MVC architecture, and there are folders like views, models, mailers, helpers, controllers and assets. Apart from what we already know about MVC, there are helpers, which are small functions or modules used in applications; while assets contain images, CSS and JavaScript files.
Bin: This folder contains all the commands and the set-up utility. Usually, we will not touch this folder.
Config: This folder contains all the configuration files including database.yml, which is for database related configuration and routes.rb, where we will write routes to call Web pages.
All other folders are of not much use currently, so we will not go deeper into them.
Now, to check our home page, we need to do some modifications. After running the previous controller command, we can look into the folders that are inside the controller and also the views. There are some new files created.
If you can’t see the new files created, go to your folder and press F5 or refresh it. Then check for newly created files.
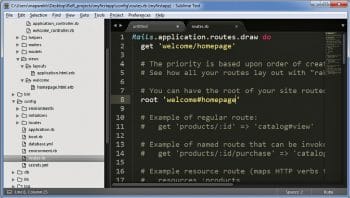
As you can see in Figure 4, we need to create routes so that the request will be directed to our home page. Check line no. 8 inside the Config/routes.rb file, uncomment it and replace the word ‘index’ with the word‘homepage’.

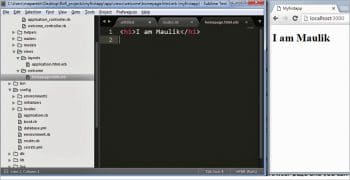
Now reload the browser page and you can see our new sample home page of the Web application.
We can go to homepage.html.erb and write code to create the application.
So this is our sample Web application. Now, we will use one of the bootstrap templates and see how effectively and easily we can build a powerful website and customise it.
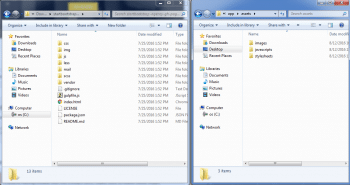
Go to https://startbootstrap.com/template-overviews/agency/ and download any template—I have chosen the agency template. Download the agency template Zip file and extract it. Compare it with our myfirstapp application and add all CSS, JavaScripts and images from the agency template into myfirstapp/assets/ and the respective folders. Also, copy index.html from the template and paste the contents into homepage.html.erb.
If your application, running on localhost: 3000, is taking too much time to reload, go to http://stackoverflow.com/questions/26318837/slow-localhost-load-running-rails-and-webrick and make the changes accordingly.
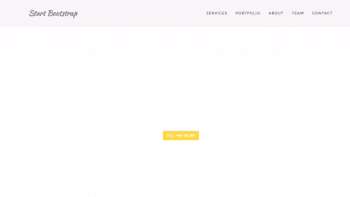
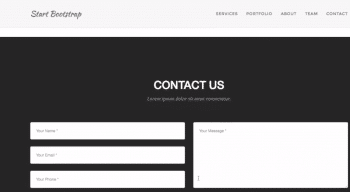
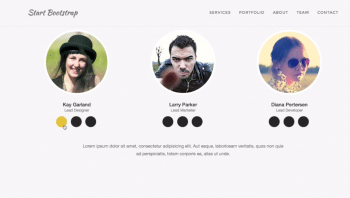
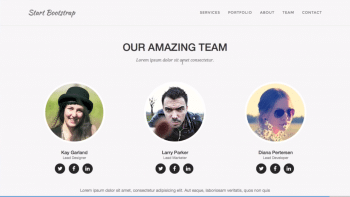
Now, once all the contents are replaced, you can see the website as shown in Figures 13, 14 and 15
We now have to resolve the following issues:
1) All images are not shown in the website; so go to homepage.html.erb and search for src=”img, then replace img with assets, and reload the page. You can see all the images, except the background image.
2) The background image is not visible, so go to stylesheets/agency.css and search for background-image: url(‘../img/header-bg.jpg’); then replace img with assets.
The result will look like this background-image: URL (‘../assets/header-bg.jpg’);
3) As this template uses the font ‘Awesome’, different font icons are not visible on the page. Please follow http://stackoverflow.com/questions/11052398/rails-using-font-awesome to solve this problem.
Finally, you can see the entire website running, as shown in Figure 16.

