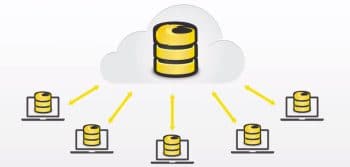
Firebase is a cloud based platform for mobile and Web application development. In this article, which is aimed at Android enthusiasts, we explain how to use Firebase’s cloud services to store and retrieve real-time data.
In today’s digital economy, most of our interactions, such as streaming stock exchange news, weather reports or news updates, occur in near real-time. The need for real-time data is shaping the way technology and markets are evolving currently. While the mobility trend and Android usage have grown over the past decade, combining mobility with real-time data will open up a plethora of opportunities to explore. Firebase is one cloud based platform that has great support for dealing with real-time data when it comes to Android. In this article, I will explain how to integrate Firebase with your app in Android Studio, with an illustration.
For start-ups, Firebase is a quick and easy-to-use cloud based platform for making apps without worrying about servers, cloud storage and high availability among those servers.
About Firebase
Firebase is a unified mobile and Web app development platform from Google. It serves as a back-end as a service that provides real-time data syncing with all the clients subscribed to it, at a given instant. It also gives tools to rapidly develop high-quality apps with quick turnaround times. It is easy to implement Android apps using Firebase without the need for any server side expertise or any knowledge of the database.
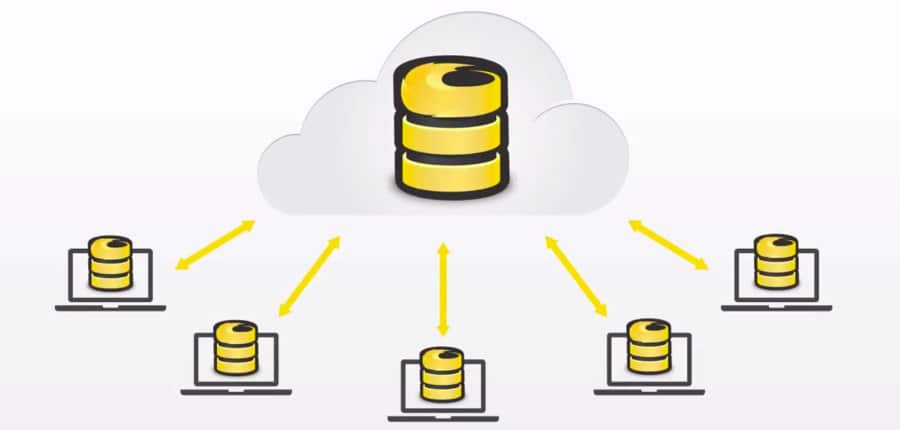
Firebase provides a real-time database for storing and syncing your app’s data. The data is stored in JSON format and synchronised to every connected client. Besides, it automatically backs up user data every day without any performance or bandwidth impact on the app.
Getting started with Firebase
Before integrating your app with Firebase, the pre-requisites are:
1. Android Studio version 1.5 or higher, and the device should be running Android 2.3 (Gingerbread) or above. Android Studio being the official SDK, it can be downloaded from the Android developer’s website.
2. A Firebase account is needed to be able to use its services. You can create a free account by visiting https://www.firebase.com/ and signing up using your Google credentials.
3. SDK tools: Android studio needs to have Google Play services (version 9.2.0 or newer) installed. If not, you can install it using the SDK manager of Android Studio.
Integrating the Android app with Firebase
Firebase provides Java APIs for the Android platform to use its cloud services. To use these APIs, one needs to include Firebase libraries in the app’s build scripts to point to the class path and compile-time dependencies. The three steps described below explain how to set up the necessary environment in Android Studio.
1. Since we are using an external library here, the build.gradle at project level (which should be in the root directory of your project) needs to be told about the classpath for Google services by mentioning it as a dependency in the buildscript as shown below:
classpath ‘com.google.gms:google-services:3.0.0’ |
The buildscript block of build.gradle at the project level should now look like what’s shown below, with the above addition:
buildscript { repositories { jcenter() } dependencies { classpath 'com.android.tools.build:gradle:1.5.0' classpath 'com.google.gms:google-services:3.0.0' }} |
2. The module’s buildscript (build.gradle in the app folder) needs to add the Firebase library as a dependency:
compile ‘com.google.firebase:firebase-database:9.2.1’ |
This library is for the real-time database’s features. The dependencies block of the module’s build.gradle will now look like what’s shown below, with this addition:
dependencies { compile fileTree(dir: 'libs', include: ['*.jar']) testCompile 'junit:junit:4.12' compile 'com.android.support:appcompat-v7:23.2.1' compile 'com.android.support:design:23.2.1' compile 'com.google.firebase:firebase-database:9.2.1'} |
3. Finally, make sure that AndroidManifest.xml has permissions set for Internet access, as the app needs to contact the Firebase server for pushing and pulling real-time data.
All these steps are done on the SDK side. Now, you may have to register the app with a Firebase account. This can be done with the following steps:
1. Log in to your account from https://firebase.google.com/ using your Google credentials. The site has support for both Firebase’s legacy and its latest consoles. This whole article is based on the latest styled consoles. The consoles here are used to access your account to check the real-time database to which the app will be writing.
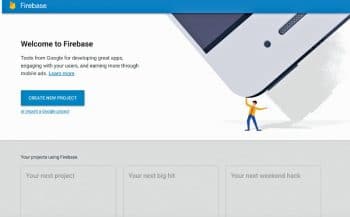
2. You might see the post login screen as shown in Figure 1. Click on ‘Create New Project’ to start with the Firebase project.
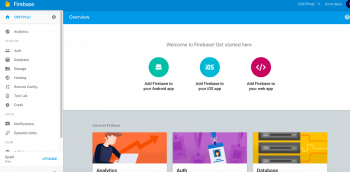
3. A new project gets created under your account, and you can view and use different Firebase services using the project’s dashboard as shown in Figure 2. These different services are seen on the left side column of the dashboard as shown in this figure. This article deals with the database service for dealing with real-time data.
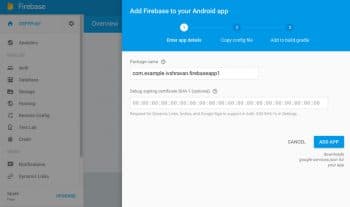
4. Now the mechanism in which the app communicates with your Firebase account during its run time needs to be set up. For this, we need to register the Android app with the created account. This can be done by clicking on ‘Add Firebase to your Android app’ as shown in Figure 2, that will pop up a window like the one seen in Figure 3, prompting you to enter the package name of your Android project. Once added, click on ‘Add App’.
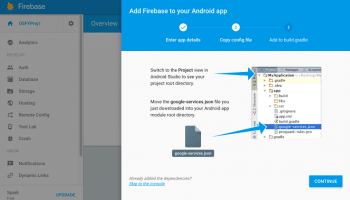
5. The website then generates a config file named google-services.json using the package name provided in Step 4. This file needs to be placed in your Android Studio app’s root directory. All these instructions are displayed on the Firebase site (Figure 4).
6. Google-services.json is needed during the compile time of the Android app. It indicates which Firebase URL/account the app needs to connect with to store and retrieve data. In this case, it happens to be the account you have just created using Google credentials.
With this, the environment needed for using Firebase has been set up. We are now ready to use Firebase APIs to push and pull data from the mobile device.
A simple application for pushing data
Let me now illustrate a sample Android application that writes weather updates to Firebase’s cloud database which, in turn, notifies other clients registered to this account. Let us take a couple of cities, say Bengaluru and Delhi, and their corresponding temperature in Celsius, humidity in percentage and atmospheric pressure in millibars. Then let’s try to update the Firebase database from the app.
Firebase APIs will try to write the Java object’s values to the cloud’s database. So, we first need to create a class, say Weather as shown below, then create objects of this class representing different cities and populate the objects with temperature, humidity and atmospheric pressure values. Here, the classes for serialisation expect to contain a default blank constructor.
public class Weather { private String city; private int temperature; private int humidity; private int pressure; public Weather() { } public void setCity(String city) { this.city = city; } public void setTemperature (int temperature) { this.temperature = temperature; } public void setHumidity(int humidity) { this.humidity = humidity; } public void setPressure (int pressure) { this.pressure = pressure; } public String getCity() { return city; } public int getTemperature() { return temperature; } public int getHumidity() { return humidity; } public int getPressure() { return pressure; }} |
With this class, one can create objects representing Bengaluru and Delhi, and use setter methods to set temperature, humidity and pressure. Once the values are set, they can be written to the database like in the following code snippet:
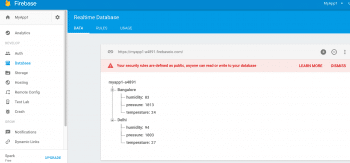
DatabaseReference rootRef = FirebaseDatabase.getInstance().getReference();Weather bangalore = new Weather();bangalore.setCity(“Bangalore”);bangalore.setTemperature(24);bangalore.setHumidity(83);bangalore.setPressure(1013);rootRef.child(“Bangalore”).setValue(bangalore);Weather delhi = new Weather();delhi.setCity(“Delhi”);delhi.setTemperature(27);delhi.setHumidity(94);delhi.setPressure(1003);rootRef.child(“Delhi”).setValue(delhi); |
FirebaseDatabase.getInstance().getReference() returns a reference to the real-time database you got on creating your Firebase account. The app gets compiled with details of the database URL from google-services.json that you had downloaded and added to your project. When the app runs the above code fragment, it writes the object’s values to the Firebase db using setValue() methods that get immediately reflected in your account, as shown in Figure 5. In addition, the database rules which dictate who can read and write in real-time to the DB can be set using the Rules menu, as shown in Figure 5. Permissions are set as public for this illustration. You might want to create the GUI and other means of interaction with the Android app to feed in these weather values, which I’m not covering in this article as it would digress from the intended topic. I am hosting the code of a sample app at https://github.com/shravaniv/OSFY/Firebase_sampleRTdb for reference.
Getting notified on real-time updates
Now that data is pushed to the cloud, one can also register for real-time data updates by adding callbacks or event listeners in the app’s code. The clients need to have their google-services.json compiled with this account’s URL to get these notifications. Event listeners get notified whenever any of the JSON object’s values get updated. A sample code snippet on how to add this callback for value change notifications is shown below:
rootRef.addValueEventListener(new ValueEventListener() { @Override public void onDataChange(DataSnapshot snapshot) { for (DataSnapshot postSnapshot : snapshot.getChildren()) { Weather climate = postSnapshot.getValue(Weather.class); /* You could extract the values of object using the getter methods * and display it in your GUI. * climate.getCity() * climate.getTemperature() * climate.getHumidity() * climate.getPressure() **/ } } @Override public void onCancelled(DatabaseError firebaseError) { /* * You may print the error message. **/ } }); |
The onDataChange() method gives an iterable snapshot of the database which could be used to read the updates. This way, a simple publisher-subscriber model could be implemented quickly using Firebase. There are also many other services like authentication, crash reporting, cloud messaging, analytics, etc, that are provided. You could learn and explore these different services from the Firebase site.



Thank You);
I just read your article in “Open Source” Is there any way to communicate Real time db to MySQL database ?
Thanks Nithin for going through!!
So, firebase itself is a NOSQL based real time dB. Any reasons behind attempting to connect real time db with mysql ? May I know the exact requirement you are looking for?
— Shravan.
thanks for this information,
i was just thinking that, is there any way to make connect with server and firebase .if it is possible, then make it as cache…
that’s why i asked.
thanks for your great consideration.
So, If you’d want to maintain a cache in your mobile device (probably to improve app’s performance), then yes should be possible. You could use Android sqlite and your app could first look into this local dB(cache, if this is what you are referring to) and if it doesn’t find whatever its looking for can then contact the remote firebase dB.
But this I feel this would defeat the complete purpose of firebase dB. The idea here is to provide real-time updates to your app. And in real-time scenarios (like say stock market updates), you need to make sure mysql cache on your mobile always needs to be in sync with firebase.
Hope this helps,
–Shravan
Thank You..!
Sir how to show this data in custom listview
Are you referring to the dat in the firebase site?