User Mode Linux or ‘Linux in Linux’ allows you to run Linux within itself. This gives users a powerful means of doing all sorts of things like debugging kernels, studying processes, etc. This article is a guide to building User Mode Linux (UML) and running multiple UML instances on the same system.
Today, Linux is one of the most widely used kernels for personal computers, embedded systems, etc, and hence everybody wants to understand and learn this important piece of code for various reasons such as educational purposes, for projects and to improve one’s career options. Linux is a multi-processor, pre-emptive kernel with loadable modules, and has all the features that any modern operating system kernel has, such as user space processes, a file system, paged memory management, device drivers, kernel threads, etc.
Kernel code is too vast to understand and debug at one go. So one of the ways to study the Linux kernel is to browse the source code and understand the flow. Let’s suppose you want to crash the running kernel to study debugging or change the way the user-space of your kernel boots by changing startup scripts. Such changes could create havoc on your machine and can’t be easily done on your personal computer. The other option is to buy some small hardware that can boot Linux. You could then build a kernel for it and play around with it; but again, the problem is that even that hardware could get damaged and cost you yet more money to repair. If you want to just learn the kernel’s features and want to avoid the above procedures, one option is User Mode Linux.
User Mode Linux is ‘Linux on Linux’. By adopting this method, you could run a Linux instance on your host machine like any other user space process such as the ‘ls’ program. User Mode Linux is a way of compiling Linux as a user space program, which can be executed on a terminal. With this, you can run multiple virtual Linux kernels as processes. You can crash each of them without doing any harm to your host machine. Besides, you can debug your virtual Linux in GDB. With this method, you can learn about the different parts of the kernel by debugging them when it is running.
So let’s explore the way in which you can build User Mode Linux.
Building User Mode Linux (UML)
User Mode Linux (UML) has full support in the official kernel release. It can be built by going through the following steps.
1. Download the latest kernel from https://www.kernel.org.
Note: The kernel version used is 4.8.0-rc3.
2. Type the following command to make the kernel source folder clean.
make ARCH=um mrproper
3. First, we need to generate a default configuration for the build. So, give the following command:
make ARCH=um defconfig
4. A .config file will be generated in the source directory. We need to modify the default kernel configuration and make sure certain configurations are enabled to make the build successful. To do this, execute the following command:
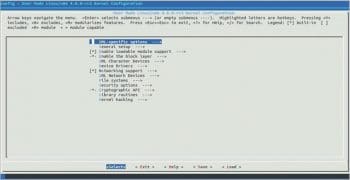
make ARCH=um menuconfig
5. You will see the menu shown in Figure 1 on the screen.
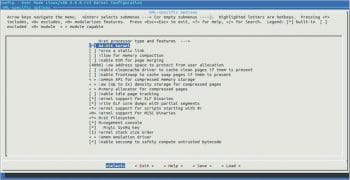
6. Go to the ‘UML-specific’ option and disable ‘64-bit kernel’.
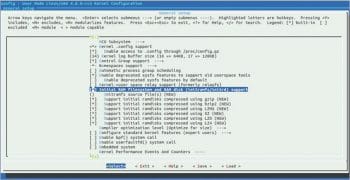
7. From the main menu, go to ‘General setup → Initial RAM filesystem and RAM disk support’ and select the option shown in Figure 3.
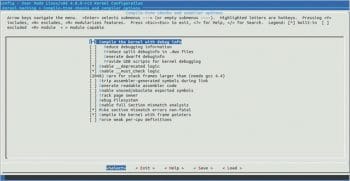
8. From the main menu, go to ‘Kernel hacking → Compile-time checks and compiler options’. Compile the kernel with debug information. Select the option shown in Figure 4.
9. Type the following command to start building the kernel:
make ARCH=um
Once the kernel is compiled, an executable named Linux, which can be executed as a user space program, will be created.
You can execute this Linux executable on the host Linux operating system. Since you can run this virtual Linux on an actual Linux OS, it is also called Linux on Linux. This virtual Linux uses the system call interface of the host operating system to work.
If you execute UML without any argument, you will notice two things.
The output of the execution is the same as the output when you boot the Linux OS on your machine. Some output may change but most of it will be the same.
Execution will fail because it requires a root filesystem to start with, which was not provided.
You will observe the same behaviour if you give no option or a bogus option to the ‘root’ variable while booting up, using LILO or GRUB; note that the same problem in UML will just make the executable crash, but the host system will not be affected. So we will be able to learn how the kernel boots without the root file system, yet not cause any harm to the existing system. This is one of the many advantages of UML. You can do all the messy user and kernel programming, change the boot parameters and even cause the kernel to crash — all without causing any harm to the existing system.
The root file system for this UML build is actually a file and not a physical device. Sample file system files can be downloaded from http://fs.devloop.org.uk/ .
For example, let’s use the Debian Wheezy root file system. To make it boot properly, execute the following command:
./linux ubd0=debian_root_fs
When the boot completes, you will be asked for the login details — the user name is ‘root’ with no password.
You can type all the commands that you use to execute on a normal Linux OS. Even if you crash this, it will only crash the UML instance; so you can re-execute the Linux executable.
Multiple UML instances
You can boot a single UML instance using the file system provided. But if you try to start a second UML instance with the same file system, booting fails, showing a ‘file system error’. To start multiple UML instances, you can provide a copy of this root file system to each UML instance, which will comprise huge files. So let’s use a concept called COW (copy on write) files as a workaround. Let’s modify the command line parameters of UML to enable them to use COW files.
Start the first instance as follows:
./linux ubd0=cow1,debian_root_fs
Start the second instance as follows:
./linux ubd0=cow2,debian_root_fs
After executing, you will see two files getting created — cow1 and cow2. These are COW files used by each UML instance to make use of the existing root file system. Any change made by the first UML instance to the root file system will not be visible to the other UML instance. This enables you to save disk space and memory, because each UML instance will see both its individual COW files and root file system, so it will get a mixed view of both files. Any changes made by a UML instance will go to its respective COW file. So when the root file system is seen, what will be seen is a mixed view of both the root file system and COW files. So suppose UML1 has installed app1 on the file system, then that app will go to its COW file and will not go to the root file system. Hence, UML2 will not see that app or any changes from UML1—this is true for all UML instances.
This has one big advantage—any corruption that a UML instance makes will happen to the COW files and not to the actual file system, so this COW file can be discarded. If you see the size of the COW files, they look large but are actually sparse files. They actually occupy the disk space of only the amount of data that is modified by the UML instance. So having multiple COW files will actually take up less space than having individual copies of the file system for each UML instance.
Kernel debugging in UML
UML is a Linux kernel in itself, but debugging it is a simple process for the host on which it is executing, just like any other process. You can debug UML using GDB, as if it is any other process. With this feature, you can learn many different parts of the Linux kernel such as process management, memory management, scheduler, file system, etc. We will see a simple example of how to debug UML. First, start an instance of UML in the terminal. From another terminal, note down the PID of the UML instance using the ps -aux command. Then start GDB (you need root permission to debug UML modules) with the Linux executable as its parameter.
Let us assume that you want to debug the ls command and see what is happening inside. To do that, you need to put a breakpoint to the sys_clone function in the Linux kernel. This is a common entry point for all commands executed on the command line. First, list the source code of sys_clone so that GDB reaches the file in which this function is present. Type the following command to list the source code of sys_clone:
list sys_clone
Press Enter continuously to find the line in which the do_fork function is called and note down the line number. Then type the following command to put the breakpoint at that line:
break <line_number>
Now, we need to attach GDB to a running UML instance. To do this, type the following command with the PID of the UML process, which was noted previously:
attach <UML_PID>
This will stop the running UML process. To start it again, type ‘continue’ on the GDB terminal.
After putting the breakpoint at that line, go to a UML terminal and type the ls -l command. Your UML instance will stop and the breakpoint will get hit in the GDB terminal. You can now use GDB commands to see the value of variables in the kernel code and learn about all the features of the kernel.
You can even write kernel modules, put breakpoints in those modules, and can debug them before they are actually inserted in a physical machine running the Linux kernel. You can even debug kernel drivers and test them virtually in UML.
Networking in UML
UML provides several interesting networking features in its virtual environment. If you were to study or build any network using physical machines, then you would need at least two physical machines with network interfaces on them. The virtual environment in UML provides a way to dynamically add or remove multiple network interfaces in it. Let us look at some way of using the networking environment in UML.
For this, let us run two instances of UML in two terminals. We need to identify each UML instance and use this identification while configuring it. This is done using ‘umid’ as a parameter while starting the UML instance. For our example of UML instances, let’s use ‘UML1’ and ‘UML2’ as identities. Run the following commands to start these instances.
For the first instance, named ‘UML1’, use the following command:
./linux ubd0=cow1,debian_root_fs umid=UML1
For the second instance, named ‘UML2’, use the command shown below:
./linux ubd0=cow2,debian_root_fs umid=’UML2’
After running these instances, type ifconfig -a in each instance. You will see that none of these instances have any network interface except loopback. There are many ways in which you can add network interfaces to these instances. We will look at two methods – the multi-cast and the Tun/Tap methods. If you need to have communication between multiple instances of UML, but don’t need these UML instances to communicate with the external world, then choose the multi-cast method. In this method, each interface of UML will subscribe to a local multi-cast group, so any packet sent out of a UML instance will reach every other instance of the UML that is subscribed to this group. The disadvantage of this is that it works like a hub, wherein if there are three instances of UML, each is subscribed to a multi-cast group and then any packet sent to that group will reach all these instances. There cannot be a switch or bridge-like configuration, whereby packets just reach a particular node. For such a configuration, you will need to use the TUN/TAP method.
Multi-cast interfaces
To add a multi-cast Ethernet interface on a UML instance, use the uml_mconsole utility. This is the utility to configure each UML instance, with which each instance is identified using its umid. From the host terminal (this is the terminal other than the one from which UML is running), to add an Ethernet interface to each UML interface, type the following command replacing the umid of the respective UML:
uml_mconsole <umid> config eth0=mcast
Note: You may need to have root permissions to execute the above command.
Now in each UML instance, type the ifconfig -a command and you will notice that the eth0 interface is added to each instance but is not up and running. To start these interfaces, assign an IP address to the eth0 interface of each UML instance. Let’s use 192.168.1.1 for UML1 and 192.168.1.2 for UML2. Type the following commands in the UML instance terminal.
In the UML1 instance:
ifconfig eth0 192.168.1.1 up
In the UML2 instance:
ifconfig eth0 192.168.1.2 up
Now, using the ifconfig command, you can see that the interfaces in each UML instance are up and running. You will also notice how easy it is to add an Ethernet interface in a virtual UML platform. Now, since eth0 interfaces are connected to the same multi-cast group, they can communicate with each other. We can test this by pinging each. First, start tcpdump from UML1 and ping UML1 from UML2. You will notice that the pinging will start getting responses, and you can observe that in tcpdump UML1 is getting packets from UML2, and is also sending responses to UML2.
From UML1, issue the following command:
tcpdump -ni eth0
From UML2, use the following command:
ping 192.168.1.1
You can also test this the other way around. The network we just created is an isolated one and will not affect any communication in your host network. Now you can write any network program and communicate between these instances. You can even start another UML instance, give it an Ethernet interface, configure its IP address and test anything on it as you would do on your PC. Congratulations! You are now the network administrator of this new isolated network.
Now, let’s look at how to add a new Ethernet interface eth1 on each instance with a different multi-cast group, so that communication on eth0 will not interfere with eth1. On the host terminal, type the following command for each UML instance:
uml_mconsole <umid> config eth1=mcast,,239.192.168.1,1103,1
After mcast, the first parameter is the MAC address. Leave it empty so that the system configures it to some random value. The third parameter is the multi-cast group address to join, and the fourth parameter is the port on which these interfaces will communicate (1102 is the default port, which was assigned to eth0; we have chosen 1103 for eth1 so that these don’t interfere, since we have chosen the same multi-cast group for both eth0 and eth1).
This will configure the new Ethernet interface on each UML instance. Now, go to the terminal of each UML instance, configure the IP address of eth1 and ping the other instance to see if it communicates. Use tcpdump to study packet flow in each instance. You can play around with the route command to route the packets of one interface to the other, try all sorts of iptables, route and tcpdump commands, and make sure things work as needed.
Now, let’s look at how to add an Ethernet interface to our instance so that it can talk to the host and send packets over the Internet. For this, start a fresh UML instance—let’s say its umid is UML. There are various methods to add interfaces that can talk to the Internet in the host. We will discuss the latest method, which is TUN/TAP. It is a virtual interface, which is added to the host that connects the UML instance to the host network. Any packet that UML wants to send to the host or the Internet will send it to this virtual TUN/TAP interface on the host, which will relay it to the host. To add a TUN/TAP based eth0 interface on the UML instance, type the following command on the host terminal:
uml_mconsole UML config ethh0=tuntap,,,192.168.42.44.
The IP address provided in the command is the IP address for the tunnel interface. This should be an unused IP address of the subnet on your PC, which is connected to the Internet. My subnet is 192.168.42.0, where 192.168.42.43 is the interface address which is connected to the Internet and 192.168.42.129 is my gateway address. So I have chosen 192.168.42.44 for my UML instance. This command will create an eth0 on your UML instance, which is connected to the tunnel interface. To get it up and running, provide an IP address to the eth0 interface on your UML instance. I have chosen 192.168.42.45. Type the following command on the UML instance terminal to make eth0 start:
ifconfig eth0 192.168.42.45 up
Typing this command will show you a lot of commands being executed by the UML instance. These are the commands actually executed on your host PC by the uml_net helper thread, to make this interface on your UML instance connect to the host network interface (see Reference 2 to understand these commands). Also, after this command, type ifconfig on your host, which will show that the tap0 interface has been created on your host, which is the tunnel interface to connect the UML instance to your host. Also, type the route -n command on your host, and you will see that a route to your UML IP address is added to the host kernel routing table. Be careful while selecting the IP address for your UML instance and your tunnel instance. You may mess up your kernel routing table and your host network may fail.
You now have a UML network interface that can connect to your host network. Start one tcpdump instance on your host and connect it to the tap0 interface. Start a second tcpdump instance, and connect it to your host Internet network interface. Ping your tunnel interface from UML (IP address: 192.168.42.44) and this will work. You can also check packet transfers on tcpdump. You can now ping to your host Internet interface from UML (IP address: 192.168.42.43) and it will also work—verify this on your host using tcpdump. Now, if you ping some IP address that is external to your host, such as 8.8.8.8, the pings will complain that the network is unreachable. Type the route -n command on your UML instance, and you will see there is no default gateway configured on it. So any packet outside the tunnel interface subnet will fail. This is because the only access for the UML network to the outside world is the tunnel interface on the host. Configure this tunnel interface as the default gateway by using the following command:
route add default gw 192.168.42.44
Now, if you ping to 8.8.8.8, the ping will succeed. Congratulations! Your UML instance is now connected to the Internet. Next, ping your UML instance from the host, and this shows that this instance is like any other physical machine over the Internet. Now if you try to ping www.google.com, pings will fail. This is because no nameserver is configured on your UML instance. Create a file named /etc/resolv.conf. Open this file and type the following command and save it:
nameserver 8.8.8.8 #google nameserver
Now if you ping www.google.com, the pings will get a reply. Your UML instance is now configured with a nameserver and is connected to the Internet. You can even access your UML instance through the SSH shell from your host. Also, if your UML instance is configured with a global Internet address, you can access it from any PC in the world. You can run HTTP or FTP servers on your UML instance, and access it from the outside world. You can even debug your UML network stack using GDB as was demonstrated earlier. The possibilities for using the UML network feature are vast.


