While reaching for this article in our very popular series on creating Android apps with App Inventor 2, some of our readers must be wondering, What next? The logical thing would be to make the app available to everyone who would like to use it. So this is how to go about it…
I hope you are enjoying the journey to becoming a smart and innovative Android app developer. So far, we have created numerous Android apps. It is fascinating to try and test your creative work on your mobile phones. Ever wondered about how it feels when other people download your apps and then share their views about the work done? Yes, I am talking about taking your app to the Google Play Store, where users from around the world can download it and see your work in action.
In this tutorial, I will guide you on how to create a Google developer profile and then, how to upload your apps to Google Play Store.
If you dont have a developer account, the first step will be to register yourself as a developer; a one-time fee of US$ 25 will be charged for this. This fee is the same for all and is charged only once, after which you can upload any number of paid or free apps to Play Store.
I will continue this session in three steps, by:
- Creating a developer account for Google
- Downloading and packaging your app from App Inventor
- Uploading the app to Play Store
Creating a developer account for Google
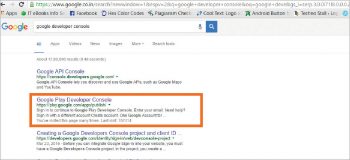
1. When you open the developer console for the first time, you might not know the URL for it.. So just go to www.google.com and search for Developer Console.
2. Click on the second link shown, which will ask you to log in using your Gmail credentials. If you dont have a Google account, first sign up for one.
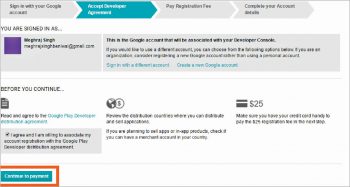
3. You will be asked to accept the license agreement. Since you will be publishing your work on a Google site, you have to abide with certain rules and terms. This agreement contains all of that. If you have the time and are pretty curious about such matters, you can read this thoroughly. Fill the checkbox for accepting the terms and click on the Make Payment button.
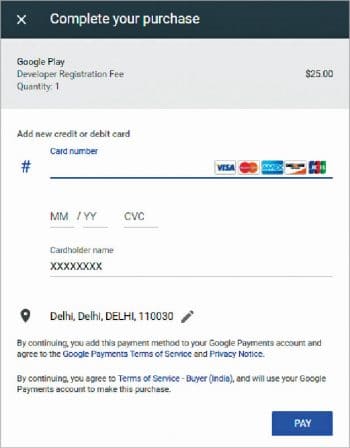
4. Payment is accepted through credit/debit cards. Enter the credentials of your card giving the card number, expiry date and the name on the card. Click on the Pay button after filling in all the correct details.
5. On the last page, you need to fill in other details related to your account. Follow the instructions and you are all set to use your developer account.
6. So now, you have your developer account ready and are eager to add your very first app to Play Store.
Download and package your app from the App Inventor
You already know how to take your app to your computer or mobile for testing. Lets once again revise all those steps.
1. Your app that you built using App Inventor is ready and you need to download the APK (Android application package) for it.
2. On the top row, click on the Build button. It will show you the option to download the APK to your computer.
3. You can see the progress of the download and after it has been successfully done, the application will be placed to the download folder of your directory or the location selected by you for your download.
4. You now need to take this .apk file for uploading to Play Store.
Uploading the app to Play Store
So you have your developer account and the .apk file of your application is ready for publication. During publication, we will require so many additional things (like images or videos), which you need to upload along with your .apk file so that users can see more about your application. Providing snapshots of the application screens gives your users a glimpse of the user interface and functionality from a top view only.
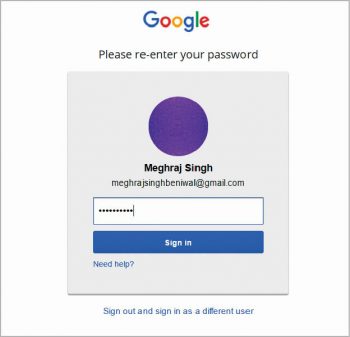
1. Sign in to your Google Play developer console account.
2. You will be taken to the dashboard, which will be empty for now because you have not uploaded any app.
3. You will see the button to Upload your first application.
4. First upload the .apk file using the Browse button.
5. Locate the file that you have recently downloaded.
6. Once your APK is successfully uploaded, you will see the message Upload successful and will be prompted to prepare store listings.
7. As already mentioned, store listings will be additional stuff that will define your application in more detail.
8. You will be asked to write a text description of your application, for which you need to upload some graphics (photos/videos).
9. You need to answer the questionnaire, which will make sure that your app doesnt have any content that violates the terms of your agreement and that it is safe to upload.
10. In the pricing tab, decide and set the price for your application. You can make your app free or you can set some fee.
11. You are eligible to get 70 per cent of the price set for your application, and the remaining 30 per cent is credited to Google for providing the service.
12. Keep checking the button on the top right corner which states Ready to publish, once everything required has been provided by you.
13. Click on the Publish button and your dashboard will list your recently uploaded application.
14. It takes three to four hours for your application to be available in Play Store.
15. Once it is available, you can share the links on social networks or via email with your friends and relatives.
Now you are a successful Android developer for Google as well. Various users across the globe will install your app and you will get to see information like how many downloads have occurred, how many current installs, country-specific download counts, etc, in your dashboard itself.
A note to readers: I would like to know more about your ideas on making Android applications. If you have anything specific that you would want me to cover, then please write to me via email. I will certainly try to help you convert your idea into a working application.


