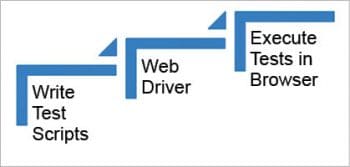
The addition of a Web driver API to Selenium 2.0 has enabled it to provide a simpler, more concise programming interface in addition to addressing some limitations in the Selenium-RC API. This article takes the reader through the installation of Selenium WebDriver, covering the commands, supported drivers and a sample script.
Selenium WebDriver is the successor to Selenium RC, or we can say that Selenium 1.0 + WebDriver = Selenium 2.0. It provides a simple interface, supports dynamic Web pages, supplies a well-designed object-oriented API, etc.
Simon Stewart is the inventor of WebDriver. Selenium WebDriver is fully implemented and supported in Java, Ruby, Python and C#. It programmatically controls the browser. Using WebDriver, script browsers can be programmed.
Installing Selenium WebDriver
1. Install the latest version of Java
2. Download Eclipse IDE for Java developers from http://www.eclipse.org/downloads/
3. Download Selenium Java driver from http://docs.seleniumhq.org/download/
4. Configure WebDriver with Eclipse IDE by going through the following steps:
- Launch eclipse.exe
- Set the workspace
- Create a Java project using File->New->Java project in the Eclipse IDE
- Create a Class in the Java project by right-clicking on it, and select New-Class
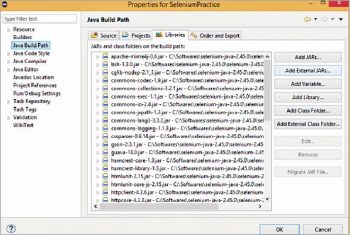
- Now, add Selenium WebDriver in the Java build path
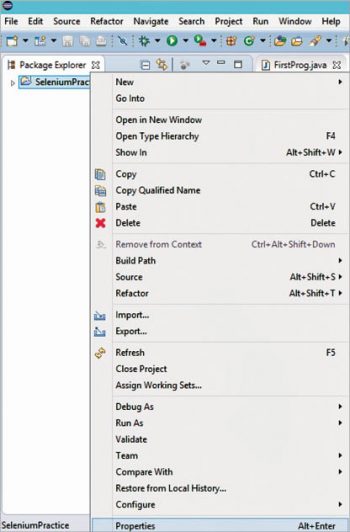
- Select the project created in the above steps, right-click on it and select the Properties option
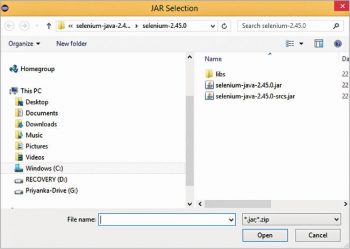
In the Properties window, click on Java Build Path->Add External Jars
- This will open the window depicted in Figure 4.
- Add all the files from the libs folder as well as the jar files, and click on the OK button.
- After following these steps, all the Selenium files will be imported in the Java project and you can start working with Selenium WebDriver to create a script.

Selenium WebDriver commands for locating UI elements
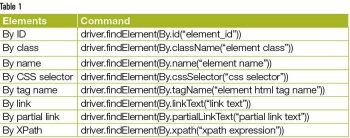
Locating the elements of the Web page is one of the very important tasks in automation testing when using Selenium WebDriver. These elements are used to navigate to the Web page automatically. There are various ways to locate the elements, as shown in Table 1.
Selenium WebDriver
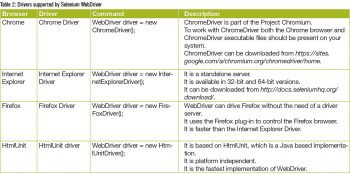
Selenium WebDriver supports various types of drivers through which Web applications can be accessed (Table 2). It overcomes the limitations of the Selenium IDE, which supports the Firefox browser only. To access the other drivers, you need to create a variable of WebDriver.
Sample script
You can follow these steps to search for Selenium on google.com.
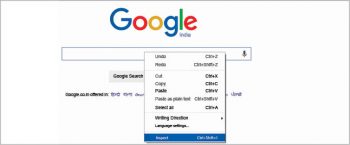
1) First, identify the field. In the above example, the text box for the search should be identified.
2) Elements can be identified in two ways:
a. Using the Selenium IDE
b. By inspecting the element
3) Right-click on the field and select the Inspect Element option.
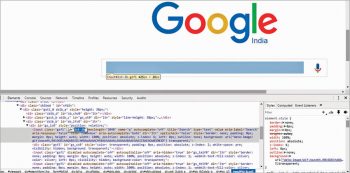
4) By clicking on Inspect Element, the screen depicted in Figure 7 will open, and you can select any of the options to identify the element as described in Table 1.
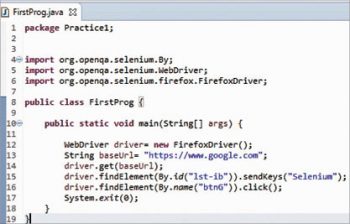
Sample script using the Firefox driver in Eclipse
A sample script using the Firefox driver in Eclipse is shown in Figure 8.
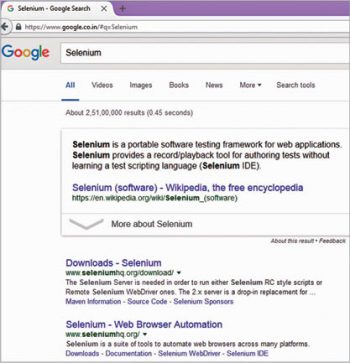
On running the script, the page shown in Figure 9 gets opened.


