


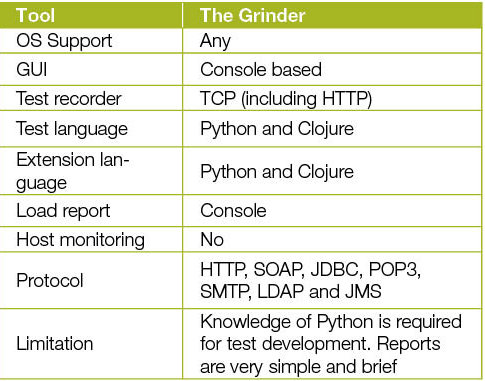
A few days ago, I was working on some performance testing tools to find out which one to use to load test our software. My search ended with The Grinder, which uses Jython to make the test scripts that can be used to test applications.
The Grinder is an open source testing framework that allows the running of tests in parallel on many machines. It is a Java based framework and is available under a BSD style open source licence.
The key features of The Grinder are:
1. It uses a TCP proxy to record network activities.
2. It uses Jython (the power of Python combined with any Java API) to create test scripts.
3. It supports multiple protocols.
4. It provides support for distributed load testing.
In this article, readers will learn how to install and set up The Grinder, as well as record a test, modify it and start running the test.

Installation
I am using a Windows environment to install The Grinder version 3. You can run The Grinder on a Linux environment as well. The set-up is not much different for a Linux environment, the only differences being in the shell scripts and installation directory.
First check whether Java is installed on the machine. If not, please download and install Java from Oracle. Then follow the steps given below.
1. Download The Grinder from Sourceforge. The URL for the download is http://sourceforge.net/projects/grinder/.
2. Download the binary distribution, if you are planning to extend The Grinder, and then download the source distribution.
3 Unzip the binary file to some suitable location. I extracted the file to C:\Testing.
4. Download Jython2.1.jar class file from http://www.jython.org/downloads.html.
After downloading it, either run Java with the -jar option, as shown below:
java -jar jython_installer-2.2.1
Or double click jython_installer-2.2.1.jar
5. Add grinder.jar to the CLASSPATH:
Set CLASSPATH = %CLASSPATH%; C:\Testing\grinder-3.11-binary\grinder3.11\lib\grinder.jar
echo %CLASSPATH%
The Grinder has been successfully installed on your computer. You can check it by running The Grinder console. To do so, enter the following command in The Grinder directory:
C:\> cd C:\Testing\grinder-3.11-binary\grinder-3.11
C:\> Testing\grinder-3.11-binary\grinder-3.11\java net.grinder.Console
You will get The Grinder console.

Creating a test
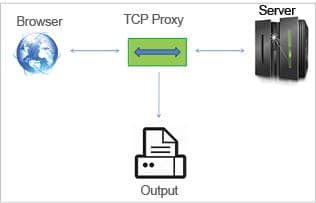
To start with performance testing, we need to have a test. You can create one either by writing your own test from scratch using a script, or you can use The Grinders proxy tool to record a scenario and to generate a test script. The Grinder comes with a TCP proxy tool. It is a proxy process that can be placed between a server and browser. It records the request and response between a server and browser, and sends the results to a terminal window.
It can be used as a very good debugging tool because it lets you see whats going on at the network level. The TCP proxy in The Grinder is used to generate Jython test scripts.
Starting the TCP proxy: To start the TCP proxy, you first need to set up a browser to temporarily use a proxy server. I used Mozilla Firefox as a proxy server.
Setting the proxy: To set the TCP proxy, follow these steps.
1. Open the Firefox menu and click on the Options tab.
2. In the Options window click on the Advanced icon.
3. Select the Network tab.
4. In the Connection section, click on the Settings button.
5. In the Connection Settings window, select Manual proxy configuration’. Set the HTTP proxy to localhost and 8001 as the port. Check the Use this proxy server for all protocols’ option. Remember that No Proxy for the text box’ should be empty.
6. Close the Connection Settings and Options windows by clicking on the OK button.
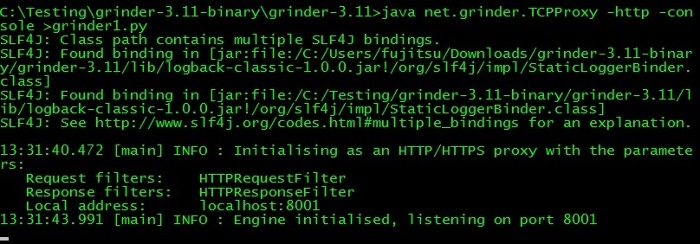
After setting the proxy in the browser, start the TCP proxy. The first step to starting the TCP proxy with an HTTP filter is as follows:
C:\>grinder> java net.grinder.TCPProxy -http -console >grinder1.py
The *grinder1.py file contains the test script written in Jython.
The output of the TCP proxy is shown in Figure 3.
The console also displays a simple window that allows the TCP proxy to be stopped cleanly. This window allows the user to add comments to the script during recording. The window looks like whats in Figure 4.
The application that you want to test in your browser can now be accessed. I used a simple Web application for creating a new user. In the test scenario, I created a user, logged in, executed a simple SQL query and then logged out using my application.
Note: While running the TCP proxy, make sure that no other tab has been opened. The TCP proxy intercepts every request that the browser makes. So, to avoid unwanted requests, dont open any other tab except the application tab.
Once youre done recording the test, press the Stop button in TCP proxy.


Parameterising the test
Lets take a look at a TCP proxy-generated Jython script. I am showing only a part of the script because the whole script is very large.
class TestRunner:
"""A TestRunner instance is created for each worker thread."""
# A method for each recorded page.
def page1(self):
"""POST j_spring_security_check (requests 101-102)."""
# Expecting 302 'Found'
result = request101.POST('/cdacdrm1/cdacdrm1/j_spring_security_check',
( NVPair('j_username', 'oracle'),
NVPair('j_password', Oracle@123),
NVPair(submit, Login), ),
( NVPair(Content-Type, application/x-www-form-urlencoded), ))
grinder.sleep(28)
request102.GET(/cdacdrm1/user/monitoring/drmHome.html)
return result
From the above code, we get a basic idea of the structure of a test script. This script is 98 per cent useful. The script can be parametrised according to need. Right now, I log in with the user name oracle, but what if I want to log in with a different user name. To log in with different names, I need to create an array that stores user names and password combinations. Then, based on The Grinder thread number, I try to log in with the appropriate user name and password.
After changing the parameter’s value, the script looks like what follows:
credentials = [{"username":"oracle", "password":"Oracle@123"},
{"username":"postgres", "password":"Postgres@123"},
{"username":"shweta", "password":"Shweta1"}];
class TestRunner:
"""A TestRunner instance is created for each worker thread."""
# A method for each recorded page.
def page1(self):
"""POST j_spring_security_check (requests 101-102)."""
credential = credentials[grinder.threadNumber];
username = credential["username"];
password = credential["password"];
# Expecting 302 'Found'
result = request101.POST('/cdacdrm1/cdacdrm1/j_spring_security_check',
( NVPair('j_username', username),
NVPair('j_password', password),
NVPair('submit', 'Login'), ),
(NVPair('Content-Type', 'application/x-www-form-urlencoded'), ))

grinder.sleep(28)
request102.GET('/cdacdrm1/user/monitoring/drmHome.html')
return result

Running the test
After you have recorded your script, you have two methods to replay it:
1. You can edit the grinder.properties file and play the recorded scenario with The Grinder.
2. You can use the console to send your script to an agent. Each agent will need a grinder.properties file containing the console address.
Next, copy grinder1.py under your C:\Testing\grinder-3.11-binary\grinder-3.11\example
Now, check for the grinder.properties file inside C:\Testing\grinder-3.11-binary\grinder-3.11\example. If it is found, then edit the existing file; otherwise prepare a new file and put it under The Grinders example directory. Please see the code below:
# Commonly used properties # # The file name of the script to run. # # Relative paths are evaluated from the directory containing the # properties file. The default is grinder.py. grinder.script = grinder1.py # The number of worker processes each agent should start. The default # is 1. grinder.processes = 6 # The number of worker threads each worker process should start. The # default is 1. grinder.threads = 20 # The number of runs each worker process will perform. When using the # console this is usually set to 0, meaning run until the console # sneds a stop or reset signal. The default is 1. grinder.runs = 1
The number of virtual users is:
Number of worker threads x number of worker processes x number test machines.
So, in our case total number of virtual users is 6x20x1 = 120.
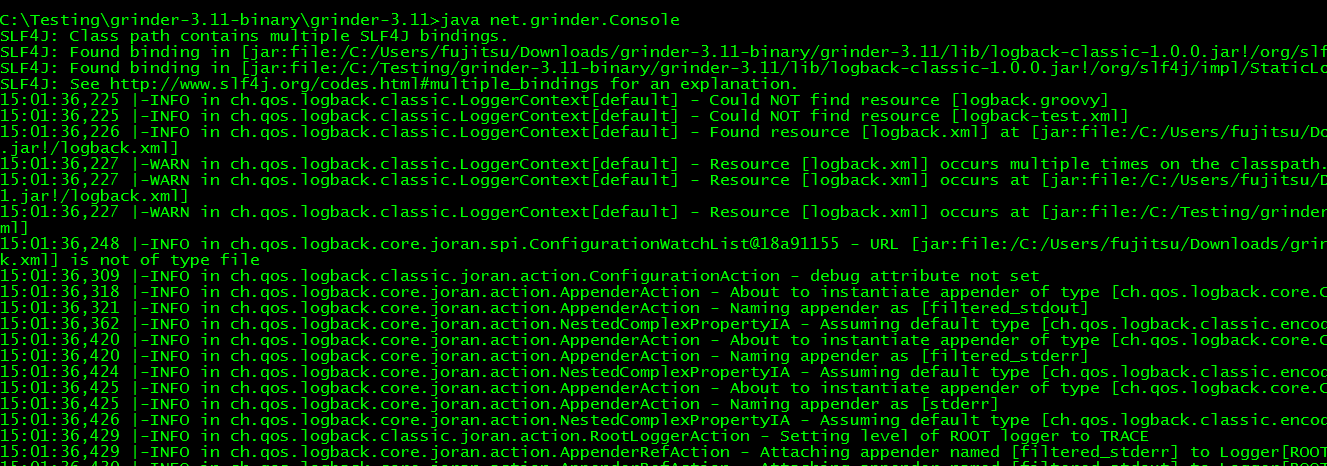
To run a test, lets start a console, open cmd and enter the following command:
C:\Testing\grinder-3.11-binary\grinder-3.11> java net.grinder.Console
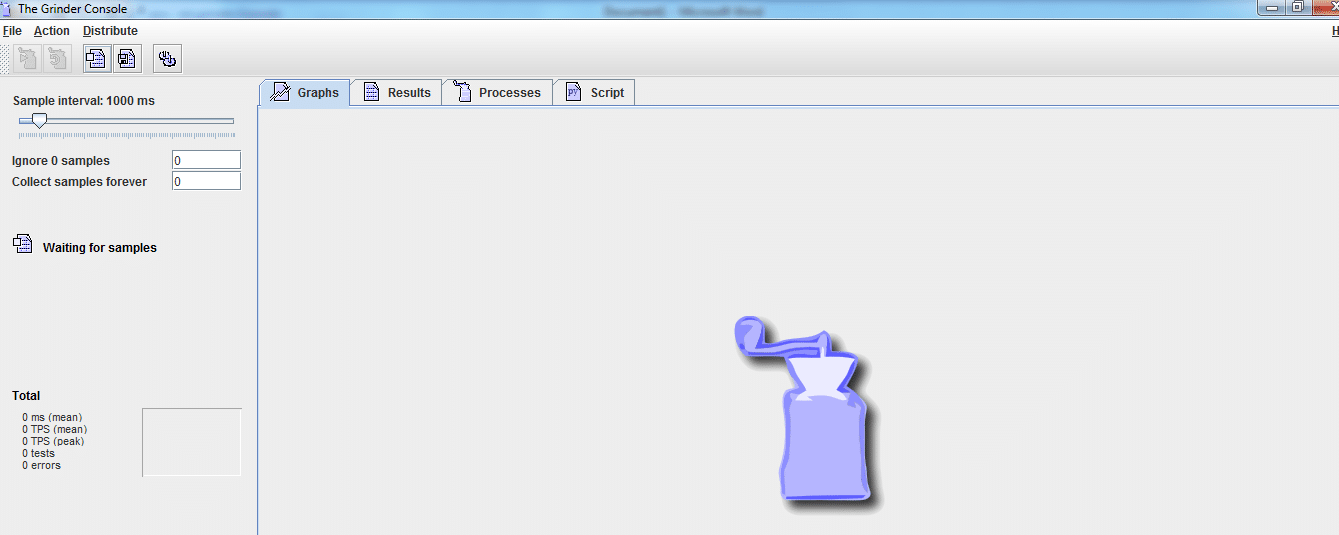
The console window opened is shown in Figure 6.
Now, start an agent, open another terminal and enter the following command:
C:\Testing\grinder-3.11-binary\grinder-3.11> java net.grinder.Grinder
Sometimes, this command gives the error shown in Figure 7 if you have set the classpath temporarily.
To solve the error, you need to set the classpath again in the new terminal window (as given in step 5 under Installation).
The output of the above command is given in Figure 8.
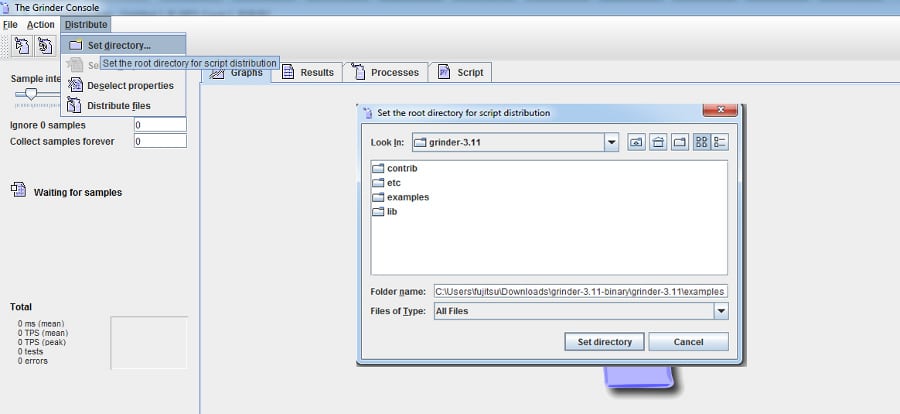
Now, distribute the file to the agent, and set the root directory for script distribution. Go to The Grinder console, select Distribute, then set the directory to C:\Testing\grinder-3.11-binary\grinder-3.11\examples
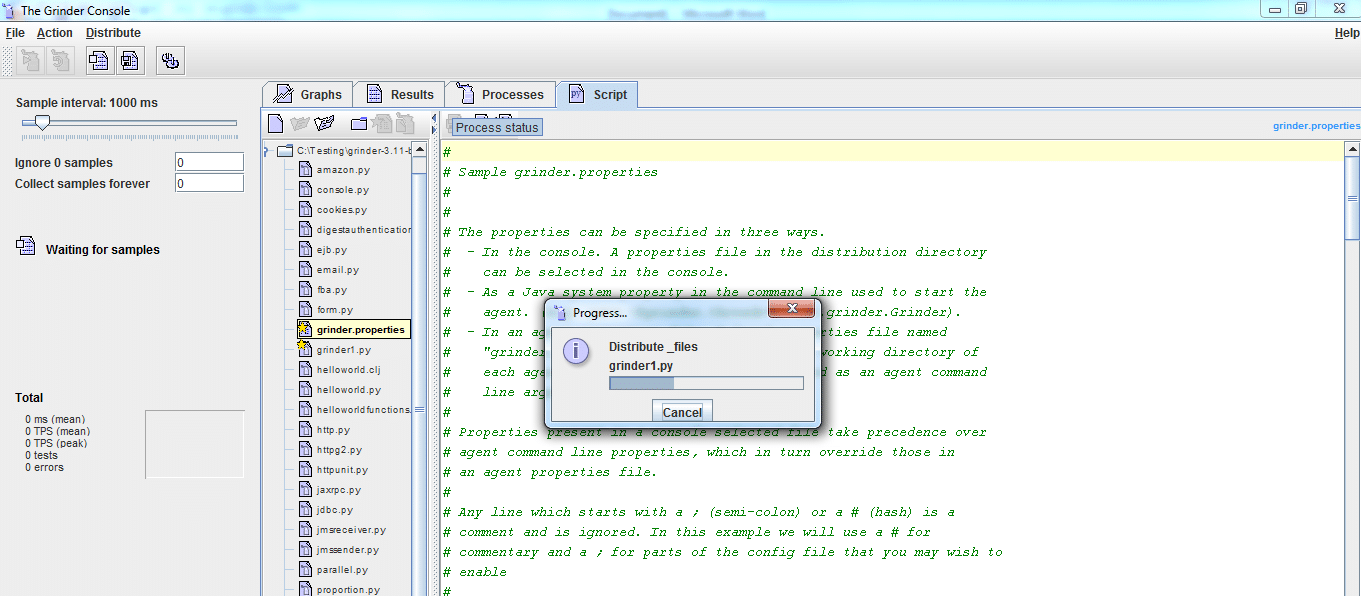
Click on the script tab and make sure grinder1.py and grinder.properties are selected or starred. If not, then right-click on grinder.properties and choose Select properties.
Run the test. Click on The Grinder Console, and then go to the Action tab and click Start process.
Check the process and view results. Go to The Grinder console, click on the Process tab to see currently running processes.
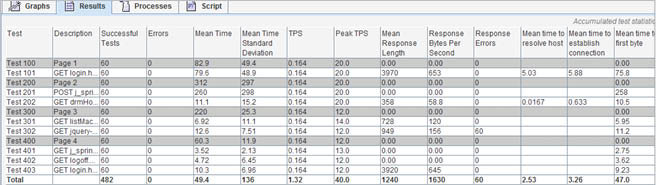
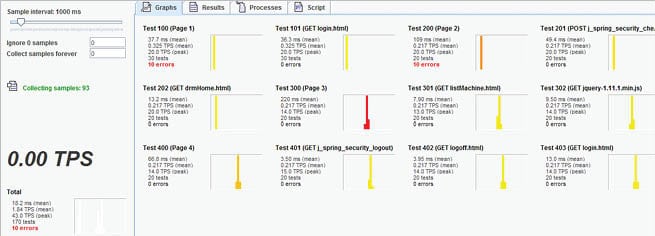
Go to the result and the Graph tab of The Grinder to see the result of testing.
Analysing The Grinder data
The Grinder is a tool that is made for developers. It generates raw data, which is not very user friendly. Once Grinder collects the data for you, you can do whatever you want to do with that data. For a quick overview of your data, you can use a tool called GrinderAnalyzer.
The Grinder is a pretty powerful and flexible performance testing tool. I hope that after this tutorial you will have the knowledge to install and set up The Grinder for testing your application.
For more information, please refer to the Grinder documentation available on The Grinder website.


Can TheGrinder be useful for Android testing?
I am sorry..
What is the answer?
I need know it
is it possible to create custom grinder agent for testing?
if possible how
tx in advance
Hi,
Unable to record the script with TCPProxy…. Browser is giving 505 Error and TCPProxy is showing failed to connect. Can you provide me the solution.