FFMPEG is a free and open source project that produces libraries and programs for handling multimedia files and data. This article shows how one can upload a video file, screen cast, or Web cam output for YouTube Live using FFMPEG.
 Sometimes, advanced technology doesnt work too well. Streaming over the Internet is an example of this. Our old bulky TV sets play live channels in real-time without any complications while a computer needs this and that to stream a single video. Playing video files on a website was an ugly job for both the developer and the user till HTML5 entered the scene.
Although video and audio streaming over the Internet has been made simple, live streaming is still challenging. But that is not the case with YouTube. Uploading video for live streaming is an easy task and the user has to do nothing more than own a device that can play regular YouTube videos.
Let us look at how we, as free software enthusiasts, can broadcast on YouTube Live. Lets use the highly sophisticated, portable, yet simple tool called FFMPEG. The command to invoke FFMPEG can be used in other situations tooto upload videos to sites other than YouTube which support the same technology. I have taken YouTube as the example since it seems to be the most stable and popular service.
How does it work?
The basic steps involved in YouTube Live broadcasting are somewhat as follows.
- You have or get a verified YouTube account, which is in good standing.
- You get the public server URL and private stream name/key from your YouTube Live dashboard, since its required to configure things like monetisation.
- Using these two values, you upload your video to YouTube with the help of an encoder.
- The stream is broadcast live and the world gets to watch you.
RTMP and encoders
RTMP (Real Time Messaging Protocol) is an Internet protocol that can be used to stream audio, video and data between a Flash player and a server. It was initially developed as a proprietary protocol by Macromedia. But Adobe, which owns Macromedia now, has released an incomplete version of the specification for public use.
RTMP is implemented over the following three stages:
- Live video encoder
- Live and on-demand media streaming server
- Live and on-demand media streaming client
There are free software servers and clients available to make use of RTMP. Thus you should be able to replace Adobe Flash Media Server with Red5 or FreeSWITCH, and Flash Player with Gnash or VLC. But in the case of YouTube, Google takes care of the server and client. As a YouTuber, all you have to bother about is the encoder.
As the broadcaster, you have to encode and upload the video to YouTube using a supported encoder. Google lists some supported encoders in its support page. There you can see an open source suggestion, Open Broadcaster Software. You may try it, but here we are taking up FFMPEG.
Note: The latest version of Firefox is needed to enjoy YouTubes HTML5 player. Chromium users are recommended to install or update the package chromium-codecs-ffmpeg-extra.

Why FFMPEG?
Because it is the simplest option! Most distros have FFMPEG preinstalled; and all you have to do is run a single line of command and you are live on YouTube!
Also, FFMPEG is highly portable (it runs on different operating systems) and powerful. It supports a lot of video formats and configurations. It can take live input from devices and push the output to remote locations. You can feel its speed even on an old computer.
It is, therefore, used as a backend of many other GUI applications, including converters and video editors. The most important thing about it is that it is a free software package!
Note: Ubuntu now ships avconv instead of FFMPEG.
Lets broadcast a video
Let us go through a step-by-step how to. It includes both YouTube and FFMPEG.
First, you have to prepare the video file. Although FFMPEG can convert it for YouTube on-the-fly, it would be nice if you can render it for the YouTube format using a video editor or converter. This is because FFMPEG options are a bit messy and you dont want to go crazy at the uploading stage. Many video editors have YouTube presets (they also use FFMPEG as the backend!). For example, while rendering with OpenShot, take the profile as Web and target YouTube-HD.
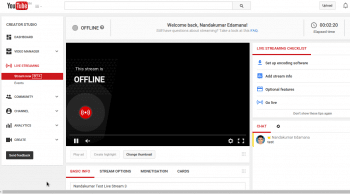
Once you have your video file, sign into YouTube. You can now access the Live Streaming Dashboard using the link on the upload page or by visiting https://www.youtube.com/live_dashboard.

YouTube Live dashboard
Set things like the stream name and monetisation. At the bottom of the page, you can see ENCODER SETUP. Grab the server URL and stream name/key from there (by pressing the Reveal button).
Encoder setup: Get the server URL and key
Now open the terminal and use the following command:
ffmpeg -i <inputFilePath> -f flv SERVER_URL/KEY
Here is an example.
Server URL: rtmp://a.rtmp.youtube.com/live2/
Key: nandakumar96.7mwj-vh6r-45ru-6eqq

Command: ffmpeg -i /tmp/a.flv -f flv rtmp://a.rtmp.youtube.com/live2/nandakumar96.7mwj-vh6r-45ru-6eqq
Your stream is online! You can now use a few options like shown below:
-s widthxheight -- to scale the video
-b value -- to set the bitrate
These two options are useful if you want to degrade the quality of the stream in case you have a low bandwidth. For example, you can stream an HD video file to 240p quality by using the following command:
ffmpeg -i /tmp/a.flv -f flv -s 426x240 -b 400k rtmp://...
Caution
Your live stream will be archived and uploaded to your channel once the broadcast is complete. To prevent this, you can edit the STREAM OPTIONS before starting the stream (in the live streaming dashboard).
Tip: A YouTube live stream is stopped when the encoder is terminated. You can press Ctrl+C to stop FFMPEG so that your stream also stops.
Make your screen public!
You’ve successfully broadcast a pre-recorded video. So why not try to screen cast it? Your screen is captured and broadcast live! The following command does that with your default microphone (or sound input device) as the audio source:
ffmpeg \
-f alsa -ac 2 -i default \
-f x11grab -framerate 24 -video_size 1366x760 \
-i :0.0+0,0 -preset medium -r 24 -g 48 \
-acodec libmp3lame -ar 44100 -threads 6 -qscale 3 -b:a 128k -bufsize 512k \
-f flv -s 426x240 SERVER_URL/KEY
The above command is split into several lines for readability. You may enter this in a single line avoiding the backslashes (\). If you use them, make sure you dont enter white spaces before entering the next line. Also, dont forget to press the Enter key after completing the command.
video_size tells you how much of the screen should be recorded. -s tells you what should be the output video resolution. In the above case, my whole screen (1366×760) is captured and scaled to 426×240. If your connection is fast enough, you can omit the second option so that a high quality video is uploaded (theres no problem if the viewer has a slow connection YouTube will take care of that).
So happy streaming!
References
[1] https://support.google.com/youtube/answer/2797387
[2] https://support.google.com/youtube/answer/2907883


Is there any way to queue multiple files so I can stream something like a playlist?
Sorry that I didn’t see your comment yet. If you meant livecasting a number of pre-recorded videos, you can consider creating a local playlist, playing it using a regular media player, and livecasting your screen. Another (probably the best) option is to write a shell script or something.
Yes:
There are 2 main options:
Option A: Pre-work: create 1 event, then duplicate and change Title/Description of each before the stream
Option B: Post-work: create 1 event, then use the same streamkey to stream the files with the same settings (automatically creating the videos)
Let’s go with the pre-work option:
#1: create a playlist on YouTube
#2: create a future event: https://www.youtube.com/my_live_events?action_create_live_event=1&ar=2
#3: in [Ingestion Settings], ensure to select [Reusable Stream Key] (Reusable keys allow for easier next stream setup, recurring events, or simultaneous events of the same quality.) (copy this stream key)
#4: create all events before: goto https://www.youtube.com/my_live_events?filter=scheduled → [New live event from these settings]
#4b: (optional addition): Depending how precise your streaming timing is, you might also look into experimenting with Auto-start: [Info and Settings] → [Advanced Settings] → [Automatically start the event when you start sending data]
#5: goto https://studio.youtube.com → [Videos] → [Live], check each video, → [Add to Playlist]
#6: stream each with the same copied stream key