Almost all institutes have a computer science department or an IT department, nowadays. Very often, these departments organise programming contests. While participating in these contests, I became aware of the following things:
- Eighty per cent of the time, the programs are checked manually
- A lot of people participate
- People prefer the contests to be online (like codechef.com)
- Offline events have their own charm and draw large crowds
The advantages offered by online program judges are numerous:
- Multiple language support
- Quick checking
- No biases
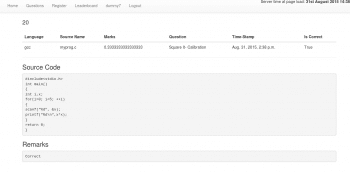
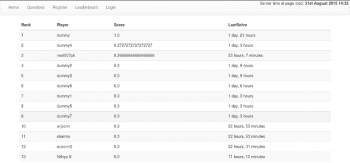
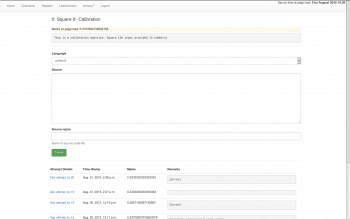
Openjudge bridges the gap between online judges and offline contests. It offers all the capabilities of an online judge for an offline system, with very few requirements. One can set up a programming competition with minimal effort spent in developing the infrastructure needed for it. So let us get started.

The set-up
Let us explore the individual components of Openjudge. To install it, we first need some configuration. Openjudge was written with Linux in mind in order to eliminate complex issues arising from supporting multiple operating systems. This article was written using Linux Mint 17. It is known to work on Ubuntu also. The prerequisites are:
1. Linux Mint/Ubuntu
2. Python 3
3. Git
4. Pip and Virtualenv
In order to complete this list of requirements, lets first get hold of a Linux system. After that, open the terminal (Ctrl + Alt + T) and type in the following commands:
$ cd ~$ mkdir judge$ cd judge$ sudo apt-get install python3-dev$ sudo apt-get install python3-virtualenv$ virtualenv -p python3 env$ source env/bin/activate$ pip install openjudge$ sudo apt-get install git$ git clone https://github.com/theSage21/judge-interface.git .$ ./setup.sh |
The first part creates a folder in your home directory called judge. The second part installs Python 3 and Python development packages. The third part creates a virtual environment and installs Openjudge in it. Since Openjudge needs an interface to function, the fourth part downloads the default interface and runs the set-up for it.
In the fourth part, make note of the dot in the end of the command. It is important.
While setting up, you will be asked to create a superuser for the competition. The superuser is one who adds or removes questions, languages of submission and participants.


Usage
The judge is simple to use. In order to host a programming competition, you must have a LAN. It does not matter if the LAN is wired or wireless. After that, the steps are as follows. In a terminal, type the following commands:
$ cd ~/judge$ ./runserver.sh |
In another terminal, type:
$ cd ~/judge$ source env/bin/activate$ openjudge |
The order is important. The interface must be started first and then the judge. That is all. In order to make this competition available to all computers on LAN one must only supply the IP address of the computer on which the judge is running. You can find the IP address of the computer by running `ifconfig` in a terminal window. Here is an example from mine.
“`
ghost@amnesia $ ifconfigwlan0 Link encap:Ethernet HWaddr c4:17:fe:b8:ab:f6inet addr:192.168.10.116 Bcast:192.168.11.255 Mask:255.255.254.0inet6 addr: fe80::c617:feff:feb8:abf6/64 Scope:LinkUP BROADCAST RUNNING MULTICAST MTU:1500 Metric:1RX packets:1947721 errors:0 dropped:0 overruns:0 frame:0TX packets:1064025 errors:0 dropped:0 overruns:0 carrier:0collisions:0 txqueuelen:1000RX bytes:2861465984 (2.8 GB) TX bytes:120199975 (120.1 MB) |
“`
This shows that my wireless network card wlan0 has an IP address of 192.168.10.116. If I have set up Openjudge on my computer, anyone on the WLAN can access the competition by typing 192.168.10.116 in their respective browser windows.
Note that since we have created a virtual environment, the openjudge command will only run when the environment is active. To do that, navigate to the folder you installed Openjudge in. In this tutorial, it is cd ~/judge/. After navigating to the folder, you can activate the environment by typing source env/bin/activate.
After this, Openjudge is available for use. Virtual environments let us use different versions of software on the same computer. When a new version of Openjudge comes out, you can test it by just creating a new folder and typing the following code:
$ virtualenv -p python3 env$ source env/bin/activate$ pip install openjudge |
Thus you can use two different versions without having to reinstall them, over and over again.

Features of Openjudge
1) The superuser can control the competition via the Administration interface, which is available at the URL http://<IP_ADDRESS>/admin/.
2) Multiple languages can be used in the programming contest. Initially, the judge only supports Python2, Python3, C, C++ and Java. Others can be added as per the need.
3) Complete details are available in the terminal running Openjudge. The judge also creates a logfile to keep track of things that have been done.
References
[1] Openjudge: http://theSage21.github.io/openJudge/
[2] Interface: http://theSage21.github.io/judge-interface/
[3] Issues may be reported at https://github.com/theSage21/openJudge/issues/


