Meteor is an open source platform which provides a complete, full-stack framework for building Web and mobile applications entirely in JavaScript. It provides a very easy and delightful app-building experience with lots of cool features such as live updates, a unified package system, Websocket Microservices, etc. Meteor has a reactive programming model that extends all the way from the database to the user’s screen. So lets explore how to build an app with Meteor.
Installing Meteor
Installing Meteor is pretty straightforward. There is just one command to be executed, after which you are all set. To install Meteor on OS X or Linux, run the following command from the terminal.
$ sudo apt-get install curl$ curl https://install.meteor.com/ | sh |
To install Meteor on Windows, just download the installer from https://install.meteor.com/windows , follow the wizard and its all done.
This will install Meteor, MongoDB and almost everything you need to get started with.

Creating a new app
To create a new app, run the following command from the terminal:
$ meteor create meteorApp |
This creates a new directory named meteorApp and places all the files in it.
Inside the meteorApp directory, the following three files are created by Meteor:
1. meteorApp.js contains all the JavaScript code which will be sent to both client and server
2. meteorApp.html is an HTML file to define views
3. meteorApp.css is a CSS file to define styles
To run the app, first navigate to the app directory and run the Meteor command, as follows:
$ cd meteorApp$ meteor |
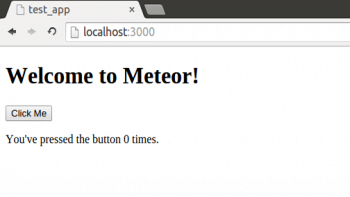
Now open the browser and enter the URL http://localhost:3000, where you will see output as shown in Figure 1.
Structure
By default, any JavaScript file found by Meteor is automatically loaded and run by it, both on the client as well as the server side. This can be a serious issue in terms of security and hence organising the code into appropriate directories is very important. Meteor provides a special way to have control of the JavaScript code to be loaded on the client and the server by using special directories which isolate the code on the server and the client side. The following is a list of special directories in Meteor:
/client
All the files in this directory are sent to the client and are published to the browser. HTML, CSS and related JavaScript can reside here.
/server
Files within this folder are run on the server only.
/public
Files in this directory are served to the client. Assets like images and videos can reside in this directory which serves as the root for assets, i.e., when including files from this directory the directory name/public is not a part of the URL.
/private
Files within this folder can be used by the server using the assets API.
If any HTML and CSS file is encountered outside these directories, its sent to the client side while the JavaScript gets loaded both on the client and the server side.


Templates
Templates are nothing but Meteors way of specifying HTML. Clients render HTML through templates. Templates also serve as a connection between the interface and the JavaScript code. All templates in Meteor are defined inside the template tag.
Heres an example:
<template name=foo>......</template> |
With the name attribute, we define a name for the template by which it is referred.
For every defined template, Meteor creates a template object. Everything inside a <template> tag is compiled into Meteor templates, which can be included inside HTML with {{> templateName}} or referenced in your JavaScript with Template.templateName.
Let us proceed to our first template by issuing the following code:
<template name=foo><h1> Welcome to Meteor</h1></template> |
Now we need to include this template inside the interface. To make the foo template appear on the page, place the following line inside the .html file:
{{> foo}} |
Given below is an example of how to create and embed the template inside the HTML body.
<head><title> Meteor </title></head><body><h1> Hello World </h1>{{> foo}}</body><template name=foo><h1> Welcome to Meteor</h1></template> |
To view the above code in the browser, first run the Meteor server.
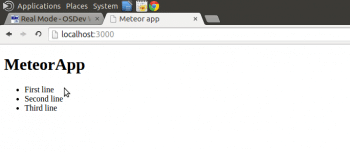
In the browser, enter the URL localhost:3000 and you will see the results, as shown in Figure 2.

Templates and JavaScript
Templates can become more dynamic with the use of helpers and they can be referenced in JavaScript using Template.templateName, as follows:
<body><div class=container><ul>{{#each lines}}{{> line}}{{/each}}</ul></div></body><template name=helperDemo><li>{{line}}</li></template> |
helperdemo.js: The following helper passes data to the template. The helper named lines returns an array to the template, where we loop over the array and display each line in an unordered list using html tags.
Template.body.helpers({lines: [{ line: This is line 1 },{ line: This is line 2 },{ line: This is line 3 }]}); |

Collections
Collections are nothing but databases. By default, Meteor comes with MongoDB, which is automatically installed and doesnt require any configuration. This database can be accessed on the server as well as the client side.
To create a collection, just add the following line in a js file:
MyDb = new Mongo.Collection(testDb); |
This database can be viewed both from the server and the client. On the server side, the database operations can be performed on the Meteor Mongo console and on the client side, these can be done on the browser console. In order to insert data into the database, open a new terminal tab, go to your app directory and type the following command:
meteor mongo |
This opens a console in your apps local development database. At the prompt, type the following command:
db.testDb.insert({ text: Hello world!, createdAt: new Date() }); |
The same can be done with the browser console or through the JavaScript file. Now this database is automatically made available to both client and server. To view the inserted elements, enter the following command:
db.testDb.find(); |
Events
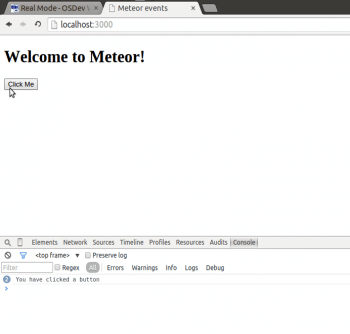
In Meteor, events are associated with templates. Events are attached to templates in the form Template.templateName.events, where events is a keyword. The following code attaches a click event to a template.
events.html<head><title>Meteor events</title></head><body><h1>Welcome to Meteor!</h1>{{> meteorEvents}}</body><template name=meteorEvents><button>Click Me</button></template>events.jsTemplate.meteorEvents.events({click button: function () {console.log(You have clicked a button)}}); |
Meteor also supports all types of HTML DOM events.
Note: preventDefault(): prevents the action the browser would normally take in response to this event, such as following a link or submitting a form. Further handlers are still called, but cannot reverse the effect.

Methods
Meteor methods are like functions in JavaScript with a different syntax. They can be called by the client as well as by the server.
Let us now look at how to create methods in Meteor.
Meteor.methods({foo: function(){console.log(Hello world, I am Method);}}); |
Every method has a method name and is associated with a function, which is executed when the method is called.
The Meteor.call() method is used to trigger the execution of the method. We pass a parameter in the Meteor.call() method which is the name of the method to be called. Shown below is the syntax to call the method foo.
Meteor.call(foo); |
Meteor methods can accept parameters and also return a value.
References
[1] www.meteor.com


