Have you ever faced a time crunch when trying to finish tasks ahead of a deadline? Or has your work suffered because of resource mismanagement, or a cost crunch during the final stages of a project? To be honest, I have faced a lot of these challenges. When I look back, the basic reason for these hiccups was that the project was not well planned. It isnt that I dont use project management tools; I try to use them but more often than not, the tool no longer has valid data, because no one in the team feels like updating it regularly. On a search for new software to manage my project, I came across Taiga. And that was where my search ended. Its simplicity and effective design differentiates Taiga from others. Its easy to use for everyone, be it a developer, manager, tester or any other stakeholder.
Taiga is an open source software platform for project management with intuitive features that match its users needs. As the developers claim, its designed so well, it is beautiful to look at all day long. As of now, all projects are private, but starting from April 2015, projects will be free, provided a user agrees that they can be included in Taigas public registry. Taiga also has paid services, which help to keep the project private. In this article, we will focus on how to install Taiga behind your firewall and use it privately.
Installation
Taiga can be downloaded from https://github.com/taigaio. The Taiga platform consists of three main components: a) Taiga-back (the back-end API); b) Taiga-front (the front-end); and c) Taiga events.
The list of major dependencies of Taiga comprises the following:
A) Runtime: (i) PostgresSQL>9.3 and (ii) RabbitMQ (optional)
B) Compile time: (i) GCC and Development Headers, (ii) Ruby 2.1 and (iii) NodeJs 0.10
Because of space limitations, I will not cover the detailed installation process. It is pretty straightforward, so just follow the steps at http://taigaio.github.io/taiga-doc/dist/setup-production.html
Kanban template
Taiga provides two templates to choose from Kanban and Scrum.
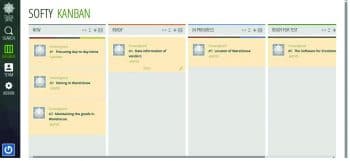
Lets explore Kanban first, which is used to manage knowledge work. In Kanban, everyone can see the status of events, from the definition of the project to the delivery to customers. Besides, team members can assign themselves work from a list of items. The UI is so simple and easy to use that both non-techies as well as techies are attracted to it. The board is segregated into five sections, namely, New, Ready, In Progress, Ready for test and Done.
All the work items are inserted into specific segments. The testing team members look into the items that are ready to be tested. Then they just click on the + button on each tab and insert the items. The bulk items can easily be added by clicking the Add new bulk button on the right. The segment marked Done contains the finished items that have gone through testing successfully.
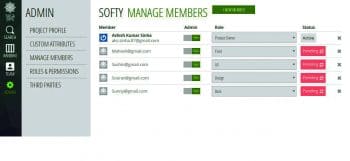
When it comes to resource management, the admin can add as many users as needed. The resources are added with valid email IDs. Once the users are validated, they become active for work to be assigned to them.
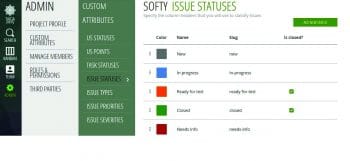
The major flaw in most software is the bugs that emerge while testing. Taiga has carefully developed features that display the bug status and the severity of each bug, and even help to manage them. The issues brought to light by the testing team are raised in the issue status report. The developer can very well see the defects. There could be situations wherein an enhancement is required to resolve a particular bug issue and even that is taken care of in Taiga. The developer can change the module from Issues to Enhancement required.
The severity of an issue as well as its priority is categorised in Taiga, and the unique feature is that it has a different colour code for different bugs.
The Scrum template
The second template which Taiga provides is Scrum. This does not let you provide all the required documents upfront. Instead, the Scrum product backlog grows as and when knowledge about the product and the customers grows.
In simple terms, what happens in Scrum is that a project is divided into succinct work cadences, known as Sprints, which cover mostly a week or two in duration. At the end of each Sprint, the team members and the owners meet to decide the progress and plan further action. This helps the projects direction to be adjusted or re-oriented based on completed work, not on speculation.
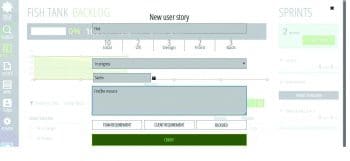
The backlog of Sprints is mapped and planned for the projects. A new Sprint can be added from the button New Sprint, which is on the right hand topmost corner of the screen by specifying the time line. You can add a user story both for the team requirements and the customer requirements. The story is defined in four phases, i.e., the user experience (UX), design, the front end and the backend.
The team tab contains the detailed information about the user experience, design, front and back groups. The information related to the product owners as well as the stake holders is placed in this tab, which is common to both the Kanban and the Scrum template. The wiki tab is used in order to add the wiki page and share the information about the project.
Another great feature of Taiga is its video conferencing capabilities. Taiga has badges which reward users for their work and keeps their morale high. And in case you are trying something beyond your comfort zone, you can notify colleagues by taking a dose or two of locaine, Taigas fictional or virtual poison!


