GIT is a free, open source distributed version control tool. It is easy to learn and is also fast, as most of the operations are performed locally. It has a very small footprint. Just to compare GIT with another SVN (Source Version Control) tool, refer to http://git-scm.com/about/small-and-fast.
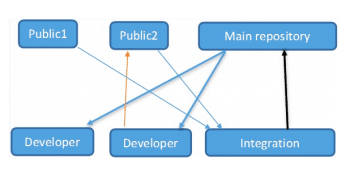
GIT allows multiple local copies (branches), each totally different from the otherit allows the making of clones of the entire repository so each user will have a full backup of the main repository. Figure 1 gives one among the many pictorial representations of GIT. Developers can clone the main repository, maintain their own local copy (branch and branch1) and push the code changes (branch1) to the main repository. For more information on GIT, refer to http://git-scm.com/book.
Note: GIT is under development and hence changes are often pushed into GIT repositories. To get the latest GIT code, use the following command:
$git clone git://git.kernel.org/pub/scm/git/git.git |
The kernel
The kernel is the lowest level program that manages communications between the software and hardware using IPC and system calls. It resides in the main memory (RAM), when any operating system is loaded in memory.
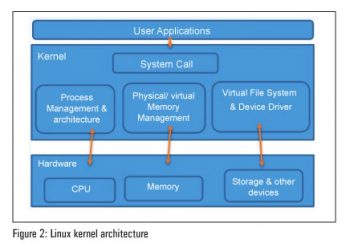
The kernel is mainly of two types – the micro kernel and the monolithic kernel. The Linux kernel is monolithic, as is depicted clearly in Figure 2.
Based on the above diagram, the kernel can be viewed as a resource manager; the managed resource could be a process, hardware, memory or storage devices. More details about the internals of the Linux kernel can be found at http://kernelnewbies.org/LinuxVersions and https://www.kernel.org/doc/Documentation/.
Linux kernel files and modules
In Ubuntu, kernel files are stored under the /boot/ directory (run ls /boot/ from the command prompt). Inside this directory, the kernel file will look something like this:
vmlinuz-A.B.C-D |

where A.B is 3.2, C is your version and D is a patch or fix.
Lets delve deeper into certain aspects depicted in Figure 3:
- Vmlinuz-3.2.0-29-generic: In vmlinuz, z indicates the compressed Linux kernel. With the development of virtual memory, the prefix vm was used to indicate that the kernel supports virtual memory.
- Initrd.img-3.2.0-29-generic: An initial ramdisk for your kernel.
- Config-3.2.0-29-generic: The config file is used to configure the kernel. We can configure, define options and determine which modules to load into the kernel image while compiling.
- System.map-3.2.0-29-generic: This is used for memory management before the kernel loads.
Kernel modules
The interesting thing about kernel modules is that they can be loaded or unloaded at runtime. These modules typically add functionality to the kernelfile systems, devices and system calls. They are located under /lib/modules with the extension .ko.
Setting up a development environment
Lets set up the host machine with Ubuntu 14.04. Building the Linux kernel requires a few tools like GIT, make, gcc and ctag/ncurser-dev. Run the following command:
Sudo apt-get install git-core gcc make libncurses5-dev exuberant-ctags |
Once GIT is installed on the local machine (I am using Ubuntu), open a command prompt and issue the following commands to create an account:
git config --global user.name Vinay Patkargit config global user. Email Vinay_Patkar@dell.com |
Lets set up our own local repository for the Linux kernel.
Note: 1. Multiple Linux kernel repositories exist online. Here, we pull Linus Torvalds Linux-2.6 GIT code — Git clone http://git.kernel.org/pub/scm/linux/kernel/git/torvalds/linux-2.6.git
2. In case you are behind a proxy-server, set the proxy by running git config global https.proxy https://domain\usernmae:password@proxy:port.
Now you can see a directory named linux-2.6 in the current directory. Do a GIT pull to update your repository:
Cd linux-2.6Git pull |
Note: Alternatively, you can clone the latest stable build as shown below:
git clone git://git.kernel.org/pub/scm/linux/kernel/git/stable/linux-stable.gitcd linux-2.6 |
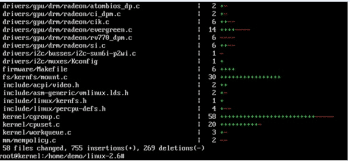
Next, find the latest stable kernel tag by running the following code:
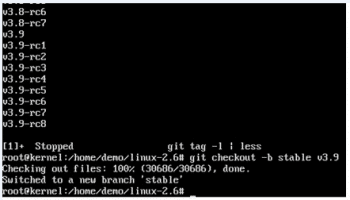
git tag -l | less
git checkout -b stable v3.9
Note: RC is the release candidate, and it is a functional but not stable build.
Once you have the latest kernel code pulled, create your own local branch using GIT. Make some changes to the code and to commit changes to the code, run git commit a.
Setting up the kernel configuration
Many kernel drivers can be turned on or off, or be built on modules. The .config file in the kernel source directory determines which drivers are built. When you download the source tree, it doesnt come with a .config file. You have several options for generating a .config file. The easiest is to duplicate your current config.
There are multiple files that start with config; find the file that is associated with your kernel by running uname a. Then run:
cp /boot/config-`uname -r`* .config orcp /boot/config-3.13.0-24-generic .configMake defconfig <---- for default configurationOrMake nconfig <---- for minimal configuration, here we can enable or disable featuresAt this point edit MakeFile as shown belowVERSION = 3PATCHLEVEL = 9SUBLEVEL = 0EXTRAVERSION = -rc9 <-- there [edit this part]NAME = Saber-toothed Squirrel |
Now run:
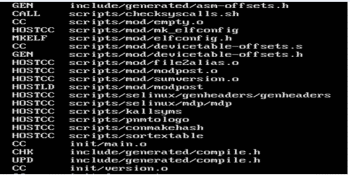
Make |
This will take some time and if everything goes well, install the newly built kernel by running the following command:
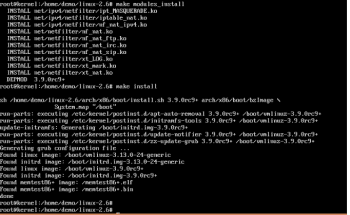
Sudo make modules_installSudo make install |
At this point, you should have your own version of the kernel, so reboot the machine and log in as the super user (root) and check uname-a. It should list your own version of the Linux kernel (something like Linux Kernel 3.9.0rc9).


