
If modelling and rigging are the most significant aspects of the final animation film that we all enjoy to watch, no less important is the process of providing good materials and textures to objects created within Blender. Any object or animation clip created in Blender (or in any good animation package) loses half its charm when it is not given appropriate materials and textures. Instead of being a life-like rendition, it takes on a plastic toy-like look.
Realism is the key to success in the animation industry. How realistically you create life-like motion is the key to getting to the top. On the other hand, if not coupled with realism in appearance, the entire effort of aiming to be the best is wasted. Hence, it is important to create good materials for your projects.
Light and objects in the physical world
We need to understand light and its interaction with objects in the physical world. Though its composition is not totally understood, it plays a great role in our world. It makes objects visible to us; when it strikes a substance, light either refracts, reflects, or is absorbed, based on the properties of the material the object is made of.
Reflection is the bouncing back of light after it hits an opaque object. The extent of regular reflection depends on the optical smoothness of a medium. Refraction is the bending of light when it traverses from one medium to another, at the plane of separation. The extent of bending depends upon the optical density of the medium into which the light travels. The phenomena of reflection and refraction are important to understand real-world surfaces.
Blender simulates real-life materials
Blender simulates how real-life materials interact with lights. In the physical world, the extent of a material’s shine is determined by the microscopic grooves and bumps on its surface, which scatter the incoming light over wider or smaller angles. The rougher the surface is, the wider the angle the incident light will be reflected at, causing blurrier highlights and reflections.
In Blender’s ray-tracer, this process has been incorporated — both for perfectly glossy mirror-like (or clear glass-like) surfaces, and also for less glossy surfaces causing blurry reflections or refractions. Rather than taking a single reflection sample for fully glossy surfaces, blurry ray-tracing works by blending multiple samples, distributed in a cone shape around the outward ray direction. The more samples that are taken, the smoother-looking the result will be, but will require extra time spent in rendering.
Blender’s Material UI
In order to create great-looking material in Blender, it would be useful if you shift to the material layout. Access this interface using the drop-down menu from the top centre part of Blender. Figure 1 shows the Material UI.

A brief look at the main shaders
The Blinn-Phong reflection model for plastics
The Phong reflection model (also called Phong illumination or Phong lighting) is an empirical model of the local illumination of the points on a surface. The Blinn-Phong shading model (also called the Blinn — Phong reflection model or the modified Phong reflection model) is a modification to the Phong reflection model by Jim Blinn.
Lambertian reflectance on non-reflective surfaces
A surface is said to exhibit Lambertian reflectance when light falling on it is scattered such that the apparent brightness of the surface to an observer is the same regardless of the observer’s angle of view. To phrase it in more technical terms, the surface luminance is isotropic.
For example, unfinished wood exhibits roughly Lambertian reflectance, but wood finished with a glossy coat of polyurethane does not, since specular highlights may appear at different locations on the surface. Not all rough surfaces are perfect Lambertian reflectors, but this is often a good approximation when the characteristics of the surface are unknown. Lambertian reflectance is named after Johann Heinrich Lambert.
The Cook-Torrance shader
The Cook-Torrance shader was an adaptation of a previous method proposed by the applied physicists Torrance and Sparrow. This method is often used to simulate the reflective properties of metals and plastics.
The Oren-Nayar model for rough surfaces
The Oren-Nayar reflectance model, developed by Michael Oren and Shree K Nayar, is a model for diffusing reflection from rough surfaces. It has been shown to accurately predict the appearance of a wide range of natural surfaces, such as concrete, plaster, sand, etc.
Creating materials in Blender
A brief look at the Material Node Editor
While applying pre-made textures may be a comparatively easy task, it is not so when creating materials. Creating realistic-looking material becomes a real challenge for 3D artists, who have to bring in realism into their scenes and characters.
There are various ways of creating materials in Blender. Once you study the material interface, it becomes fairly easy to handle the creation of materials. While simple materials can be created by clicking a few buttons, complex materials require the use of material nodes, where connections and interconnections are made to simulate very complex-looking materials.
Figure 2 shows the Node Editor while working with Material Nodes. You can access the Node Editor using the keys Shift+F3.

The figure shows two in-built Blender textures, Voronoi and Marble, which have been combined using the material nodes to produce a different effect. Thousands of such permutations and combinations could be made in Blender to create complex materials, which are rather difficult to create in any other 3D application.
Simulate simple materials in the Blender Material UI
Creating materials in Blender can be a daunting task for a novice. But if you follow a little science and understand the system by which Blender works, you will be able to create wonderful materials in no time. Let’s quickly go through a brief exercise to understand how to create simple yet realistic materials within Blender, without having to use the Node Editor. The materials we will create are glass, brass, wax and iron.
Fire up Blender and shift to the Material UI. You will observe three view-ports: the Front, Top and the Camera views. Toward the right is an array of buttons related to materials creation, normally accessed using F5 on the keyboard.
Creating glass
Once you are comfortable with the Material UI, get started with the first material, glass. Before modifying the button settings to simulate glass, consider its features. First, it is transparent; second, it is reflective. More important still is the refractive index of glass. We know it could be anything between 1.5 and 1.89, from the lightest to the heaviest variety of glass. Look at Figure 3, which shows the Material UI with the glass settings, to get an idea of how glass could be simulated.

Creating brass
Creating metallic materials in Blender is not so difficult. The factors to consider are the correct diffuse colour values, reflectivity, glossiness and the shiny look. Figure 4 shows you the correct values adjusted to simulate the look of brass.

Creating wax
Here, it becomes necessary to introduce a new element — sub-surface scattering. The index of refraction should also be set correctly, to give the right look to the material — a soft translucence that wax has. Figure 5 shows the settings to simulate realistic-looking wax.

Simulating iron
Similarly, simulating iron becomes fairly easy once you understand how metallic surfaces reflect light. Figure 6 shows the settings for simulating iron.

Render your materials applied to a simple scene
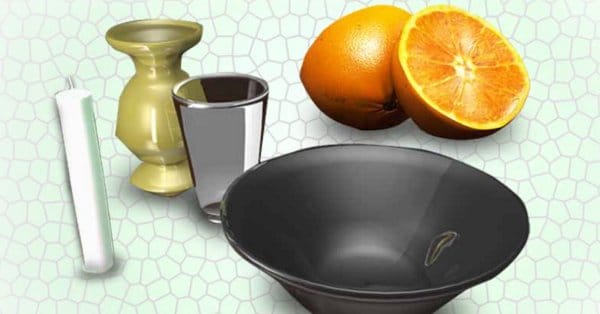
Create a simple scene with a glass tumbler, an iron basin, a brass pot and a candle. Apply your materials to them, and then make a quick render using the F12 button. Figure 7 displays the rendered scene.

Creating good materials or textures within Blender is an endless process of learning and experimentation to come up with novel permutations and combinations of your own — and in the process, the Blender user community benefits.
My final advice, however, would be to go on observing realistic materials around you in the real world. Try to emulate the look of those materials in your Blender projects. The best way would be to use a professional camera and practice taking high-resolution photographs of materials and textures that you come across in daily life.
This would not only give you access to the best materials, it would also train you in creating the best seamless textures for your models. Once you have your high-resolution pictures, it is quite easy to convert it to a seamless texture, either in GIMP or in Photoshop.













Excuse me, but really do you find your scene realistic?
Excuse me, but… really do you find your scene realistic?
Excuse me, but… do you really find your scene realistic?