The Screen utility is provided by GNU; check out its project homepage for details. It comes preinstalled in most distros — if not, you can install it from the distro’s package repositories. I’m using Ubuntu 10.04 32-bit, which has Screen preinstalled — version 4.00.03jw4. Let’s get started.
You can launch Screen by running screen in your terminal window. You will see a welcome banner and some information, which you can go through with the space bar, or hit Enter to exit to a normal shell prompt. So, from now, Screen will manage your session.
Screen lets you do many things. You can create Screen sessions using the key-binding Ctrl-a c. Understand that you have created a new shell, and that it will appear on your screen — but the old shell you started with will also be running side by side. You can toggle between the shells using the Ctrl-a . (Ctrl-a followed by a period) key-binding. To view all shells managed by Screen, use Ctrl-a “. You will see something like what’s shown in Figure 1.

By default, you will see all sessions’ names as “bash”. You can rename them using Ctrl-a A. Another way of switching between sessions is to use Ctrl-a n (next session) and Ctrl-a p (previous). To kill the current bash session, you can use Ctrl-a k.
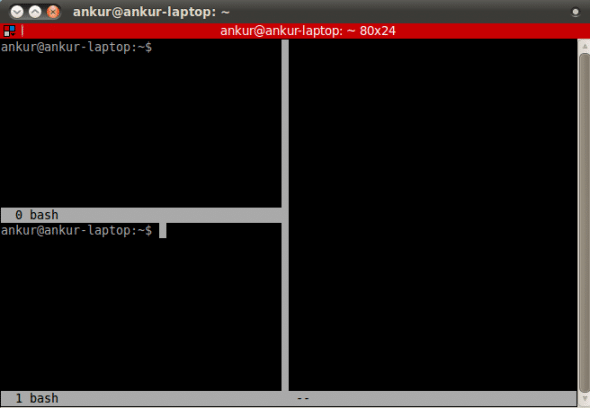
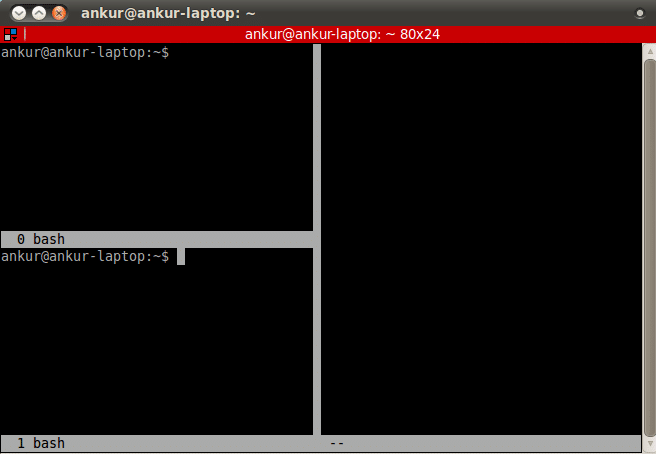
What if you want to view more than one session at a time? For this, use the screen-split feature, as seen in Figure 2.

You can split your terminal window horizontally and vertically using Ctrl-a S and Ctrl-a | (pipe). To move from one window to another, use Ctrl-a Tab. To kill the current window, use Ctrl-a X. By now, you would’ve noticed that most key-bindings start with Ctrl-a.
What if you want to use Ctrl-a in the shell (like for moving to the start of the command-line)? Simple; use Ctrl-a a.
Attaching and detaching
The reason I like Screen so much is because we can attach and detach running shell sessions from Screen’s management. This is quite useful when you are working on a mainframe system, or on a remote system over SSH, but your network connection might go down — or when you have started a long-running job, and would rather disconnect and go to sleep, than stay connected for hours while it completes.
To see which sessions you are running, use screen -ls. The output will be something like what’s shown in Figure 3, in which the first part of the output is the PID (process id), which you will need while attaching or detaching sessions. For example, 15830 is a PID in this case.

To detach a session, use Ctrl-a d. If that’s the only session running, you can reattach it using Ctrl-a r. In case of multiple sessions, you need to run Ctrl-a r pid. To connect to a session that’s still attached, use Ctrl-a x pid instead. This will let you reattach to an existing session without any problems.
Screenshots
There is a quick way to grab the screen — Ctrl-a h will save a text file hardcopy.n in your current directory, containing the existing text of your screen. To record a log of your session, use Ctrl-a H, which creates a file screenlog.0 in the current directory. To stop logging, use the same Ctrl-a H again.
Byobu
Some people find it hard to memorise the key-bindings, yet still want to use Screen. In that case, there’s a powerful user-friendly package named Byobu, mainly developed for Ubuntu, which (if you don’t use Ubuntu) you can still download from Launchpad and install on your system.
Byobu is an elaborate screen customisation that minimises the overhead of learning key-bindings, and makes it user-friendly. Launch it with the byobucommand. Something like what’s shown in Figure 4 will show up.

Most of the commands that you will use with Byobu are listed below:
| Key | Purpose |
| F2 | Create a new window |
| F3, F4 | Move backward and forward within a window |
| F6 | Detach a session |
| F8 | Set window title |
| F9 | Help |
You can read more about using Byobu from the Help menu or a Google search; I am pretty sure you will find a lot of help. So try out Screen, and rid yourself of too many terminal windows! Queries and suggestions on this article are always welcome.


Thanks for the tutorial. Weird shortcuts, though…
By “Ctrl+a d” you mean “Ctrl+a+d” or “Ctrl+Alt+d” ?
Its “ctrl+a+d” not “ctrl+alt+d” .
i played with it just recently!!!
i played with it just recently!!!
i played with it just recently!!!
i played with it just recently!!!
screen is the most useful utility for terminal lovers…
screen is the most useful utility for terminal lovers…
screen is the most useful utility for terminal lovers…
– CooL –
– CooL –
Essential app for remote users, read the MAN page for a few surprises. Ubuntu’s conf if very good and should be copied to your distro.
Essential app for remote users, read the MAN page for a few surprises. Ubuntu’s conf if very good and should be copied to your distro.