Literally, the “cloud” is a metaphor for an architecture of systems, hardware and networks, which aim to provide computing as a service. Different aspects of computing like storage, processing, etc., are provided as services to the end-user. A very common example is Google Apps. All our email, documents, spreadsheets, presentations, maps, searches or bookmarks (the list goes on) are processed, stored and used “up there”, so to speak. Whenever we need to access or modify that data, we log in to the Google Apps cloud. Google provides us the ability to process this data as a service — for instance, Gmail is a component in that service architecture, and in Google’s business model as a whole.
Cloud computing has been around for a while, and the term is more closely used in the context of enterprise computing, but it’s not restricted to that. It’s true that corporations benefit from cloud computing, since all they have to do is hire the services, and not the hardware and infrastructure — a very visible example of a cloud service provider is Amazon. Cloud computing helps businesses reduce costs by quite a large margin. In human terms: let some cloud service provider handle all the dirty work; you pay the money, and get your job done.
What’s in it for me?
Google Apps is just one example. These days, there are many browser-based operating systems, which again, is cloud computing at its core. These operating systems offer you the benefit of using them anywhere on the planet, without worrying about synchronising your data or settings across multiple computers. All you need is a PC with an Internet connection and a supported browser. What if you wanted to set up a cloud-based OS server on your own, for use on your LAN at home, or in your business? Here’s introducing eyeOS.
Introducing eyeOS
This is a cloud-based operating system powered by Apache, MySQL and PHP (AMP). Yes, a W/LAMP-based cloud OS! eyeOS allows you to have your own cloud computing system — files and desktop environments can be shared across locations. These could be different systems on the intranet, or, with a global span, across the Internet. All you need is a Web server that has AMP capabilities.
eyeOS includes the following features:
- Desktop: The desktop is similar to that of a regular operating system. It can be themed based on your preferences; it can run applications, and supports translations of up to 30 languages.
- Office-related tasks: eyeOS supports MS Office and OpenOffice.org documents, spreadsheets and presentations. On top of that, it has a simplistic Personal Information Management (PIM) system that supports calendars and contacts (with a basic import/export facility in vCard format).
- System and file management: Again, there is a pretty impressive spread of features in this domain. Uploading/downloading multiple files to the cloud, compressing in ZIP/TAR formats, and a dedicated picture viewer for slide-shows is a decent plus. As eyeOS is a cloud system, multiple users are easily managed by the simple UI offered to configure the system. Moreover, apps can be installed using the inbuilt package installer. To make things easier, multiple instances of the installed apps can be run at the same time.
- Networking: The beauty of cloud computing is the fact that networking is at its core. There is an internal (proxied) FTP client, messaging client, bulletin board and an RSS feed reader that comes bundled by default.
Installing eyeOS
First of all, go to the eyeOS website and download the tarball. There are two main steps involved, which we will tackle in the simplest way possible:
- Installing AMP (Apache, MySQL, PHP)
- Installing and configuring eyeOS
The prerequisites follow:
- Hardware: A PC with a Pentium-class processor at the minimum, 256 MB of RAM, 200 MB of free hard disk space for the installation of eyeOS; more will be required, depending on the number of users, and the volume of their files and data.
- Software: A Linux distribution (I used Ubuntu 10.10 Desktop Edition), Apache, PHP, and MySQL.
Installing AMP
In Ubuntu, go to System > Administration > Synaptic Package Manager. Search for, and install Apache, MySQL, phpMyAdmin, and PHP. Once the installation is done, we will need to configure PHP and MySQL for eyeOS. We will first need to create the eyeOS database for the system. Start the terminal, and issue the following commands:
mysql -u root |
This command will ask for a password; enter your password, if you had assigned one during the installation of MySQL. At the mysql prompt, type:
CREATE DATABASE eyeos DEFAULT CHARACTER SET utf8 COLLATE utf8_unicode_ci;FLUSH PRIVILEGES; |
Now that MySQL is set up, let’s modify the php.ini file (located at
). The following lines are to be edited to the given values:
memory_limit = 128Mdisplay_errors = Offpost_max_size = 200Mupload_max_filesize = 100M |
The last task in this sequence is to install curl. Run the following command in the terminal:
apt-get install php5-curl |
Before restarting Apache, for the changes to take effect, run the following commands:
a2enmod rewritesudo gedit /etc/apache2/sites-available/default |
Edit the file to set the <Directory /var/www/> variable AllowOverride to All.
Finally, restart Apache with the following command:
/etc/init.d/apache2 restart |
Deploying eyeOS
Now, extract the tarball you downloaded earlier into a older called eyeos in /var/www, by running the following commands in the terminal:
cd /var/wwwmkdir eyeoscd eyeoscp /path/where/you/downloaded/the/tarball>/eyeos-2.2.0.0.tar.gz .tar -zxvf eyeos-* |
Start your browser, and navigate to http://127.0.0.1/eyeos. This will bring up the login page as shown in Figure 1.

However, since we haven’t yet configured eyeOS, navigate to
http://127.0.0.1/eyeos/install. You should see something like what’s shown in Figure 2.
Click the “Install eyeOS 2 on my Server” link to proceed with the installation. This brings up the screen shown in Figure 3.

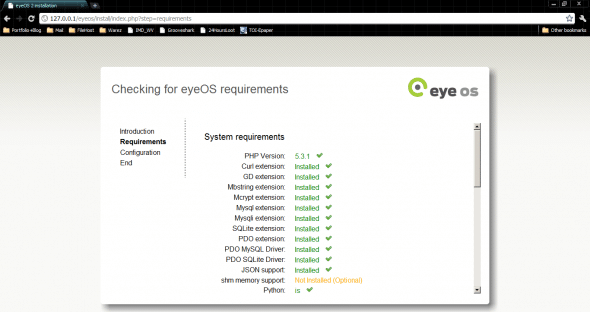
Every item on the checklist should be green or orange. If there are any red items (there shouldn’t be, since we just installed and configured AMP), then modify that parameter in
php.ini, or install the required extension using Synaptic. The items in orange are optional. Scroll down the list; once all items are green/orange, click the large arrow to continue to the database configuration screen (shown in Figure 4).
At this screen, enter the database details. Enter root for the user name, and the corresponding password. If you want, you can create a new user called eyeos, using phpMyAdmin (you can navigate to phpMyAdmin at
http://127.0.0.1/phpmyadmin). Enter localhost in the Host field, and eyeos in the Database field. Enter a root password for eyeOS. Click the arrow to continue. The system will configure itself, and voila! It’s ready to use. Remove the install directory from /var/www/eyeos.
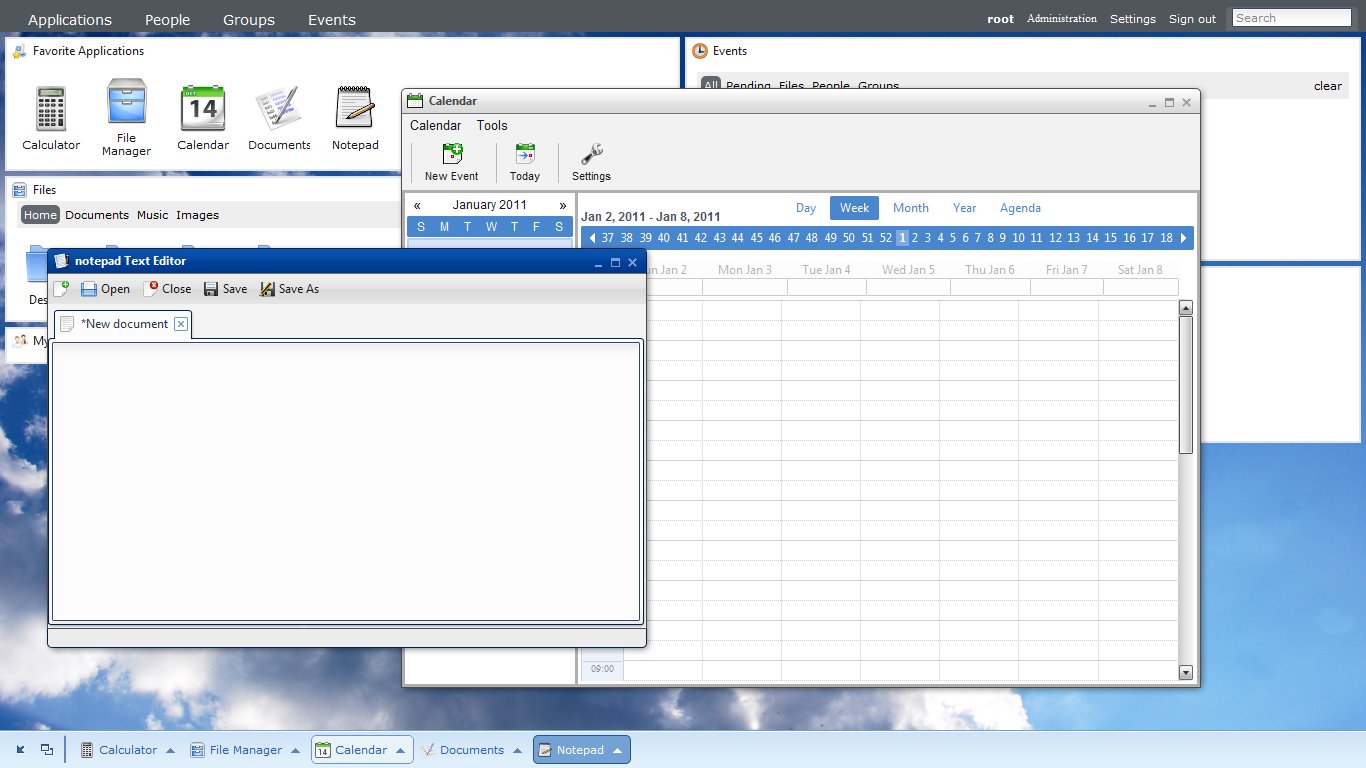
Now, navigate to http://127.0.0.1/eyeos, and log in using root, and the password you assigned for root during eyeOS configuration. You will be greeted by the eyeOS desktop shown in Figure 5.

From here, you can create new users, administer the system, and perform maintenance tasks. Welcome to the world of cloud computing; you have just set up your very own cloud OS server! Have fun.


Incoming apple lawsuit! Danger Will Robinson
Incoming apple lawsuit! Danger Will Robinson
Incoming apple lawsuit! Danger Will Robinson