Mapping solutions can be embedded in your website to display locations of various places, provide directions, obtain latitudinal and longitudinal positions, etc. Among the major mapping solutions providers (like Yahoo! Maps, GSI Map Marts, mapsofindia.com, Bing Maps and Google Maps), Google seems to have scored the highest as far as user preference is concerned.
The Google Maps Javascript API was formally launched during the Google I/O Forum in May 2009. At present, APIs are accessible in two different versions: v2 and v3. However, Google has formally deprecated v2.
With the various Google Maps APIs, you can do much more than just embed maps in Web pages; you can even merge personalised data with them to get customised output. Let me briefly describe a few really useful interfaces here:
- JavaScript API: This lets you insert a map in a website, alter the map contents, or mark any changes.
- API for Flash: You can use ActionScript to insert the map in a Web page and even in Flash-based applications and websites.
- Static Maps: We know that too many dynamic pages are not good for our site rankings. Thus, if you need a fixed map, use the Static Maps API, which doesn’t need dynamic pages, or the assistance of JavaScript.
- Web Services: When you need to retrieve geo codes, site information, directions, or elevations from a client, we use the Web services API. Further, it enables you to make changes via XML or JSON.
The Google Maps Javascript API is basically a blend of JavaScript, HTML and CSS, executing in coordination. As the name suggests, this API comprises JavaScript files containing classes for common use-cases.
Incorporating Google Maps into a Web page
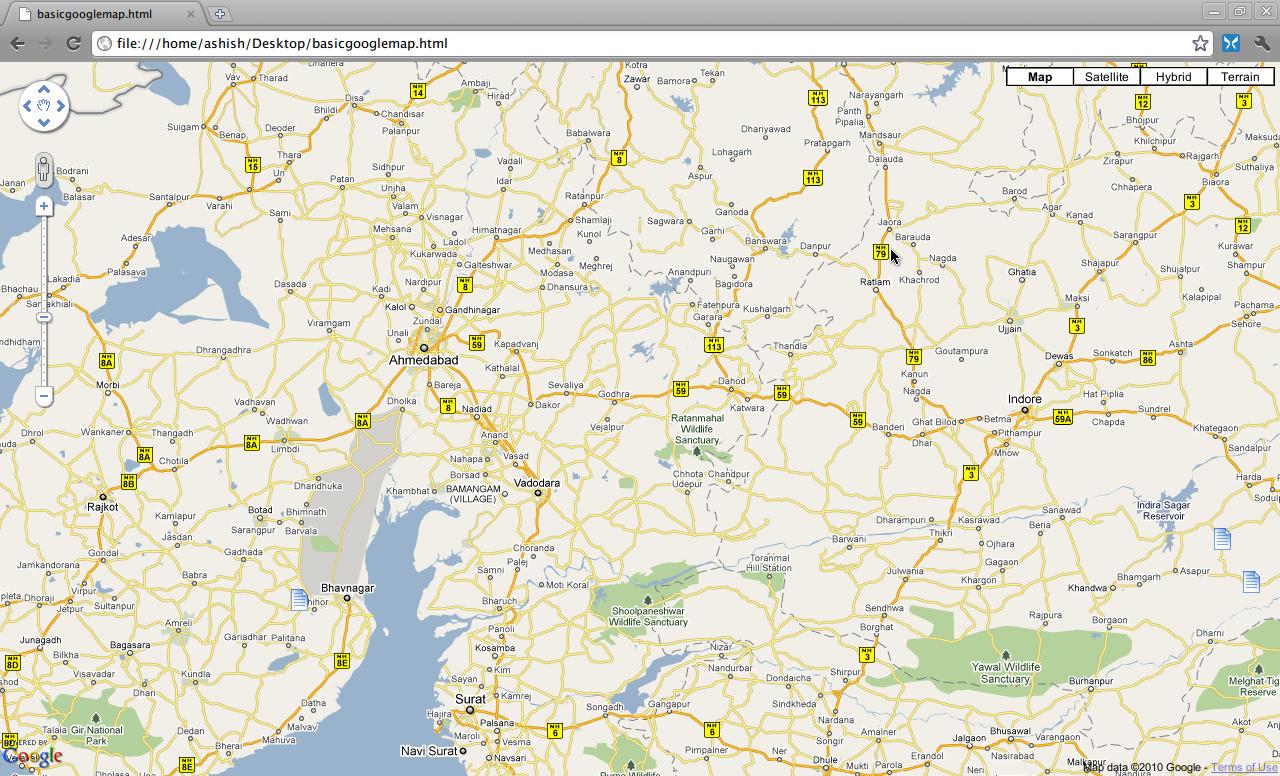
You need to modify the HTML code of a page to add a Google Map. For example:
<!DOCTYPE html>
<html>
<head>

<meta name="viewport" content="initial-scale=1.0, user-scalable=no" />

<style type="text/css">
  html { height: 100% }
  body { height: 100%; margin: 0px; padding: 0px }
  #map_canvas { height: 100% }
</style>

<script type="text/javascript"
    src="http://maps.google.com/maps/api/js?sensor=set_to_true_or_false">
</script>

<script type="text/javascript">
  function initialize() {
    var latlng = new google.maps.LatLng(23.219104, 72.657137);
    var myOptions = {
      zoom: 8,
      center: latlng,
      mapTypeId: google.maps.MapTypeId.ROADMAP
    };
    var map = new google.maps.Map(document.getElementById("map_canvas"),
        myOptions);
  }

</script>
</head>

<body onload="initialize()">
  <div id="map_canvas" style="width:100%; height:100%"></div>
</body>
</html>

Loading the Google Maps API
<meta name="viewport" content="initial-scale=1.0, user-scalable=no" />
<script type="text/javascript" src="http://maps.google.com/maps/api/js?sensor=set_to_true_or_false">
</script>
- The
<meta>tag enables you to position the map with a full-screen view. You can set the user-scalable property tofalseto ensure the map will remain as a fullscreen. http://maps.google.com/maps/api/jshelps you access JavaScript definitions and symbols that are vital for using the Google Maps v3 API.- The
sensorparameter can be set to true or false, depending on whether the page/application needs to determine the location of the user.
Latitude-longitude positions
The latitude/longitude coordinates marked as x and y axis points on a virtual graph sheet on the globe assist us in specifying the location of any particular place. To do so with Maps, create a google.maps.LatLng object, providing the parameters: {latitude,longitude}. For example, to represent Delhi, the code would be:
var myLatlng = new google.maps.LatLng(28.650825,77.224274)
Map options
var myOptions = {
  zoom: 8,
  center: myLatlng,
  mapTypeId: google.maps.MapTypeId.ROADMAP
};
The map is initialised based on the settings in the myOptions variable. Available settings are:
- Zoom: At zero level zoom, the entire map is visible. The maximum range that Google permits for scaling is 23 points, though the upper level for zooming is relative to the data available for the specific region being viewed.
- Center: This parameter lets you specify the central point of the map. If you set the earlier myLatlng as shown above, then you’d see New Delhi at the centre of the map.
- MapTypeId (the type of map desired)
- ROADMAP: To view normal 2D tiles (default)
- SATELLITE: Photographic tiles (satellite imagery)
- HYBRID: Photographic tiles plus a layer of prominent features (cities, landmarks, etc.)
- TERRAIN: To make physical relief (altitude, water resources, hills, plateaus, etc) visible.
google.maps.Map — the basic object
var map = new google.maps.Map(document.getElementById("map_canvas"), myOptions);
The google.maps.Map constructor takes two parameters — a DOM object for the DIV tag that should contain the map, and a Map Options object as clarified above. The DOM element looks like what follows, in HTML:
<div id="map_canvas" style="width: 100%; height: 100%"></div>
Adding a marker to the map
<script type="text/javascript">
    function initialize() {
    var latlng = new google.maps.LatLng(23.219104, 72.657137);
    var myOptions = {
      zoom: 18,
      center: latlng,
      mapTypeId: google.maps.MapTypeId. SATELLITE
    };
    var map = new google.maps.Map(document.getElementById("map_canvas"),myOptions);
    var marker = new google.maps.Marker( {
        map: map,
position: latlng,
title: "Vidhan Sabha, Gandhinagar"
}
        );
  }
</script>

In order to mark any position on the map, you need to provide a google.maps.Marker object with the following values:
- position: A
google.maps.LatLngobject. - title: Provides roll-overs, alternate text, or tool-tips for
- the marker.
- draggable: Allows the marker to be relocated by dragging.
- map: A reference to the map object in which the marker will be added.
- clickable: To enable the marker to be clickable.
- icon: Provides a URL for a new icon for the marker. To choose from various available icons, visit this googlecode Web page or add the path to any image of your choice.
Displaying the floating window on the marker
var infowindow = new google.maps.InfoWindow({
content: "<b> State Legislature, Gujarat State</b>"
});
infowindow.open();
To provide the floating window, you need an object of the type google.maps.InfoWindow. The constructor accepts InfoWindowOptions; content specifies the text for the window, in HTML format; and maxWidth the maximum width of the window.
The google.Maps.InfoWindow class has several methods besides the open method. To open the info window in response to a user click on the marker, you could use the following code:
google.maps.event.addListener(marker, 'click', function() {
                infowindow.open(map,marker);
});
User events like mouse clicks are propagated to the Google Maps API from the DOM. A property_changed convention is used to reflect changes in API objects. Such notifications are known as MVC state changes, but this is not discussed here.
The events addressed by google.maps.Marker are click, dblclick, mouseup, mousedown, mouseover, and mouseout.

Getting directions between two markers
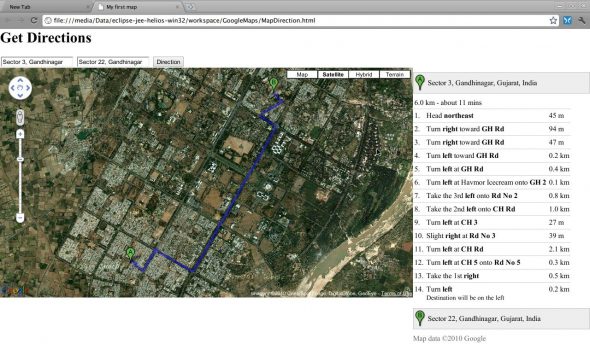
The Google Maps API provides the google.maps.DirectionsService class, which accepts the source and destination as a string or as google.maps.LatLng instances. The DirectionsService object may return multi-part directions as an array of way-points. The directions are also displayed as a polyline route drawing on the map, and may even provide text descriptions as a series within certain <div> elements.
function calcRoute(){
    var latlng = new google.maps.LatLng(23.219104, 72.657137);
    var myOptions = {
        zoom: 15,
        center: latlng,
        mapTypeId: google.maps.MapTypeId.SATELLITE
    };

    var directionsDisplay = new google.maps.DirectionsRenderer();
    directionsDisplay.setPanel(document.getElementById("directionsPanel"));
    var map = new google.maps.Map(document.getElementById("mapc"),myOptions);
    directionsDisplay.setMap(map);
    var directionsService = new google.maps.DirectionsService();
    var start = document.getElementById("start").value;
    var end = document.getElementById("end").value;

    var request ={
        origin:start,
        destination:end,
        travelMode: google.maps.DirectionsTravelMode.DRIVING
    };
    directionsService.route(request, function(result, status) {
        if (status == google.maps.DirectionsStatus.OK){
            directionsDisplay.setDirections(result);
        }
    });
}
HTML code:
<div>
        <input id="start" type="textbox" value="Sector 3, Gandhinagar">
        <input id="end" type="textbox" value="Sector 22, Gandhinagar">
        <input type="button" value="Direction" onclick="calcRoute()">
</div>

Direction services are asynchronous. On an instance of google.maps.DirectionsService, we invoke the route method, passing a request and a call-back function. The request can contain:
- origin: source location; text, or a LatLng object
- destination: destination location; text, or a LatLng object
- travelmode: Walking, Bicycling, or Driving
- unitSystem: Whether to use imperial or metric systems of measurement
- optimizeWaypoints: When
DirectionServicesare enabled, they try to re-order the provided transitional way-points to minimise inclusive cost.
The google.maps.DirectionsRenderer renders the path between source and destination on the map. It should be initialised with the draggable parameter set to true to make the marker draggable:
var directionsDisplay = new google.maps.DirectionsRenderer({draggable: true});
Displaying a marker from XML
To conclude, let’s see how to extract data from stored destinations (data for markers, stored in an XML file). A simple AJAX request is placed to fetch the XML data to be plotted on the map, which looks like the following code:
<markers>
    <marker lat="23.224823" lng="72.646365" text="GH-4 Torrent Circle"/>
    <marker lat="23.219104" lng="72.657137" text="Vidhan Sabha"/>
    <marker lat="23.217882" lng="72.643061" text="Central Bus Depot"/>
</markers>

<script language="javascript">
var map; // A new marker is created based on the parameters provided and the listener is added to them"
function createMarker(latlng, name) {
var html = name;
var marker = new google.maps.Marker({map: map,position: latlng});
var infowindow = new google.maps.InfoWindow({content: html});
google.maps.event.addListener(marker, 'click', function() {
     infowindow.open(map,marker);
});

return marker;
}
function initialize() {
var latlng = new google.maps.LatLng(23.224823,72.64636);
var myOptions = {
     zoom: 15,
center: latlng,
mapTypeId: google.maps.MapTypeId.SATELLITE
};
map = new google.maps.Map(document.getElementById("mapc"),myOptions);
        //Ajax request to get the data.xml
                   var x = new XMLHttpRequest();
         var url = "http://localhost:8080/GoogleMaps/data.xml";
         x.onreadystatechange=function()
         {
if(x.readyState==4)
             {
var xmlDoc = x.responseXML;
var d = x.responseXML;
// Parsing XML to get the data
var markerNodes = d.getElementsByTagName("marker");
var bounds = new google.maps.LatLngBounds();
for (var i = 0; i < markerNodes.length; i++){
     var name = markerNodes[i].getAttribute("text");
     var latlng = new google.maps.LatLng(
parseFloat(markerNodes[i].getAttribute("lat")),
parseFloat(markerNodes[i].getAttribute("lng")));
var marker = createMarker(latlng, name);
marker.setMap(map);
bounds.extend(latlng);
}
}
}
x.open("get",url,"true");
x.send();
}
</script>

References
- Google Maps Documentation
- Beginning Google Maps API 3 by Gabriel Svennerberg (Apress)


This a nice article about the Google Maps JS API v3. You can check out more existing example codes using Google Maps JS API v3 at my blog Spatial Unlimited at http://shreerangpatwardhan.blogspot.com
The Function calcRoute() is not working. On “Direction” button’ s click it show nothing.
Nice tutorial. I need your help with something. I’m trying to integrate your code with my address-based geocoding code. The problem is that my geocoding code requires
where as your code requires:
I am unable to use both of these at the same time.
who can get me this whole code as a whole