In this article, I talk about editing videos (one of my hobbies) using one of the many open source video editors available — Pitivi. With this, I hope to get new GNU/Linux users started on video editing. Pitivi is good for professionals too.
While other FOSS video editors like OpenShot and Avidemux are good, Pitivi comes preinstalled with Ubuntu 10.04. (You can also install it manually by typing sudo apt-get install pitivi.)
The latest version of Pitivi was 0.13.4, at the time of writing. This full-featured video editor is written in Python (with GTK+) and is licensed under the LGPL (refer to pitivi.org for more details). It is supported by the Gstreamer multimedia framework, so it can handle most of the available formats and conversion. You can also convert your videos to HD using Pitivi, which we will come to soon.
For now, let’s get started. I suggest you try out these steps as you read.
You can launch Pitivi from Applications –> Sound and Video –> Pitivi in Ubuntu (or run pitivi in a terminal window). You should see the welcome screen as shown in Figure 1.

The next step is to import a clip; click the Import button on the tool bar. Choose the video file you want to edit. From the Clip Library area, drag your video to the preview area on the right, and to the video and audio panel too (sometimes also called a timeline, since it has a “ruler” showing the time of various frames above the video and audio tracks). Your screen should now resemble Figure 2.

Next, click the Play button below the preview area. You will notice that a Seek bar moves along the timeline, showing how many seconds into the video the playback has proceeded.
At the bottom of the application window are the tools that we use for video editing (shown in Figure 3). We’ll look at each of these in turn.

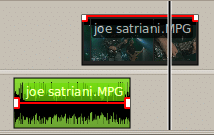
Use the Scissors tool to cut the clips into different parts, like those you can see in Figure 4 (three parts). This tool operates on the video and audio parts together. Deleting portions of the clip created by the scissors is simple; just select the part you want to delete, and click the delete tool (trash-can icon). You can also drag the portion of the clip to the trash-can icon to delete it.

The last button, Ungroup, lets you separate the audio and video parts so that you can edit each independently. Select the portion of the clip that you want to ungroup, and click the Ungroup button. The Group button is the second-last; to join audio and video parts, select both and click the Group button.

Linking arbitrary clips together: Suppose you have two cut parts and want to link them together, use the Link Together button (the fourth one).
Breaking clips: If you want the clips not to be linked together, so that they work according to their individual needs, select the clips and click on the Break Clip button (the third one). You can preview the results of your editing by clicking the Play button, as mentioned earlier.
When it’s time to make a final package of your work, use the Render project toolbar button. Provide a name and output location for your video, and click OK. Click the Modify button to enter the Export settings dialogue box, as shown in Figure 6.

Choose the video output from the options listed — 720p, 1080, etc, which lets you make an HD video too. Next, choose your audio output, and then move to the format. The Container part will amaze you with the large number of supported formats. Select the appropriate audio and video codecs, click OK, and then render. Enjoy your newly-created video!


nice article
how do you cut it out???
this is booboo
is there open source web video editor?? so we can create video from text, photos, audio or video?