Glass Text Reflection
- Select “glass_text” layer, click the layer duplicate button on the Layer Window, and send this layer just below the “glass_text”. Name this duplicated layer “glass_text_reflection”.
- Select Flip Tool from tool box, select Flip Type to “Vertical” from the tool configuration.

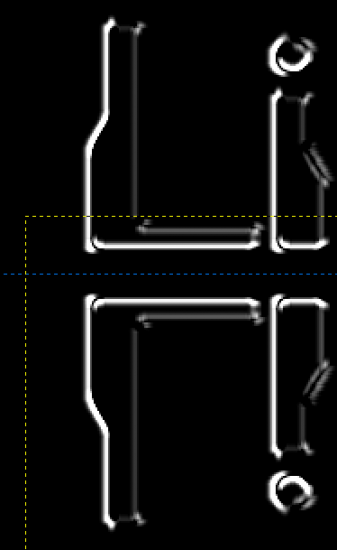
Filpped Layer (section) 
Flipped Layer (full) - While the “glass_text_reflection” is selected click on that layer, to flip it vertically.
- Select Move Tool, and while Shift is pressed drag the flipped layer below the original text
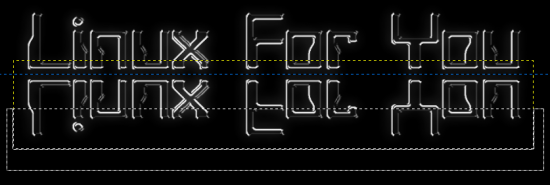
- Drag down a guide to make a reflection plane reference and place both the “glass_text” and “glass_text_reflection” equally separated from the guide. Use the arrow keys for fine movements of the layers.
- With the Rectangle Selection tool select an area, such that 40 to 50 percent of the lower part of the “glass_text_reflection” layer is inside the selection.

Rectangle Select Layer (full) - Now feather the selection with a good high value of about 200 to 250 pixels. Select -> Feather {200px}
- Press Delete button once to feather delete the section, you can try hitting the Delete button twice and see how the effect looks and keep it if you like. Now the reflection will fade outward.

After Deleting the Feathered Selection 
Layers
Glass Sparkle
Here we will make the text sparkle in 2 or 3 places of the text. We will draw the sparkles in the brightest edges of the text. We will make a small (1pixel) spot on a transparency so that it is on the glass text font, and then make the spots sparkle.
- Create a new Transparency layer, and name it “glass_sparkle”, and bring it at the top.
- Select the Pencil Tool.
- Select the smallest brush {Circle (01)}
- Select the foreground color to White {#ffffff}
- Select the “glass_sparkle” layer and click on the points only once where you want the text to sparkle.
- Click only a few edges of the text where you want it to sparkle (2 or 3).
- Toggle the visibility of the “glass_text” layer to see actually where you have created the white spots.

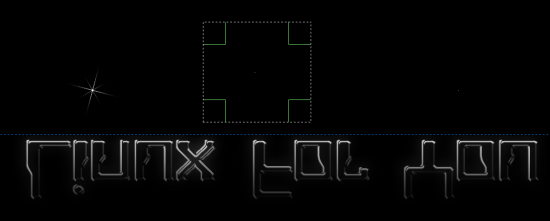
Pencil Spot (section) - Select The dots individually with the Rectangle Selection tool, and apply Sparkle filter as below to each of the dots individually. For each dot slightly change the parameters so that the three dots create different looking sparkles.

Making Spots Sparkling Individually (full)
My initial setting for First Dot:
Filters -> Light And Shadow -> Sparkle {Luminosity Threshold=0.001, Flare Intensity=0.50, Spike Length=20, Spike Points=4, Spike Angle=15, Spike Density=1.0, Transperency=0.0, Random Hue=0.0, Random Saturation=0.0, Select Natural Color, Uncheck all check boxes}
Changes for Second Dot:
- Spike Angle changed to: -1 (Random)
- Spike Length changed to: 45
Changes for Third Dot:
- Spike Angle changed to: -1 (Random)
- Spike Length changed to: 68
- Spike Points changed to : 2

After Sparkle (full) 
The Effect 
Layers
This is a matter of personal taste, so you should keep on researching and make trial and error and see which parameters come with the best. After this, select a rectangular portion of the “glass_sparkle” layer include all the sparkles and crop the layer to the selection. this will keep the sparkle layer compact by only keeping the needed area. Make the “glass_test” layer visible from the Layer window. Put the “glass_sparkle” Layer just below the “glass_text” layer.


[…] And this is it which ends up in my desktop, a fully personalized unique wallpaper. Final Wallpaper First Publish Information : This article was first published on opensourceforu.com (LFY), under Creative Commons Licence.
[…] Learn image manipulation and create a glassy wallpaper on GIMP […]
Please put the final image on the first page, so that it will be useful to the readers what the tutorial is all about
[…] https://www.opensourceforu.com/teach-me/learn-image-manipulation-and-create-a-glassy-wallpaper-on-gimp/ […]
When this article was published ?
This article was not published in the magazine. This one is for the website only.
Looks great. My opinion is to adjust the glow and the intensity of the glassy text by curves. Else the easiest easy is to copy the glassy text layer 3 to 4 times and merge all the copy layers into one , which will result in a brighter one.
Here is my wallpaper:
http://picasaweb.google.com/lh/photo/zhUt4Dx201…
Here is my wallpaper:
http://picasaweb.google.com/lh/photo/zhUt4Dx201…
[…] Learn image manipulation and create a glassy wallpaper on Gimp … […]
nice post. thanks.
Polissage verre…
Free advice on How to Fix Scratched Window Glass….
Its like you learn my thoughts! You seem to know so much about this, such as you wrote the ebook in it or something. I feel that you can do with some % to force the message home a little bit, however instead of that, this is great blog. An excellent read. I will certainly be back.