I wrote a quickie on Kdenlive last time and wanted to do a more thorough job this month because this is one killer video editor. If you like to make movies and show them to your friends, or even need software for a presentation, Kdenlive is your candidate. If you want to create something that looks professional, I can tell you that while it may not stand as tall as Final Cut Pro, Kdenlive comes quite close to Sony Vegas Pro or Adobe Premiere.
It doesn’t matter if you have a Web cam, a mobile phone camera or a high-definition camera; Kdenlive is ready with all the punches. The software supports so many formats that it’s not possible for me to give the list without missing out something (for the full list, visit kdenlive.org/about-kdenlive/audio-and-video-formats).
Window shopping
Once you install Kdenlive, the rest is as easy as a walk in the park. In Figure 1, you can see multiple panes. The first window is the project tree that shows you the clips/images/audio files you are using in this project. You can just browse for the files here and bring them to the timeline, or a simple drag-and-drop will work too.
Remember one thing: when you start a project, do not change the location of the files being used. Otherwise, Kdenlive will not be able to find those files, which will result in a broken project. Of course, you can relocate the files using a file browser. But it is better to create folders to save such clips. That way, in case you have to move the whole project from one machine to another, you can do so easily.
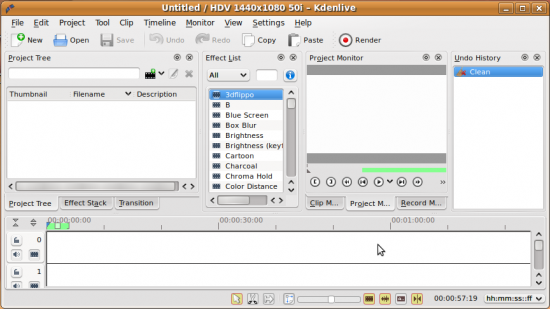
Anyway, first, you have to start a new project. You can create one by accessing File–>New. Make sure you create it in a master folder as it will create numerous sub-folders, which it will use for editing purposes. Now, save the project in the same folder. Remember, this is not the movie, but only the project file that keeps all the references. Here you can select the video profile (Figure 2) and the format in which you want to create and edit your movie. You can also import clips directly from your video camera. However, the moment you unplug the camera, the references to the clips are gone. So, either keep the camera attached or save those clips locally, beforehand.
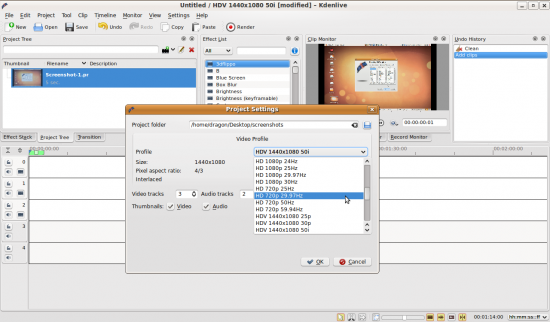
The second window is the ‘Effects window’ where you can use plug-ins to add visual effects to your clip. The third is the ‘Clip monitor’ where you can preview the working projects and clips. The fourth window is ‘Undo history’ where you can see all the latest actions made by you, and you can also undo them. The last and the most important window is the timeline. This panel is what makes movies.
The timeline
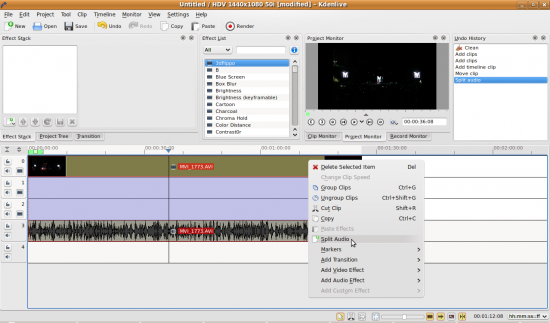
You can drag your clips to the timeline. Here, you can right click and view all the options for what you can do with the clips (Figure 3). I would suggest you go for ‘Split Audio’ so that you have audio and video on separate tracks, which gives you more control over the editing procedure. You might wonder about the need for this. Well, let’s assume you have taken a shot of a conference and you now want to add your commentary to it. You will need to cut out the live audio from the conference and add your layer of commentary. Moreover, you can also boost the audio if you want to show some response from the audience. It is always better to have independent control on your media.
Here, on the timeline, you can add as many audio and video tracks as you wish. Now, in case of the footage shot at an event, you might wish to make a documentary. You could also take pictures of interviews elsewhere, or of different stalls and activities. To put them together, avoid the same track—this causes confusion and overlap. Always use different tracks for different locations/activities and then you can place them on the timeline according to your script.
Keep one track for the V/O (voice over) or your commentary and another track for background music. This way, you will have full control over your project and you will be able to edit shots easily without disturbing other clips. By right clicking a clip, you can also cut it and insert another clip (Figure 4), on a different track. You can also right click to add a ‘Guide’, which will be a horizontal line so that if your other clips are somewhere down the timeline, you can place them at the correct point. The beauty of Kdenlive is that, just like any other non-linear video editor, you can add, delete and insert clips anywhere on the whole timeline.

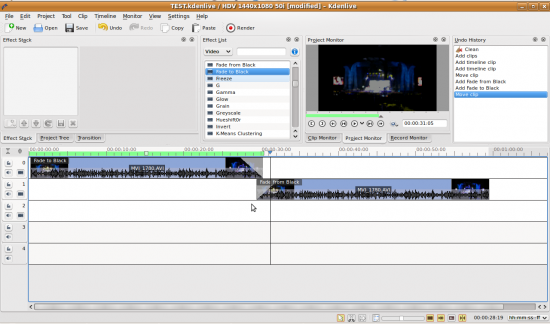
You can also select video transition effects from the second video to apply the right transitions. It could fade from black (good for the opening shot—see Figure 5) or you could also create ‘title clips’ by going to Project–>Add Title Clip. Here, you can type the text, add the background, colour it, or do what ever you want. Once the clip is ready, save it and it will be visible in the ‘Project Tree’. Just drag the clip to the desired place. You may also control the duration of the clip by simply stretching it.
