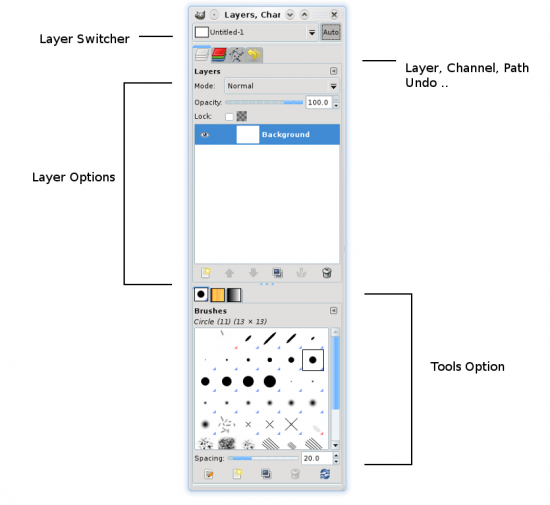
The layer box
The layer box (Figure 7) is the last toolbox that appears on the right side of the screen. As the name suggests, this toolbox has been designed to work with layers. Like its sibling—the toolbox—the layerbox has also been partitioned into four sections.

The first option is the layer switcher. This drop down menu helps you easily switch between layers of two or more different images. This is only useful when working with multiple multi-layer images.
The second section has four tabs—layer, channel, path and undo history. Layer is to manage layers and it displays all the layers in the image. Channel lists the red-green-blue (RGB) colours in the image—you can disable any of them by clicking on the eye. Path is a very useful section when working with the path tool. It tracks the history of the path created [only with the path tool] and helps you easily use it in case you’ve lost the path that you had created.
Undo history lists all the steps/changes you have applied to an image. You can easily step down and undo any change with a simple click.
In the next section (down the layer box) you will notice the brush, patter and gradient tabs. You can choose any preset template and use it while drawing.
The bottom-most option is for the editing brush, gradient and patters. You can even create you own patters and brushes with easy options.
Well, this pretty much sums up the basics of the GIMP’s interface. In the next article, we’ll learn more about working with the interface.
It is very important to get comfortable with the user interface before working with it. So even if this tutorial was not sufficient, don’t worry too much; you will only learn the ropes when you start using it regularly. Knowing a little bit of image editing comes very handy, whatever job you do!


[…] Note that this tutorial will begin with a modified version of the Toolbox since we had learnt about customising the GIMP interface in the first article under this series. You can get to know more about that in LFY’s July 09 issue. […]