The GIMP or the GNU Image Manipulation program is a free and open source raster image editing software. It is very powerful and a great alternative to Photoshop. It has always been denounced for an interface that’s too perplexing for newbies.
I always wondered how people could be so good at creating wallpapers and editing images. I even asked them and tried Photoshop many a time. But its complexity always forced me to un-install it. One fine day, I installed Linux and started playing with the GIMP, as it was the default image editor. It wasn’t long before I got used to it. I am still discovering uncovered facts and reaching newer shores with this tool. After I became comfortable with the GIMP, it was just a matter of time before I created a wallpaper, edited an image or any other work of art.
Now, allow me to guide you through the first leg of this tutorial where you will get introduced to a few basic facts about the interface, several basic editing tools, how to spice up photos, and other tips and tricks. Once we get these done, we will explore how to make wallpapers and designs with this image editor.
First, let me introduce you to the GIMP 2.6 interface and what those tools are meant for.
But before we get started, it is necessary to install the application (preferably, the latest version). The current stable version is 2.6.6 and it ensures that you are not affected by unwanted bugs. Every new Linux distribution comes with the GIMP 2.6 as the default image editing program. If you have an older revision, you can update it using your package manager. If your operating system doesn’t ship with it, head to www.gimp.org to find a binary installation package for your OS. Since the GIMP is a cross-platform software, it is available for nearly all the operating systems, ranging from Linux and Windows, to Mac OS and BSD. Thus, it shouldn’t be a problem for you to get your binary package.
The interface
Once you have finished the installation, it’s time to start the application. GIMP starts with a ‘Splash Screen’; the initial loading can be a bit long depending on the system you use and the number of fonts and plug-ins installed. But this load time becomes much snappier from next time onwards.
Tips: You can change the splash screen by creating a ‘splashes’ directory in the .gimp folder.
- Linux:
~/.gimp/splashes - Windows:
X:Documents and Settingsusername.gimp-2.6splashes
And copy the desired splash image with gimp-splash.png name.
The default interface of the GIMP consists of three features:
- Toolbox: This consists of tools and the tools option to perform several operations.
- Image Window: This is the section where you can do editing and drawing. It loads images and provides you with a platform to showcase your creativity.
- Layer Option: The toolbar lists all the major functions like setting layers, paths and several other functions.
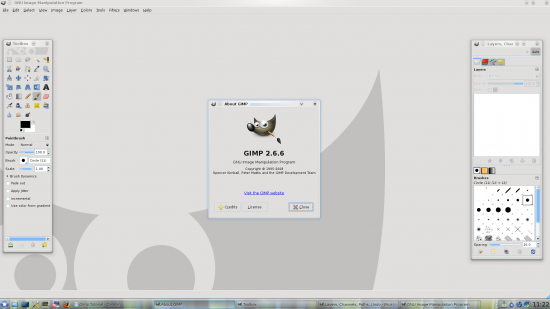
The GIMP’s interface is very flexible. You can easily customise it to suit your work needs.
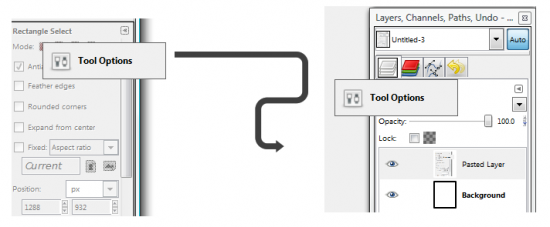
Tips: You can always alter the interface for better ergonomics and for a lucid work experience. To change the interface, simply drag the icon/toolbox name and drop it in the area assigned (Figure 2). For example, to make the left toolbox utilise less space, we need to adjust the tool options located at the lower end. To do so, just click on the name written in bold black. By default, it is the Paintbrush, so drag it to the empty space in the right toolbar near the other tabs like Layer, Channel, etc. Now just resize the left toolbar to give it a more streamlined look. It is advisable to change the default interface for a better and faster work experience.
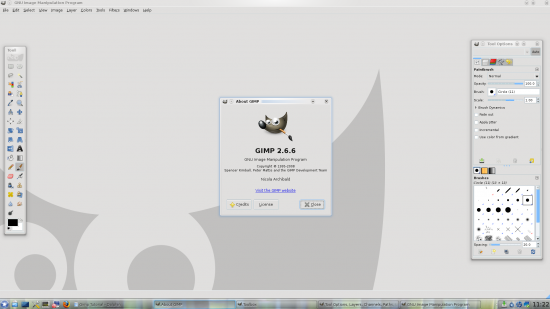
Once you get the interface altered, you can start learning about the tools and options that the GIMP ships with. Another important aspect of note is the new interface. Since we will be using version 2.6 for our tutorial, please bear in mind that this version has a new kind of windows list —i.e., the toolbox, layerbox and current window has been merged into one windows list, making it easier for users to work with. But this new interface doesn’t work well with KDE’s Kwin and Compiz window managers; so if you are using any of these, you might face some problems while using the new interface.
The toolbox and layerbox don’t stay on top of the image windows. In order to work with the GIMP in these two listed window managers you have to restore the default behaviour of version 2.4. To do this, simply navigate to Edit→Preferences→Window Management and select ‘Normal Window’ in both the drop down menus, save and restart the GIMP. You will now be able to use it without problem.




[…] Note that this tutorial will begin with a modified version of the Toolbox since we had learnt about customising the GIMP interface in the first article under this series. You can get to know more about that in LFY’s July 09 issue. […]