I have tried out many flavours of GNU/Linux over the years—starting from Red Hat 9 to Fedora 10, Ubuntu, Sabayon, openSUSE, etc. In my book, all of these have their pros and cons, although I keep distro hopping not because of their cons, but because I am fickle and get bored with using the same thing for a period of time.
When I heard that LFY was bundling the latest Slackware 12.2, it reminded me that this was one distro I was yet to try out; besides, I wasn’t all that happy with Sabayon 4 that I was currently using on my home computer. Slackware, as you know, is the oldest surviving GNU/Linux, whose roots go way back to the early 90s, and a motto to keep things stable and simple. Version 12.2 was released on December 11, 2008, and I wanted to see if they still lived by that motto.
Now, when Slackware says that it’s focus is on simplicity, don’t take that to mean the typical ‘click-next’ stuff we generally associate the term with. In fact, technically speaking, ‘click-next’ makes things more and more complicated due to various top-tier UI abstractions that try to obscure the backend command-line. So, when they say Slackware likes to stick to simplicity, it means things are kept in line with the upstream, without any distro-specific customisation. In a way, it tries to stay aligned to the original UNIX philosophy—why break things if it still works well.
This brings me to the installation procedure. You’ll still find the same installer that’s perhaps been in use for the last few years—maybe even for a decade or more. The installation and package configuration for Slackware is all text-based.
Before I talk about the installation, a new experience for me, here are the specs for my test system
- Pentium 4 with HT technology
- Intel 865 motherboard
- 1 GB RAM
- 80 GB hard drive
Ready for installation
After popping in the DVD, I was greeted with a non-graphical interface. A word of advice for people who have never tried anything that’s not graphical: you need to pay attention to the things being displayed on the screen… keep reading!
Now, with the bootable DVD inside and everything on-screen in black and white, I started reading every page on-screen to make the proper choices. First, you will be asked to select a keyboard layout. Once done, you will be given a root shell prompt. From here, you will need to execute the correct commands and make a proper partition selection to install Slackware—remember, you generally don’t have those Back buttons as in the case of the command line. This is the most complicated part—a single mistake here can format your earlier data. So, be very cautious while creating the partitions for installation.
fdisk or cfdisk are the two commands that can be used to partition the hard drive. I did it using fdisk because I am familiar with it—although cfdisk is more user-friendly, they say. Once partitions are created, you will have to type setup and hit Enter to begin the installation.
Next, it will ask you to format the partitions that you have created and you can also mount the other partitions in Slackware. The other non-Slackware partitions can be given permission like read/write/execute. Once you are done with all these, you can select CD-ROM as the source media for installing Slackware into your hard drive. You should then get an on-screen prompt asking for an auto (recommended) or manual device name (CD ROM) selection.
Slackware will also give you an option for selecting the packages, like full, menu, expert, newbie, custom, tagpath and help. I went with full, and the package installation started. The full installation takes around 5 GB of disk space. Anyway, it was time for me go get myself a cup of tea.
After the package installation is over—the procedure on my system took around 50 minutes—an on-screen text menu appears asking whether you want to use a USB device to boot Slackware. I chose to skip this option. Now comes the most critical part of the installation, the boot loader. In Slackware, the bootloader is still LILO—I told you, they don’t change things if they are not broken—so no Grub. You must be very careful while installing LILO. During its installation, you are given three choices: simple, expert or else you can skip and install LILO later. I opted for the ‘simple’ option and then I chose the standard resolution for my screen. You will also be asked about the location to install LILO (root, floppy, MBR). I chose MBR. After that, you’re prompted for the mouse, network, font configurations, hardware clock settings, time zone selection and default window manager for X. After the entire set up is done, you get a prompt saying ‘Setup complete’. Now exit the installation and reboot your system by entering init 6 from the root prompt.
The system boots into a text mode. In order to view the graphical interface, you will have to log in as the root and type startx or kdm to start the graphical desktop. I hit kdm, as startx would log me into the GUI directly as the root. On the KDM screen I released I have to create a user account first.
So, it was time to go back to the root shell by hitting Ctrl+Alt+F1. First, execute the following to create a user account:
# useradd -m abhijit
Abhijit happens to be my name. Remember to replace that with yours. Now, set the user account password with the passwd command.
This is the time to go back to the KDM screen—hit Ctrl+Alt+F7—select your desktop interface from the Menu button, where I chose KDE, and log in.
The Slack-perience

As for the other important software, it comes with kernel 2.6.27.7, GCC 4.2.4 and Xorg server 1.4.2. Since I opted for a full installation, I noticed that whether you’re a normal desktop user, a developer, or a sys admin, Slackware doesn’t disappoint anyone—things are pretty much covered for everyone here.
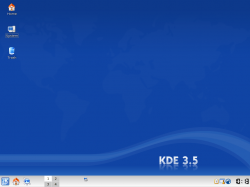
There’s really nothing much to report here—everything is in line with vanilla upstream versions (check sidebox for a list of available GUI applications). However, don’t automatically take that conclusion as a bad sign. In fact, I meant it as a compliment. I found the desktop to be more stable than anything I’ve used in the last few years. Another thing to note is how snappy the desktop appears—it felt so much faster than the alternate distros, that I wonder why the others can’t follow suit? Why do they have to be so slow?

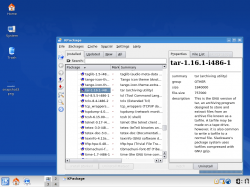
installpkg for installing, removepkg to remove packages, and upgradepkg to upgrade installed packages. In fact, there are two other commands that you might find useful: explodepkg to extract files without installing them, and makepkg to create a Slackware package from source files. A handy resource to check whether a Slackware package is already available for a task you need to perform is packages.slackware.it.
Although the distro provides you with a lot of utilities, I guess people would rather prefer working on the programs they are familiar with. Similarly, I did not find certain software that I frequently use—VLC, Flash, and system monitor (Gkrellm) were missing. So, a quick Google search gave me the link to the Slackware 12.2 repository at repository.slacky.eu. From here, you can download the packages that are not currently installed. If it’s not here, I recommend checking out the individual software vendor’s website first. If a Slack build is not available here, which is likely, Google for a Slackware build.
I downloaded VLC player directly from the VideoLAN website. You can install the VLC package in Slackware by simply using the following command:
# installpkg vlc-0.9.8a-i486-2alien.tgz
Similarly, I downloaded the native Flash tar file provided by Adobe, and used the Adobe default installer to install it after going through the readme files.
After having installed these packages, I tried playing songs in my system. I noticed that I was not able to play music simultaneously on two media players. The reason was that ALSA was not being configured out of the box, and this sound was default to the age-old OSS drivers. So I configured ALSA by running alsaconf from the command line, and that fixed the issue for me.
Another interesting thing is that Slackware comes with the KOffice suite for word processing, spreadsheet, presentation, or database management requirements. I didn’t mind using it for a change—in fact, I am writing this article on KWord. However, if you can’t do without OpenOffice.org, you can take a look at the repository hosted at rlworkman.net/pkgs. In fact, the site has Slack builds for a lot of other useful utilities also.
In a nutshell, I found Slackware 12.2 a very stable version, very true to its motto. Whether I’ll stick with it for long, I can’t really tell—remember, I confessed that I’m fickle. But if you are someone who vouches for stability, then I’ve got to say Slackware is the distro for you. By the way, Debian 5 has also been released. ;-)


