The GIMP, or the GNU Image Manipulation Program, is one of the most powerful free and open source raster image editing software. It rose from the ashes of a hideously crafted class project under the name of General Image Manipulation Program by Spencer Kimball and Peter Mattis. Later on, it was merged into the GNU Project and is often considered a replacement for the icy-pricey Adobe Photoshop.
Until recently, the diverse GIMP was very much a mixed bag—too perplexing for newbies on the one hand while requiring high-end colour channels and plug-ins support. Besides, its meagre 8-bit colour support (instead of 32-bit) and complex UI was a major barrier in its adoption among professionals.
Finally, after eight years of planning, the developers took a major leap in GIMP development. The spanking new GIMP 2.6 was introduced, loaded with GEGL, a CMYX/32-bit colour channel, minor UI changes and a plethora of nifty add-ons and plug-ins.
On October 1, 2008, the venerable raster image editor got refurbished with a new version 2.6.x. The major change in this version lies in the core of the software—the addition of GEGL, a powerful graph-based image-editing framework.
| GEGL and CMYK integration |
|---|
| GEGL, or Generic Graphics Library, is a powerful graph-based image-editing framework. The most enticing reason for developers to opt for GEGL is its library functions, which can deal with the 32-bit colour channel. In addition to this, GEGL supports the CMYK (cyan, magenta, yellow and ‘k’ for black) colour model, which is used in high quality colour printing.
Previous versions of the GIMP had support only for 8-bit colour channels, which was a setback for raw formats, and thus owners of high-end digital cameras were forced to opt for paid alternatives. The newer version paved the way for GIMP’s acceptance and future development. |
Let’s take an in-depth look at what the newer GIMP has to offer. In this review, I will be using the third revision of the latest GIMP—that is, GIMP 2.6.3, which provides significant improvements over the basic release.
When initiating the GIMP, you will be greeted with the latest splash screen—not the best, but certainly much better than its previous version. I always felt that if a bigger and wider splash were added by default, like Photoshop [PS], it would provide a more aesthetic feel. Unlike other image editing applications, GIMP’s hardware resource expectations aren’t that high, and likewise the application is quite responsive despite being one of the most feature rich editors.
The first thing you will notice about GIMP is its rejuvenated interface. Yes, it has finally gone through some UI changes. A new permanent ‘empty’ window will appear next to the toolbox and layer box. In addition to this, the toolbox, layer box, and active image editing window list has been merged into one window list, making GIMP more aesthetically appealing.
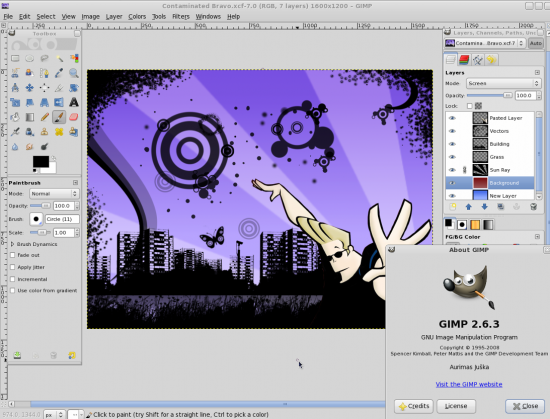
Apart from that, the current UI changes are too minimal and experimental—it seems developers were uncertain about what to implement and what not to. The current UI development indicates that developers intend to evoke community feedback for further UI development.
On the templates front, GIMP hasn’t added new window sizes and ratios, and it would have been a welcome change if the developers had added the HD template by default.
In a nutshell, it’s the tools, plug-ins and the core that have witnessed a major facelift. With the inception of GEGL, a few new image editing plug-ins and enhanced editing tools are now available.
We’ll take a look at some of these new additions.
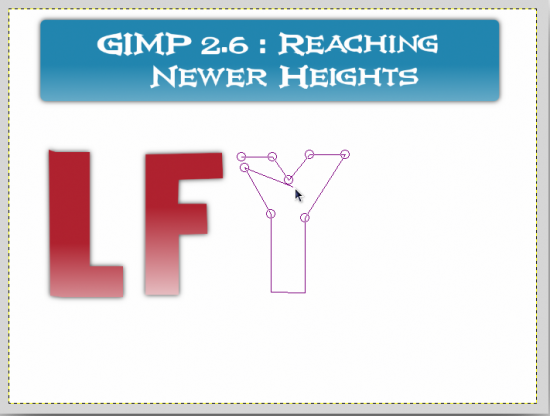
Polygon selection tool
The most exquisite feature of GIMP is the polygon selection tool, an add-on to the existing free-hand selection tool. Unlike the earlier versions, this tool lets you select/outline an image or its part in multiple clicks. Previously, you couldn’t perform this function completely if you took your finger off the mouse, mid-click. So, in order to select/outline a part, you had to complete it at one go, else it wouldn’t be done.
Brush dynamics
Brush dynamics is another value-added plug-in. The latest version now has added extensions to the brush tool—viz., Velocity, Pressure and Random. You can create different styles using similar brushes by varying the speed, although this option is aimed at users owning a pen and tablet. Each of the above mentioned parameters can be further enhanced by opacity, hardness, size and colour.
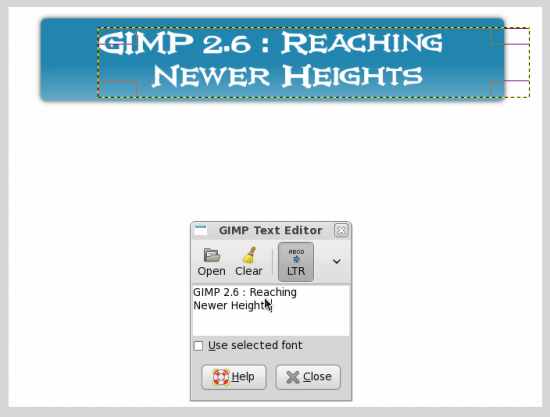
An enhanced text tool
The new text tool lets you frame your text into a box, and then you can move/resize it at will. This function is useful for large text editing, though you have to edit the text in a different window. On-canvas text editing has been planned for GIMP 2.8.
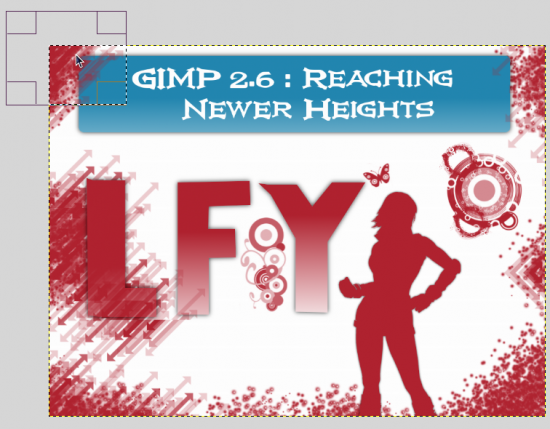
The ability to pan beyond the border
This feature lets you use the brush tool at the edge of the image while the image is being zoomed in. The feature provides precise control over the brush tool making it much easier for you to control even at high zooms.
GEGL operations and tools
The talk of the town is, however, GIMP’s GEGL integration. As already mentioned, GEGL supports high-end graph-based editing with 32-bit colour channel support. And although version 2.6 carries the GEGL tag with honour, is GEGL integration really worth it? No! There are many reasons GEGL doesn’t make version 2.6 much better than 2.4 because the developers haven’t yet finished the integration. GIMP, by default, still thrives on 8-bit colour support. There are no documents available for GEGL, or to be precise, the documentation team hasn’t yet released documents for the new version. You can activate GEGL from Colours→Use GEGL.
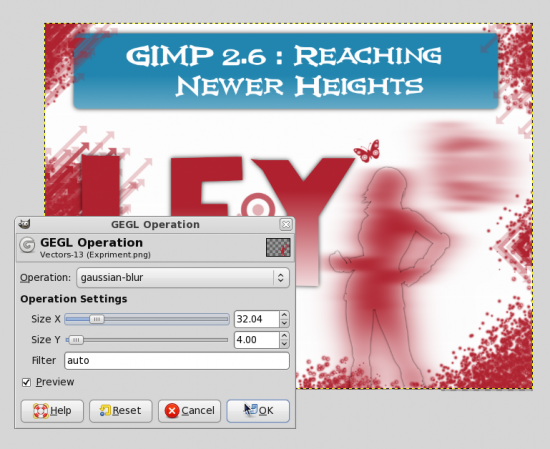
There are only two operations possible with GEGL—one, to enable it, and the other can be accessed from Tools→GEGL Operations. This option has lots of options like Gaussian Blur and White Balance, to name a few.
Additionally, GEGL operations and plug-ins are sluggish as compared to old plug-ins. A newbie will surely get confused with what GEGL is all about. Though the GIMP 2.6 launch announcement does promise better inter-portability of GEGL and with version 2.8.
Apart from these major changes, there have been modifications in existing tools. So let’s take a look at some of the better plug-ins that come along with GIMP 2.6
GIMP selection tools
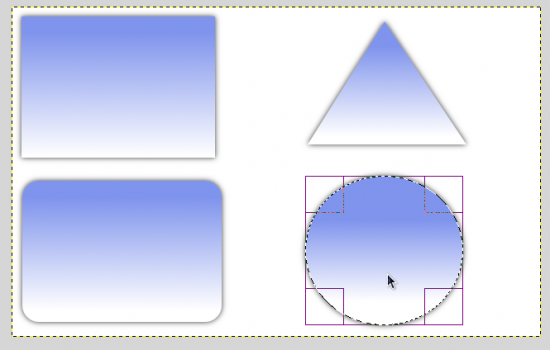
One of the unique tools that can give Photoshop a run for its money is the selection tool provided by GIMP. Well, of course, PS also has selection tools. However, what makes GIMP tools unique? The ability to resize even after making a complete selection. In addition to this, GIMP’s rectangular selection tool has the ability to add curved edges in a few clicks, which makes your job much snappier and more efficient while creating headers, buttons and logos. The new polygon selection tool is the real icing on the cake.
Colour selection and ‘colour to alpha’
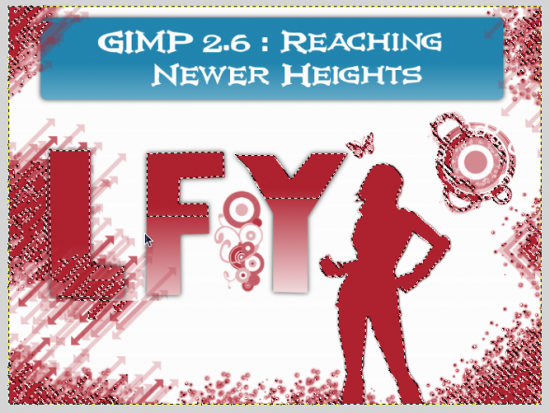
If you are not well versed with the Path Tool and Free Selection, and you want to remove the background from an image, then these two colour tools come in handy. Both of them work pretty differently.
With the colour select tool, you first select the tool from the tool bar and then click the colour you want to select/remove, and press Delete. That will remove the selected colour from the background. But it will leave some traces on the border of the image/colour. Later on, you can use the blur effect on the borders to smoothen it.
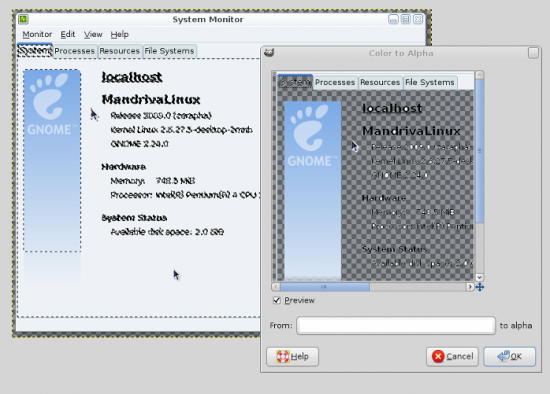
‘Colour to alpha’ takes the same process to the next level. It makes it even easier for you to remove the background. Select the colour you want to remove from the ‘wand’ tool and navigate to Colour→Colour to alpha and apply the effect.
Custom brush
Have you ever wondered how those beautiful brushes are made? You probably think that one must be adept with vector graphics to create these brushes. Well, you are wrong! Although most of the scalable brushes are created using vector graphics, creating brushes in GIMP is child’s play. Yes, simply open an image, select it and copy it, and bingo! You have just created a new brush. This new brush will appear in the brush window and you can save it by clicking on the Save button.

Bottom line
The GIMP is certainly one of the best image editors available out there, and version 2.6 is no exception. Though a majority of the changes lie in the core, some of the user-level features make it a pretty nifty update. The inclusion of GEGL and CMYK support has certainly opened new doors for this venerable FOSS image editing application.
Version 2.6 tries to leverage the gap between paid alternatives and freely available tools. But with incomplete integration and UI improvements it still has a long way to go.
Looking forward, it seems that version 2.8 will be a killer release. Developers have revealed some plans for the next stable version: on-canvas text editing, merger of finished projects from the Google Summer of Code, a revamped user interface and better GEGL integration.
Till then, let’s wait. But, just in case you haven’t tried GIMP out, then 2.6 is the release for you. As for the missing features… well, as they say, “Rome was not built in a day!” The GIMP has already gained some much-needed momentum, and with GEGL and CMYK on board, it seems it’s destined to gain a lot of respect among the pros.




great article,thanks, I’v submitted a link of this article to http://www.linuxine.com in order to share it with more people.
it's like photoshop …
it's like photoshop …