2006 was a grand year for virtualisation fans. And why not? SUSE Linux Enterprise introduced the much-hyped Xen in its official offering. Meanwhile, kernel 2.6.20 integrated KVM (Kernel Virtual Machine) in its main tree, which Fedora 7 packed in the following year.
While Xen offers a pretty complicated offering—requiring you to boot a patched Xen kernel to create and run virtual machines—KVM is a loadable module that works with the distribution’s default kernel. The only requirement is that your processor should have the hardware assists for virtualisation, which most processors that came out in the last few years, do have.
LFY did carry a tutorial on KVM in its October 2007 virtualisation special issue. It talked about how to get started with this technology using the default command-line tools. Although that may be the preferred way for most geeks, us plebs would rather have everything as GUI wizards that don’t require us to remember too much command-line jargon.
Fedora 10: It’s only KVM!
Going back to as early as Fedora 7, the project introduced one tool called the Virt-Manager, which integrated support for Xen, KVM and Qemu. With the latest Fedora 10, there’s however no Xen kernel being offered. Take a look at Figure 1—it’s only KVM under the virtualisation section. Seems like the die-hard Xen fans would have to wait another six months for Fedora 11. Like I care!
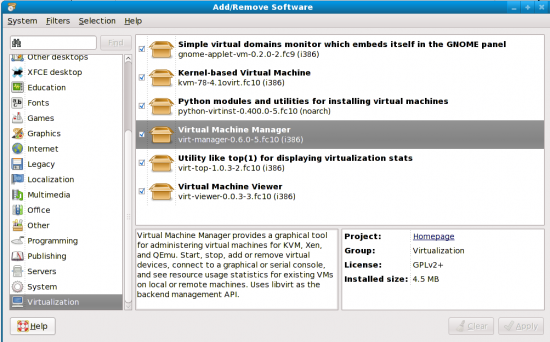
For my virtualisation needs, I’ve been using the VirtualBox OSE edition that many distros pack in by default, viz. Mandriva, openSUSE, etc, for a while now. So, after installing Fedora 10, I obviously had plans to install it. But alas! Fedora doesn’t include that in its official repositories.
As furious as I was… in a rage I ended up selecting all the seven packages listed under the ‘Virtualization’ section in PackageKit (Figure 1) to see what KVM had to offer me. It turned out that KVM is not bad at all. I have even configured a network bridge—needs more steps when it’s a VirtualBox—by simply editing a couple of files by hand. But more about that later… Let me first walk you down the path of easily creating virtual machines using this nifty GUI wizard called Virt-Manager using KVM.
Click Next—step-by-step
Now that you have the required tools installed (you did install the tools, didn’t you? See Figure 1), it’s time to run another ‘guest’ OS from within Fedora 10. Launch the Virt-Manager from Applications menu—>System Tools—>Virtual Machine Manager. It’ll prompt you for a root password—yes, you can run it under the under-privileged mode as a normal user too, but that’s another story.
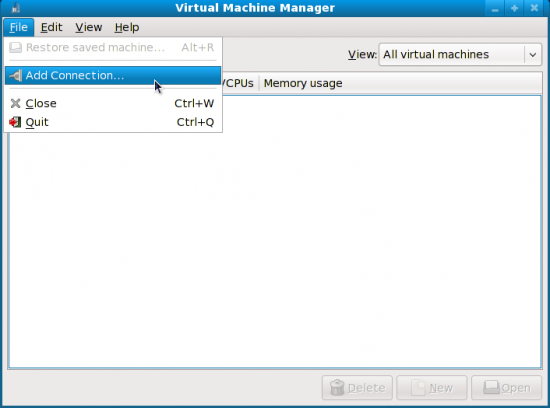
This will launch a bare-bones empty window as shown in Figure 2. Click on File—>Add Connection… This will bring up the window where you need to select the hypervisor that Virt-Manager will use. By default, it will show Xen. Click on the drop-down menu and select QEMU, because KVM uses this one to function. Let the Connection type remain ‘Local’, as we’ll create the virtual machine on the local system. Now, click the Connect button. A localhost entry will appear in the Virt-Manager window.
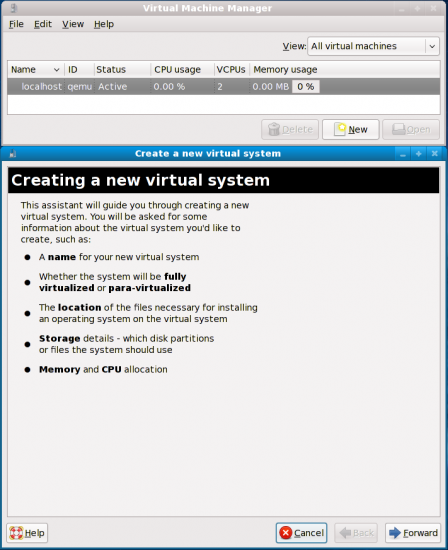
Now we can click on the New button at the bottom right corner of the window to create a new virtual system (Figure 3), with information on the steps to follow. However, before we do that it’s better we set up the networking system that will aid our guest OS first.
Networking anyone?
There can be two types of networking—a virtual network (viz. NAT), or a shared physical device (your Ethernet card). The former is okay, if you don’t want to access your guest OS from the host system—which is also the default in VirtualBox. This is configured in Virt-Manager by default. To check it, click Edit—>Connection Details… This brings up the ‘Host Details’ window. Select the tab that says ‘Virtual Networks’. There should be an interface called ‘default’ listed on the left-side pane, with the details of the network on the right side as shown in Figure 4.
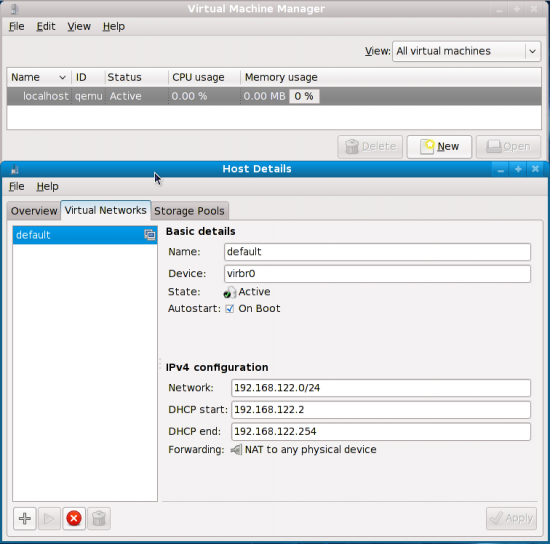
But just in case this screen is empty, there’s no reason to panic. Clicking the + [plus] button at the lower left corner of the window brings up a new wizard for creating the virtual network with details of the steps to follow. Click Forward and set the name of the network to whatever you like (viz. default). The next window gives an IP range; the default 192.168.100.0/24 is cool. The next screen lists the DHCP beginning and end of the IP range. The default again is okay. The following window is a bit tricky—you have an option between an ‘isolated virtual network’ or ‘forwarding to physical network’. If you want the Internet to work on the guest OS, then you need to select the second option and from the drop down window, select the option that says ‘NAT to any physical device’. The following window gives you a summary of the virtual network. Simply, click Finish here. There… now does your screen look like Figure 4?
However, this sort of a NAT-based set-up is invisible from systems on your LAN. In fact, forget LAN, you can’t even access the guest system from within the host system by means of tools like ssh or ping. So what is to be done now? This is where the bridged network comes into the picture. To set it, you first need to edit the /etc/sysconfig/network-scripts/ifcfg-eth0 file as the root user. By default, it should look somewhat like the following:
# nVidia Corporation MCP67 Ethernet
DEVICE=eth0
HWADDR=00:1d:60:66:aa:3b
ONBOOT=yes
BOOTPROTO=dhcp
USERCTL=yes
IPV6INIT=no
NM_CONTROLLED=no
TYPE=Ethernet
PEERDNS=yes
In here, you have to make the following changes:
- comment out the
BOOTPROTOline - Add a new line:
BRIDGE=switch
Here’s what mine looks like after the editing work:
# nVidia Corporation MCP67 Ethernet
DEVICE=eth0
HWADDR=00:1d:60:66:aa:3b
ONBOOT=yes
#BOOTPROTO=dhcp
BRIDGE=switch
USERCTL=yes
IPV6INIT=no
NM_CONTROLLED=no
TYPE=Ethernet
PEERDNS=yes
Now we need to create another file called /etc/sysconfig/network-scripts/ifcfg-br0 and add the following text to it:
DEVICE=switch
BOOTPROTO=dhcp
ONBOOT=yes
TYPE=Bridge
Now restart your network as follows:
service network restart
The idea is that the bridge br0 should get the IP address (either DHCP or static) while eth0 is left without one. Don’t ask me why now. I Googled for how to create a bridge so that I could use my shared physical Ethernet for networking with the guest, and found the solution at kvm.qumranet.com/kvmwiki/Networking.
That’s it! Now that our initial hitch with the networking set-up is done (which we’ll eventually require later), let’s move on to creating a virtual machine.
Back to real business
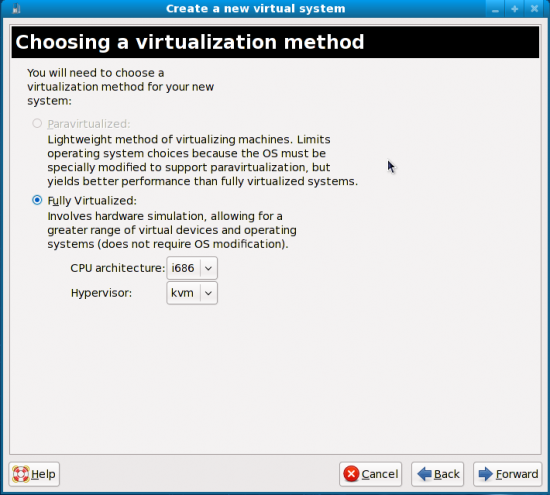
Take a look at Figure 2 once again. You’re back in this window. Click the New button, and you’re now in Figure 3. Clicking Forward here will ask you to enter a name of the system that you’ll create. I put ‘openSUSE11.1’ here as I have an openSUSE 11.1 RC KDE Live CD. After clicking Forward again, the next step is where we need to select the virtualisation method. Nothing much to do here as you can see in Figure 5—the paravirtualisation option is grayed out as KVM is a full virtualisation solution, unlike Xen. You will also notice in this window that the CPU architecture and hypervisor are already defined as i686 (unless your host system is an x86-64 OS) and KVM, respectively. So, just click Forward again.
This next window is where you’ll need to define the installation method. By default, it’s ‘Local install media (ISO image or CDROM)’. I used this! You can also go for a Network or PXE installation, but then you’re on your own ;-)
Below that you can define your guest OS type and version/distribution. By default, both are defined as ‘Generic’ and you may leave them as they are if you aren’t too particular. Otherwise, please take a look at the options and see if it has what you’re looking for.
The following window inquires about the location of your installation media—an ISO image or a CD/DVD media. I had the openSUSE image in my hard drive, so I simply pointed to that by hitting the Browse button. You can also place a bootable media in your CD/DVD drive instead.
The next screen is where you’ll assign storage space—a disk image file (selected by default), or a regular disk partition. I opted for the default disk image route, and was also satisfied with the predefined file size as 4000 MB—a live CD can’t have more than 2.5 GB of data after installation, which leaves me more than a GB for swap and/or additional free space. So, I moved Forward.
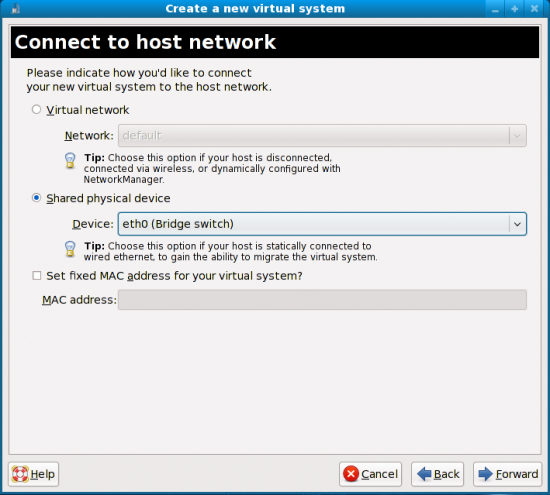
The following window is where you define the networking details (Figure 6), and this is where the game becomes a bit tricky—which is exactly why we’ve already set up networking first. You can either have the virtual system to use a virtual network (the ‘default’ interface we discussed earlier), or a shared physical device (your Ethernet card). The latter should appear as “eth0 (Bridge switch)” if you have followed the initial networking set-up steps. I selected this option and moved Forward.
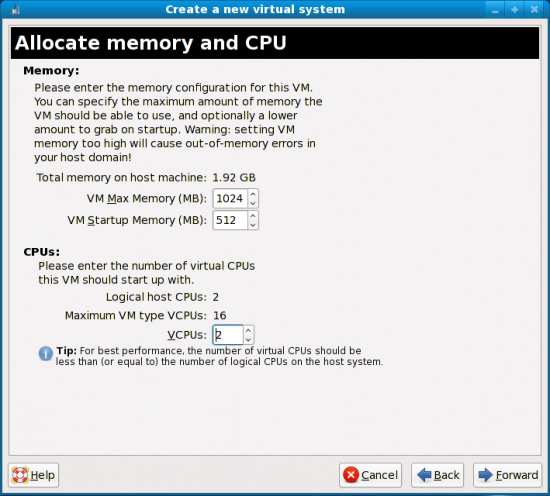
This is where we need to allocate the memory and CPU information (Figure 7). I hope you have sufficient memory, as this is the most important aspect of successfully running virtual machines. So, I’d recommend reading the information provided in this screen very carefully. Out of the 2GB memory I have in my system, I allocated 1024 MB as the ‘VM Max Memory’ and 512 MB as ‘VM Startup Memory’. Also, since my CPU is an AMD dual core, I’ve two logical CPUs; hence, I have defined the number of virtual CPUs for the guest OS as two.
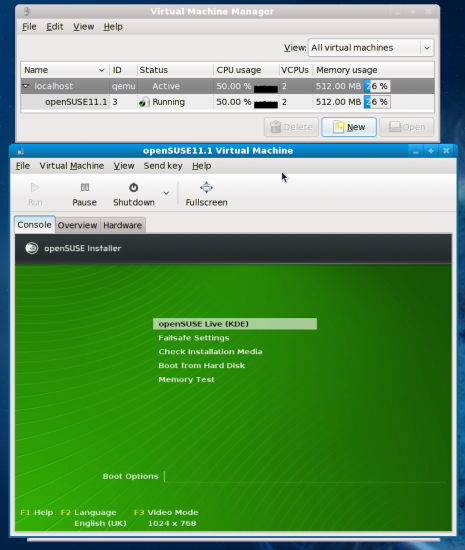
Moving Forward will display the summary screen with the different parameters we’ve set in the configuration steps. Hitting the Finish button here boots the install/Live media. This opens a new window where you can see your guest OS boot (Figure 8). You know what to do next, don’t you? Use it as you would use any other OS.
This, in fact, is an excellent way to quickly test beta-quality releases like the openSUSE11.1 RC release I am using here. After a successful boot, it picks up an IP supplied by an Airtel broadband router, just like my host OS, and appears to be just another machine in the LAN. In Figure 9, notice that I’m accessing the home directory of the guest OS from my host OS using ssh over Nautilus. Note that I’m also accessing the KDE Quick Start Guide from within the guest (where it’s actually located), as well as the host.
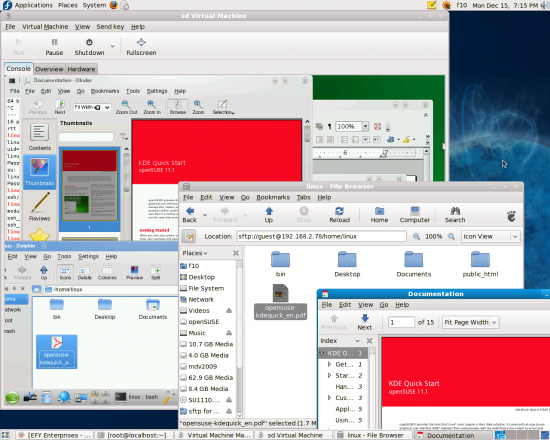
Similarly, accessing websites from the guest OS is also as simple as launching Firefox and keying in the URL. The guest OS will send the request directly to my router and retrieve the data.
Now, installing this Live CD as a guest OS is also just like you’d install your regular (host) OS. The only difference is, perhaps, the partitioning. Since I exported a file image during the configuration steps for storage space, it’ll appear as a blank (raw) hard disk to the guest OS. I accepted the default partition set-up suggested by openSUSE—approximately 500 MB of swap and the rest as root. To tell you the truth, I accepted all the defaults during the installation process to quickly get done with it. Figure 10 shows the guest OS after installation. Installation is not really necessary but… hey, it’s possible, so why not?
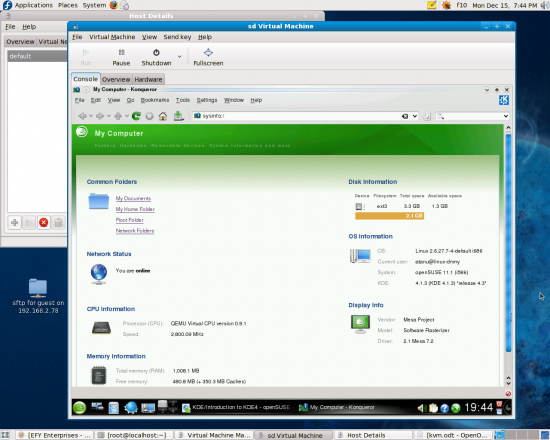
Of course, there are a few other tweaks possible even after installation. Like what if you would like to increase the maximum memory (RAM) allocation for the guest OS on-the-fly? Click on the ‘Hardware’ tab on the Virtual Machine window. Select the ‘Memory’ parameter from the left pane, and there you have it (Figure 11).
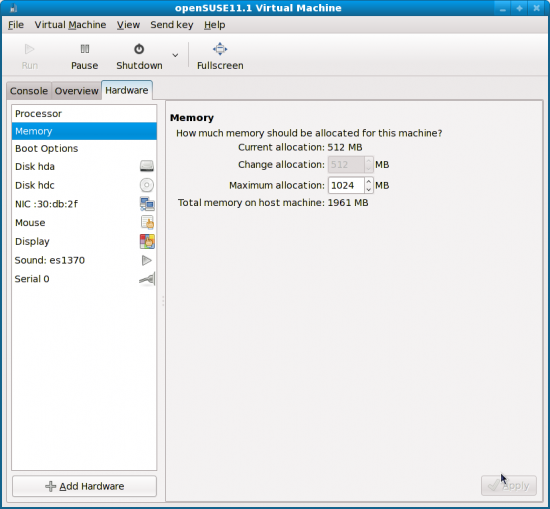
Other hardware changes are also possible, like start-up memory for the VM, the number of virtual CPUs, etc, and can be done offline—that is, after switching off the guest OS. Go through all the hardware parameters available in the ‘Hardware’ tab to get yourself familiar with it. Clicking the ‘Overview’ tab, on the other hand, gives you information about the CPU and physical RAM that the guest OS is currently using. Pretty simple, isn’t it?
Closing up
Finally, my business is done here! Obviously, there’s a lot, lot more that KVM (and even the GUI wrapper called Virt-Manager) is capable of; I’ve only managed to touch base with the easily-accessible upper crust. This Virt-Manager plus KVM is a new thing for me, so I wanted to share my explorations with all of you. Catch you later when I have something else to rant about.


this is a very good and best method of linux vertualization .i like this ]
ok thak u linux virtualization group