

Piwik is a free and open source analytics platform which provides 100 per cent data ownership, is highly customisable, and protects user privacy.
Data analytics is today one of the most important needs of any organisation. There are many analytics platforms available, some of which are free while others are proprietary. Being FOSS enthusiasts, let’s analyse Piwik, one of the most popular, extensible, free and open source analytics platforms that has a range of features.
We can self-host Piwik in our production environment, which will provide us with 100 per cent data ownership and privacy. If we don’t want to manage this platform, then we have the option of cloud hosting— a pay-as-per-use model that is quite good for large organisations whose main business is not data analytics.
Why Piwik?
Piwik is chosen because of the following reasons:
- It is a free and open source platform.
- It offers mobile app support.
- It is quick and easy to install.
- It enables 100 per cent data ownership and privacy.
- It has no data limit.


When should Piwik be used?
Piwik offers four major services. Any organisation that falls within one or more of the following categories can use this tool.
- Web analytics: If you want to increase the popularity of your website and want to know more about visitors and other trends, then Piwik can help you. It can measure the achieved targets, sign-ups, performance and many other things.
- E-commerce analytics: We can integrate Piwik with e-commerce websites to analyse profit-loss margins, revenues, and trends like maximum orders, average order values, etc. There are many platforms like Magneto, Prestashop, etc, with which Piwik can easily be integrated.
- Server log analytics: Web servers generate lots of logs. We can use Piwik to collect and analyse those logs and generate meaningful insights. We can analyse access logs, failure and exceptions in logs, forecast the health of the hardware, avoid transaction failures and do much more.
- Intranet analytics: Many government organisations, universities and enterprises have their own intranet network due to privacy issues. Their major requirement is to use analytical tools within their premises and Piwik provides this option.
There are lots of gadgets and plugins available in the Piwik marketplace, which we can use based on customer use cases.
A demo of Piwik
We will see how we can install Piwik in a WAMP server on localhost. The installation is very easy.
The WAMP server is used in Windows. Similarly, for Linux, we can use the LAMP server.
Installation steps are mostly the same for any distribution. Here, we will consider Windows for the demo.
The steps given below demonstrate the configurations for Piwik. First, go to https://piwik.org/download/ and download the Piwik file as shown in Figure 1.
Now, go to the /www relative path. In my case, as I am using a local machine, it’s C:\wamp\www. If you are hosting your website, then search accordingly. Go to the www folder where all the projects are listed. Copy the archive file and extract it here. See Figure 2.
Next, go to the browser, and open the /piwik related path. In my case, it’s http://localhost/piwik/. If you are on a production server, then localhost is replaced by your domain name, as shown in Figure 3
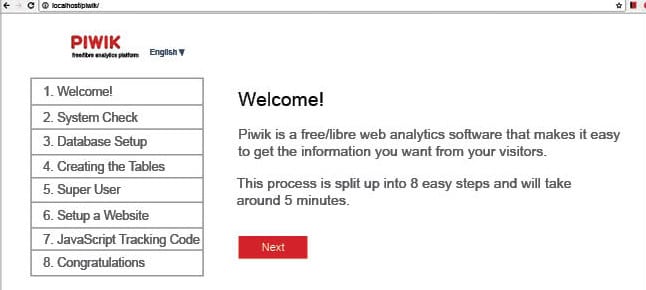
Now click on Next. There are totally eight steps to complete the entire setup of Piwik. We will examine all the steps.
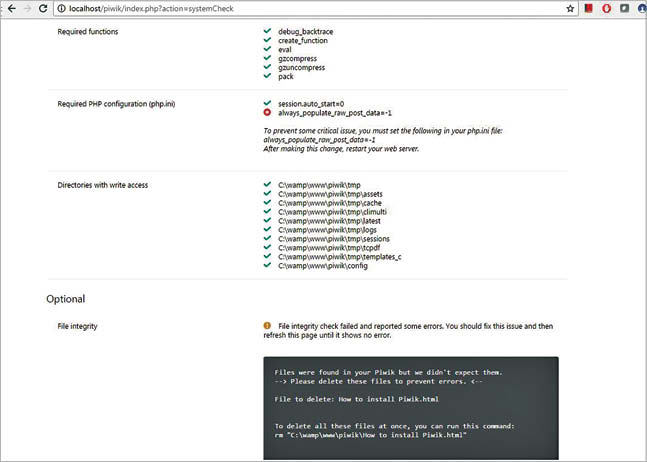
Step 1 is Welcome, which is done. Step 2 is the system check, when Piwik checks for system compatibility and throws errors or warnings if anything is critical. Figure 4 provides the snapshot for this—we can see some errors. From the description, we can resolve the errors.
Here, in my case, always_populate_raw_post_data=-1 is not there in the php.ini file. Add this line in the php.ini file, restart the server and reload the page. Once the error is resolved, click the Next button.
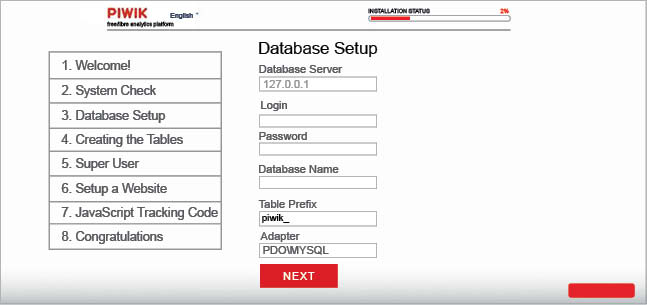
Now you can see the database set-up screen. Before that, create a separate database for Piwik. Go to the phpmyadmin panel and create a new database. Complete the database set-up stage with your MySQL user name and password, and enter the database name which we have just created for Piwik. See Figure 5.
Once the database set-up is complete, click Next and go to the stage of creating the table.
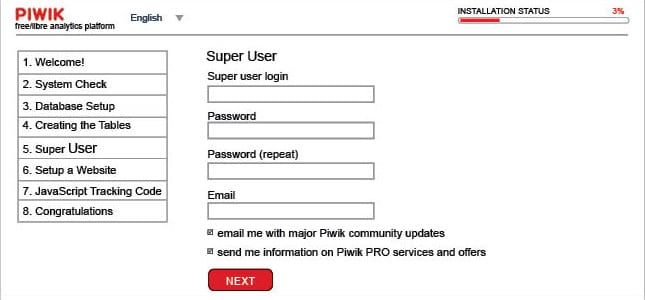
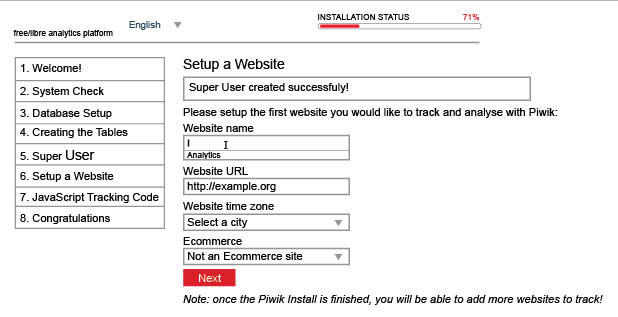
Now we will create a super user and provide credentials for it (Figure 6).

Next, provide the details of the website that has to be analysed (Figure 7).
The next thing is the tracking code. Figure 8 shows the JavaScript code which we can use in websites, in WordPress, or in any blog or CMS platform to track and start analysing the website.
The Piwik set-up is now complete. Go with the default settings. Log in to Piwik with super user credentials.
Once you log in to Piwik, you can see that we haven’t started analysing the website. Go to the sample code.html and paste the code.
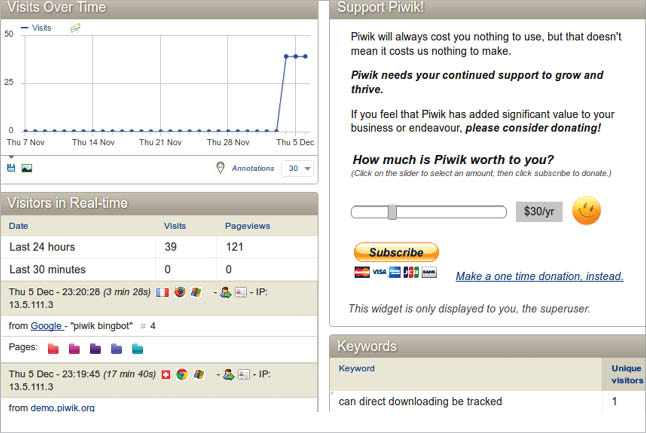
Once you reload the page, you can see the visitors and actions performed by them. See Figure 10
There are specific tabs for visitors, actions, referrers, e-commerce and goals. These are self-explanatory, so we will not go deep into the topic. This information will however help you to kickstart your own analytics platform.
There are many competitors providing analytics platforms but Piwik is one of the simplest, user friendly, free and open source tools available for the job.


